
Are you ready to unleash your creativity and dive into the world of fashion design? Creating your own patterns is a fulfilling and rewarding way to express your unique style and vision. Whether you're an experienced seamstress or a beginner just starting out, learning how to make fashion patterns will empower you to bring your ideas to life.
With a little practice and patience, you'll design one-of-a-kind garments that showcase your style and talent. So, grab your materials and tools; it's time to get inspired and start creating!
Key Takeaways
- Create a sloper/block as a foundation for designs by transferring measurements onto pattern paper.
- Draft the basic shape accurately onto pattern paper. Mark key points like grainlines, notches, and darts.
- Add seam allowances to pattern pieces for a professional finish. Then, test the pattern with a muslin sample.
- Test the pattern on the wearer to make fitting adjustments. Identify areas for modification and make fabric—and measurement-based adjustments.
- Finalize the pattern by tracing it onto paper, noting fit issues and design flaws, and saving it for future use.
What Is a Fashion Pattern?
When creating garments, a fashion pattern serves as your blueprint. It provides a detailed template to ensure accurate sizing, fit, and construction of clothing items.
Fashion patterns consist of flat pattern pieces that represent different parts of the garment, such as sleeves, bodices, and skirts. These patterns include seam allowances, notches, and other markings to guide the garment assembly.
Understanding how to read and manipulate these patterns is crucial for successful garment construction. With a well-crafted fashion pattern, you can confidently bring your design vision to life.
Step 1: Understanding Measurements and Sizing
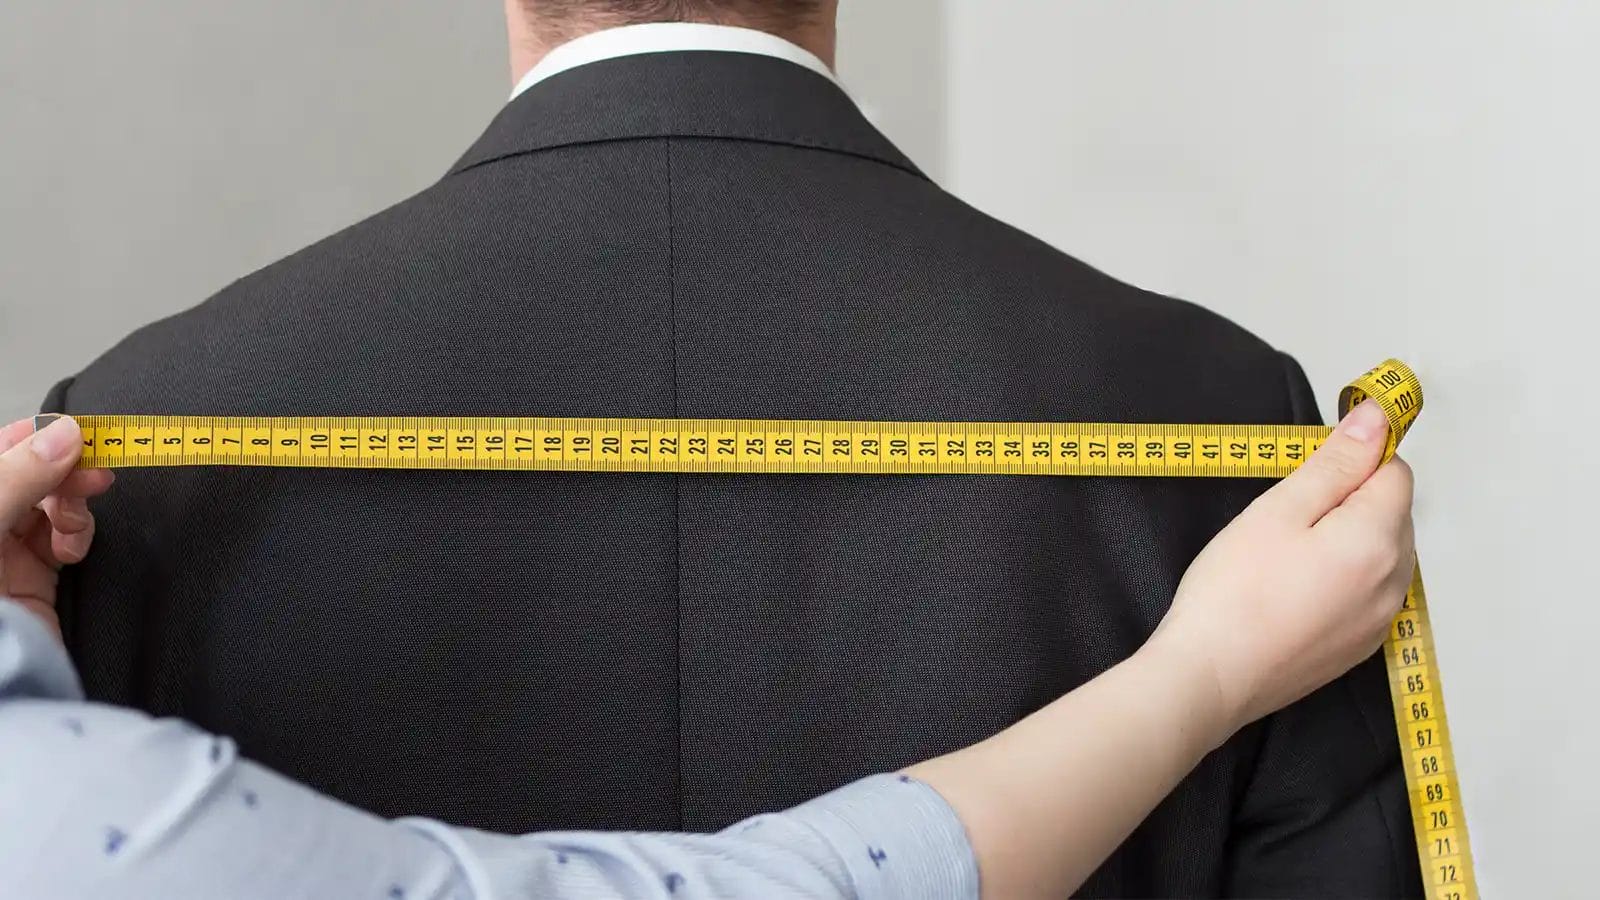
When creating fashion patterns, you need to take accurate body measurements to ensure a perfect fit. Then, use these measurements to determine your standard size or make a custom fit.
Take Accurate Body Measurements
To ensure well-fitting patterns, use a flexible measuring tape to take your body measurements. The tape should be snug but not tight. Record measurements such as bust, waist, hip, shoulder width, and inseam. This will serve as the foundation for creating well-fitting patterns.
Remember to update your body measurements regularly, especially if you experience significant weight changes.
Standard Sizing vs Custom Sizing
Now, let's explore the two approaches to sizing: standard sizing and custom sizing. Standard sizing relies on measurement charts and varies between brands. So, it's essential to check them for each pattern.
Conversely, custom sizing allows for adjustments in key areas like length, width, and proportions to achieve a perfect fit tailored to your unique body shape.
Understanding the differences between standard and custom sizing helps you choose the approach that best suits your needs.
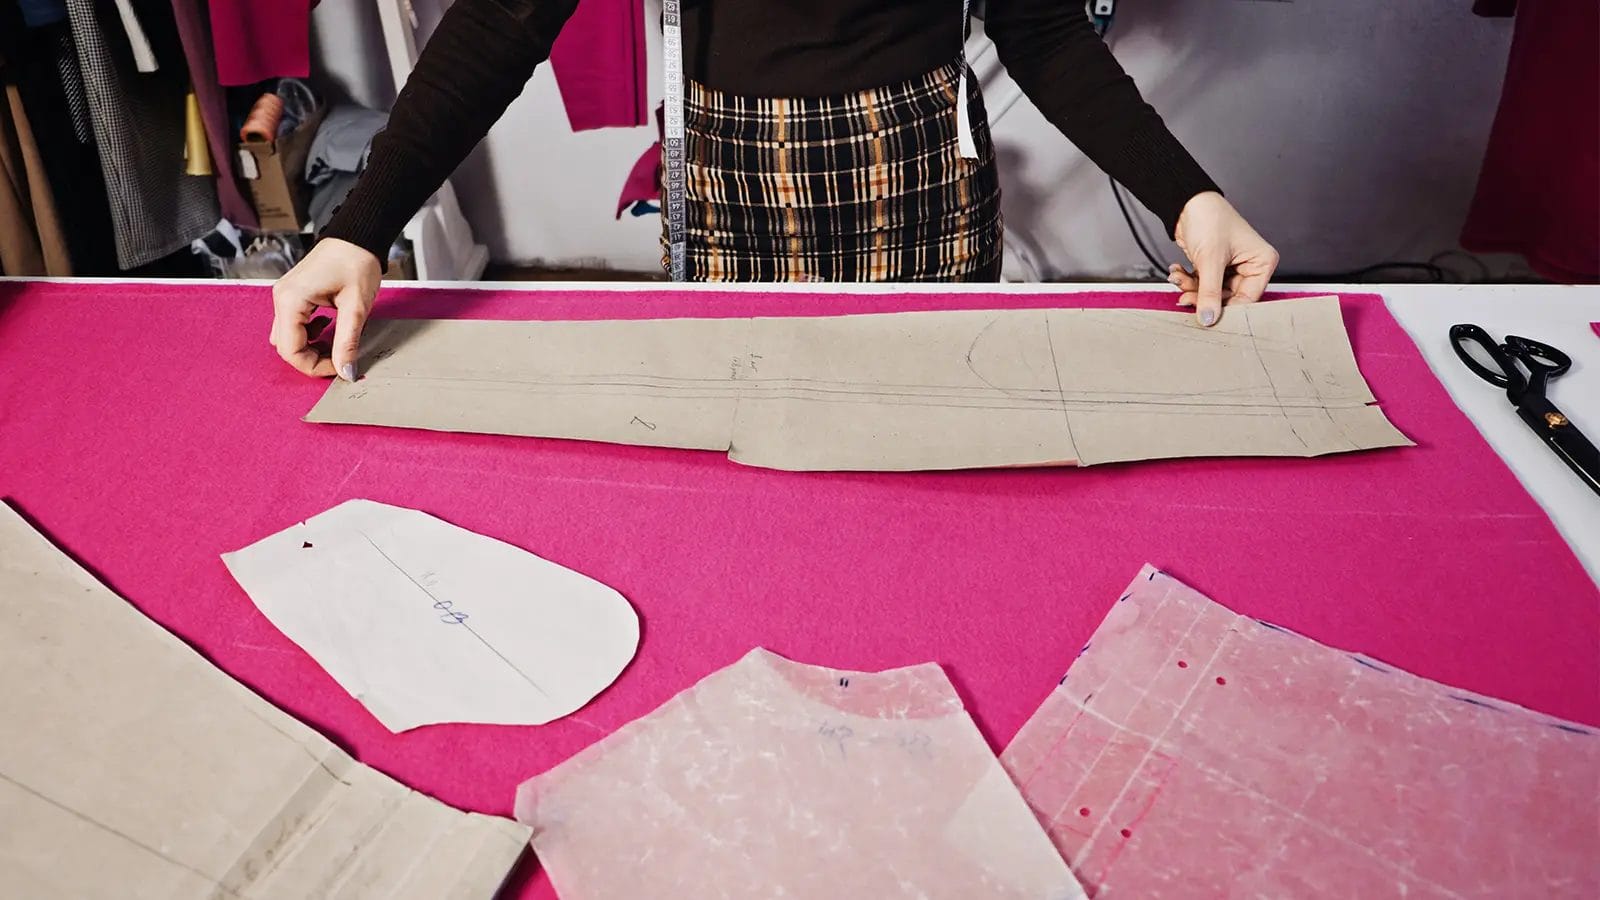
Step 2: Drafting the Pattern
Now, it's time to start drafting your pattern. Begin by drawing the basic shape of your garment. Then, mark key points to ensure a precise fit. Next, add seam allowances to your pattern pieces, which will help you achieve a professional finish.
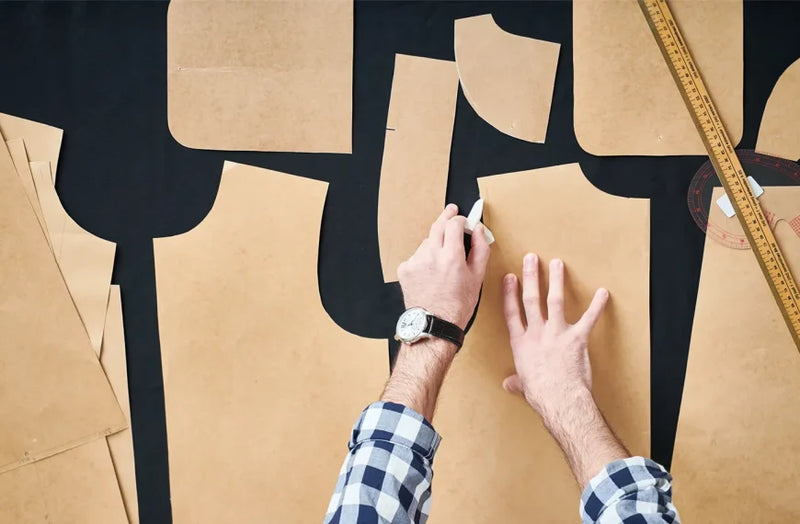
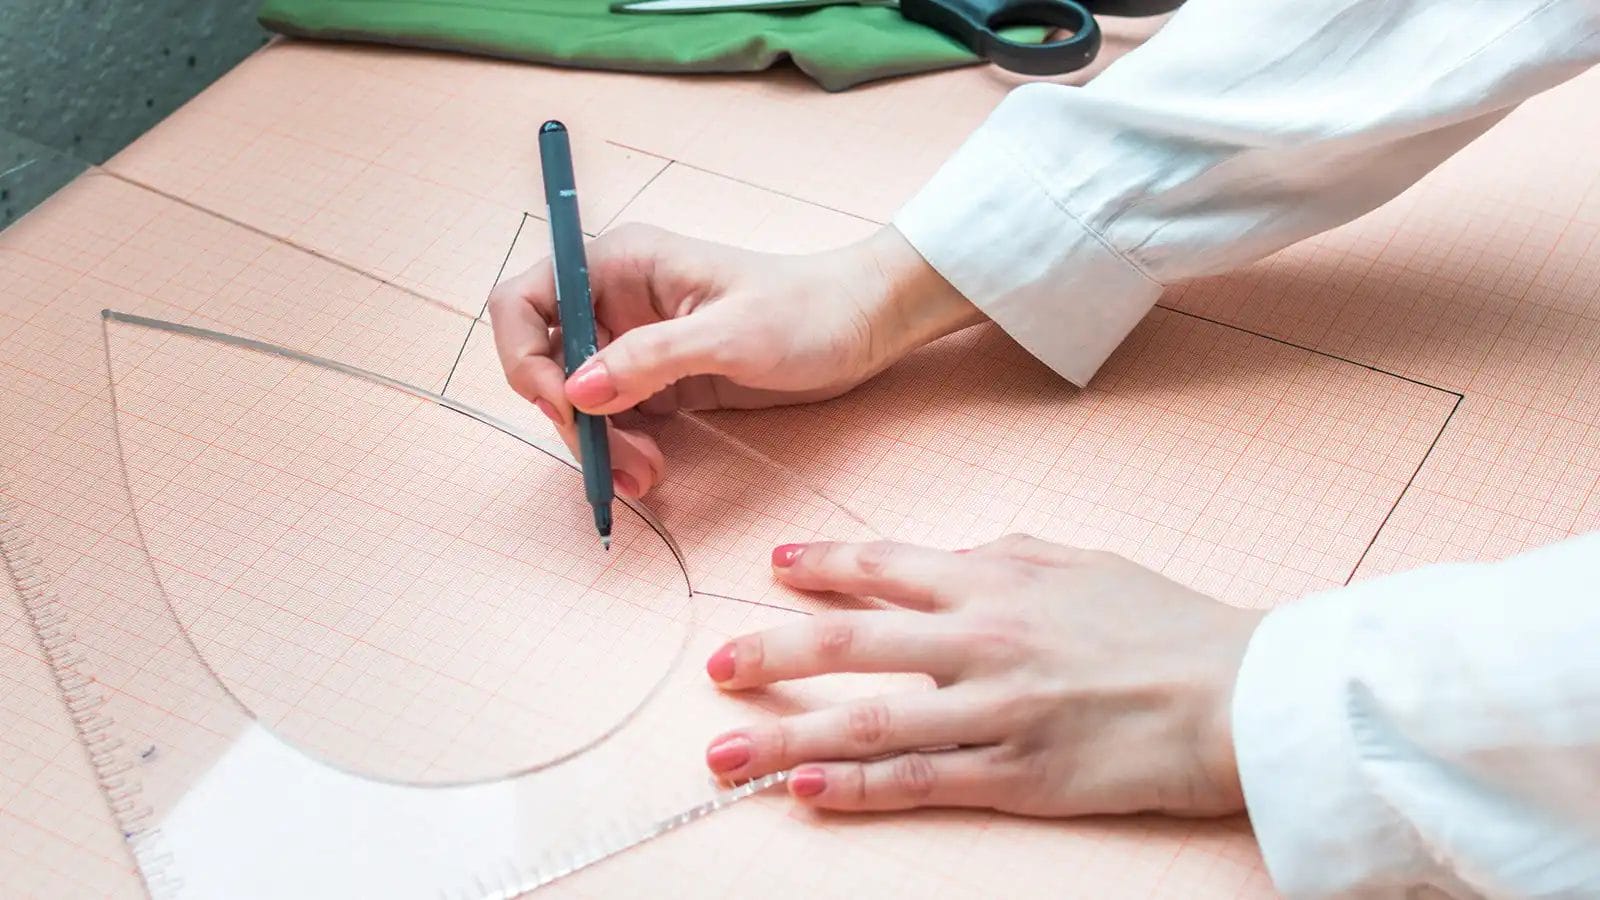
Draw the Basic Shape
Begin by sketching the basic shape of your fashion pattern onto pattern paper using a pencil or marker. Use a ruler and measuring tape to maintain accurate dimensions and straight lines.
As you draft the basic shape, consider the garment style you're creating and any design details. At this stage, don't worry too much about the finer details—just focus on getting the overall shape and proportions correct.
Mark Key Points
With your basic shape drafted, you'll need to mark key points on the pattern to ensure accurate construction and sewing alignment. Start by identifying the grainlines to help you align the fabric correctly.
Next, mark notches, which serve as reference points for matching seams. You'll also want to indicate darts, which shape the garment to fit the body.
Don't forget to include seam allowances, which add width to the pattern pieces for a smooth fit. Use a tracing wheel and carbon paper to transfer these markings onto fabric for precise sewing alignment.
Step 3: Creating a Sloper
Now that you've got your draft pattern, it's time to create a sloper, also known as a block. This custom-fit pattern will serve as the foundation for all your future designs.
Create a Sloper/Block
A sloper, also known as a block, is a fundamental component in pattern-making. To make one, start by transferring your measurements onto pattern paper. Then, draft basic shapes and refine the pattern through fittings and adjustments.
Remember, a sloper is typically created for the upper body (bodice) and lower body (skirt or pants).
With a perfected sloper, you'll have a template for creating custom patterns, ensuring consistent fit and style across different designs.
Modify the Sloper
Modifying your sloper allows you to create a wide range of custom-fit patterns by strategically adjusting the basic pattern block.
Common modifications include altering dart placement, changing neckline shapes, and modifying garment silhouettes.
You can adjust sleeve lengths, add or remove features, and experiment with different design elements.
These sloper modifications enable you to create custom-fit patterns that cater to individual tastes and preferences.
Step 4: Creating a Sample to Test the Pattern
Creating a muslin sample, also known as a toile, is necessary to ensure a flawless final garment. This step is crucial in the patternmaking process, as it allows adjustments without wasting valuable materials.
With your muslin sample, you can now test the pattern on the intended wearer and make adjustments as needed. During this fitting session, you'll assess the fit and identify areas for modification. Common adjustments include altering the bust, shoulder slope, and neckline to ensure the garment fits correctly and comfortably.
Fabric properties and wearer measurements play a significant role in determining the final fit of the garment. You may need to make darting, pleats, or fullness adjustments to achieve the desired silhouette and shape. Through multiple fitting sessions, you'll perfect the fit of the garment before finalizing the pattern for production.
Step 5: Finalizing the Pattern
Now that you've tested your pattern, it's time to finalize it. You'll make any necessary adjustments to ensure a perfect fit and desired design.
Next, you'll trace the final pattern onto paper, creating a precise template for future garment construction.
Make Necessary Adjustments
What adjustments will you need to make to finalize your pattern, ensuring it's precise and ready for garment production? At this stage, you'll make necessary pattern, fit, and design adjustments to ensure your pattern is accurate and reliable.
Since you've tested patterns with muslin prototypes, take note of any fit issues or design flaws and make the necessary changes.
It's essential to make these adjustments now, as they'll affect the overall quality of your final garment.
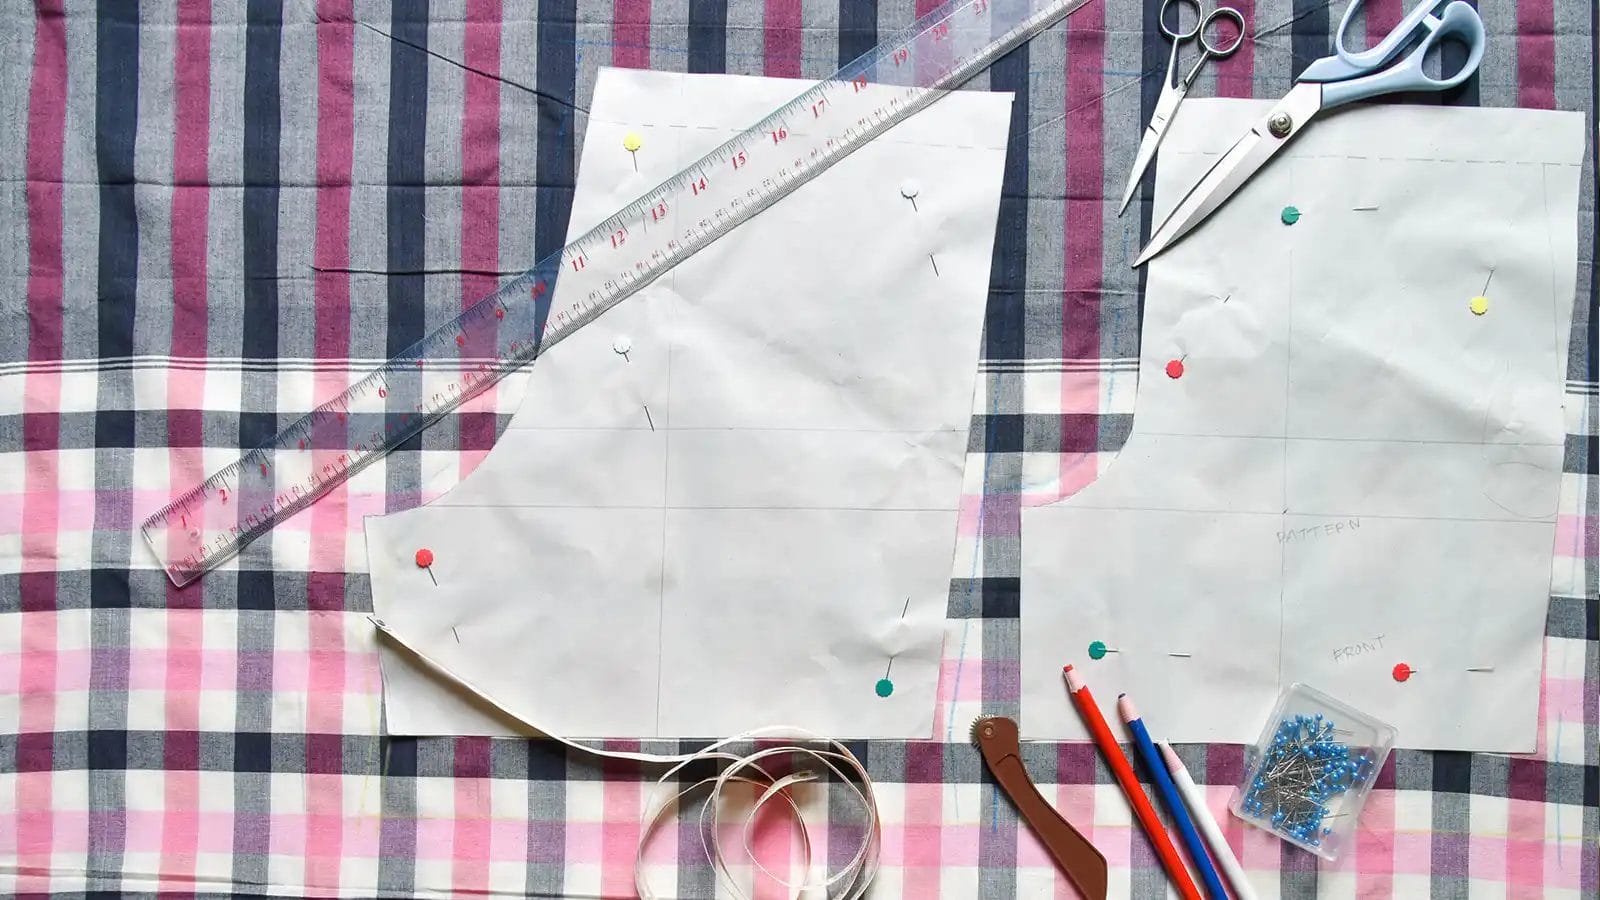
Trace the Final Pattern
After carefully refining your pattern, it's time to commit the final design to paper. Now, accurately transfer your final pattern onto a fresh or pattern paper. Make sure to include all notches, marks, and labels from the original pattern to maintain accuracy during garment construction.
Double-check the traced pattern against the original to ensure all lines, curves, and details are accurately transferred.
Once you've traced the final pattern, store it in a safe place for future sewing projects or alterations.
Step 6: Digitizing Patterns (Optional)
If you want to improve your pattern making, think about turning your paper patterns into digital files using computer-aided design (CAD) software.
CAD software can accurately grade and optimize digitized patterns for marker making. This helps reduce errors and allows for quick adjustments to fit and design changes. CAD software provides tools for precise pattern drafting, grading, and marker making, making the pattern development process more efficient.
Step 7: Using Your Pattern
Now that you've created your pattern, it's time to bring your design to life! Accurately cut out your fabric using your pattern pieces. Make sure to follow the markings and notches carefully.
Next, follow the sewing instructions to assemble your garment. Use the markings on your pattern pieces to guide you through the process.
Cut Fabric Pieces
With your pattern pieces ready, lay them on your fabric. Before cutting, ensure the fabric and pattern pieces are flat and wrinkle-free. Then, you can secure them with pattern weights or pins to achieve accurate cutting.
Always follow the grainline marked on your pattern to ensure the fabric drapes properly. Next, cut along the designated cutting lines on your pattern pieces to maintain accuracy in construction.
Take your time when cutting fabric to avoid mistakes and ensure clean, precise edges for your garment. Remember, accurate cutting is key to a professional-looking finish, so don't rush this step.
Sewing Instructions
Use your pattern pieces to guide you through the sewing process. Match them according to the layout guide provided in your pattern instructions to ensure proper alignment.
As you sew, follow the indicated seam lines and use the recommended stitch length for your fabric type. Don't forget to leave a seam allowance for structure and stability.
After sewing, press seams open or to the side as directed in the pattern instructions to achieve a professional finish.
Conclusion
You've successfully created a custom fashion pattern! Now, use it to bring your design to life.
Cut out your fabric, sew your pieces together, and enjoy the perfect fit. Don't be afraid to experiment and make adjustments as needed.
With practice, you'll refine your skills and create stunning garments that make you feel confident and stylish. Happy sewing!
Learn more sewing tips from the Longan Craft Blog, and dive into the fabric world with Longancraft!
FAQs
Can I Make My Own Clothing Patterns?
You can create your own clothing patterns, and it's easier than you think! By learning basic techniques and practicing with different styles, you'll design custom pieces that fit you perfectly in no time.
How Do Fashion Designers Make Patterns?
They use techniques like draping fabric on forms, modifying existing garments, and drafting flat patterns with precision tools to ensure accuracy and a perfect fit for their designs.
How Can I Make Patterns Out of Clothes?
You carefully trace the outline of the garment onto pattern paper. Then, add seam allowances around the lines and label each piece with grain lines and notches. Finally, refine the pattern through mock-up testing.
Is There an App to Create Sewing Patterns?
You can use apps like PatternMaker, Seamly2D, or Valentina to design custom patterns and input measurements and easily print them to scale.
0 comments