

Are you tired of tangled cables cluttering your workspace? Creating a DIY cable organizer could be the solution you've been looking for. With a few fabric scraps and some basic sewing skills, you can craft a personalized organizer that keeps your cables neat and adds creativity to your space.
Start by measuring and cutting your fabric. Then, sew the edges together and add a snap closure for convenience. Before you know it, you'll have a functional and stylish organizer. But what if you could take this project a step further?
Key Takeaways
- Creating a DIY cable organizer using scrap fabrics can help declutter your workspace and add a creative touch.
- Essential materials include sturdy fabric, snap closure sets, a sewing machine, a ruler, and a fabric marker or chalk.
- Making the organizer includes measuring and cutting fabric, sewing edges together, and adding a snap closure.
- Personalizing the organizer not only keeps cables neat and accessible but also enhances the visual appeal of your workspace or home.
Prepare the Essential Materials
To get started on your DIY cable organizer, you'll need a few essential materials.
- Fabric: Choose a sturdy fabric, such as canvas or cotton.
- Interfacing: Optional, to add structure and stability.
- Snap closure sets: For securing the organizer.
- Thread: Matching the color of your fabric.
- Scissors: Sharp fabric scissors.
- Sewing machine: Or needle and thread if sewing by hand.
- Ruler: For measuring.
- Pins: To hold fabric pieces together while sewing.
- Fabric marker or chalk: For marking measurements on the fabric.
With these materials, you can create a functional and attractive cable organizer that keeps your cords neat and easily accessible.
How to Make a DIY Cable Organizer Using Fabric Scraps
To start making your DIY cable organizer, measure and cut your scrap fabric into rectangles.
Sew the edges together, leaving one end open, and then turn the fabric inside out to hide the seams. Finally, add a snap closure, and your cable organizer is complete!
Step 1: Measure and Cut Fabric Pieces
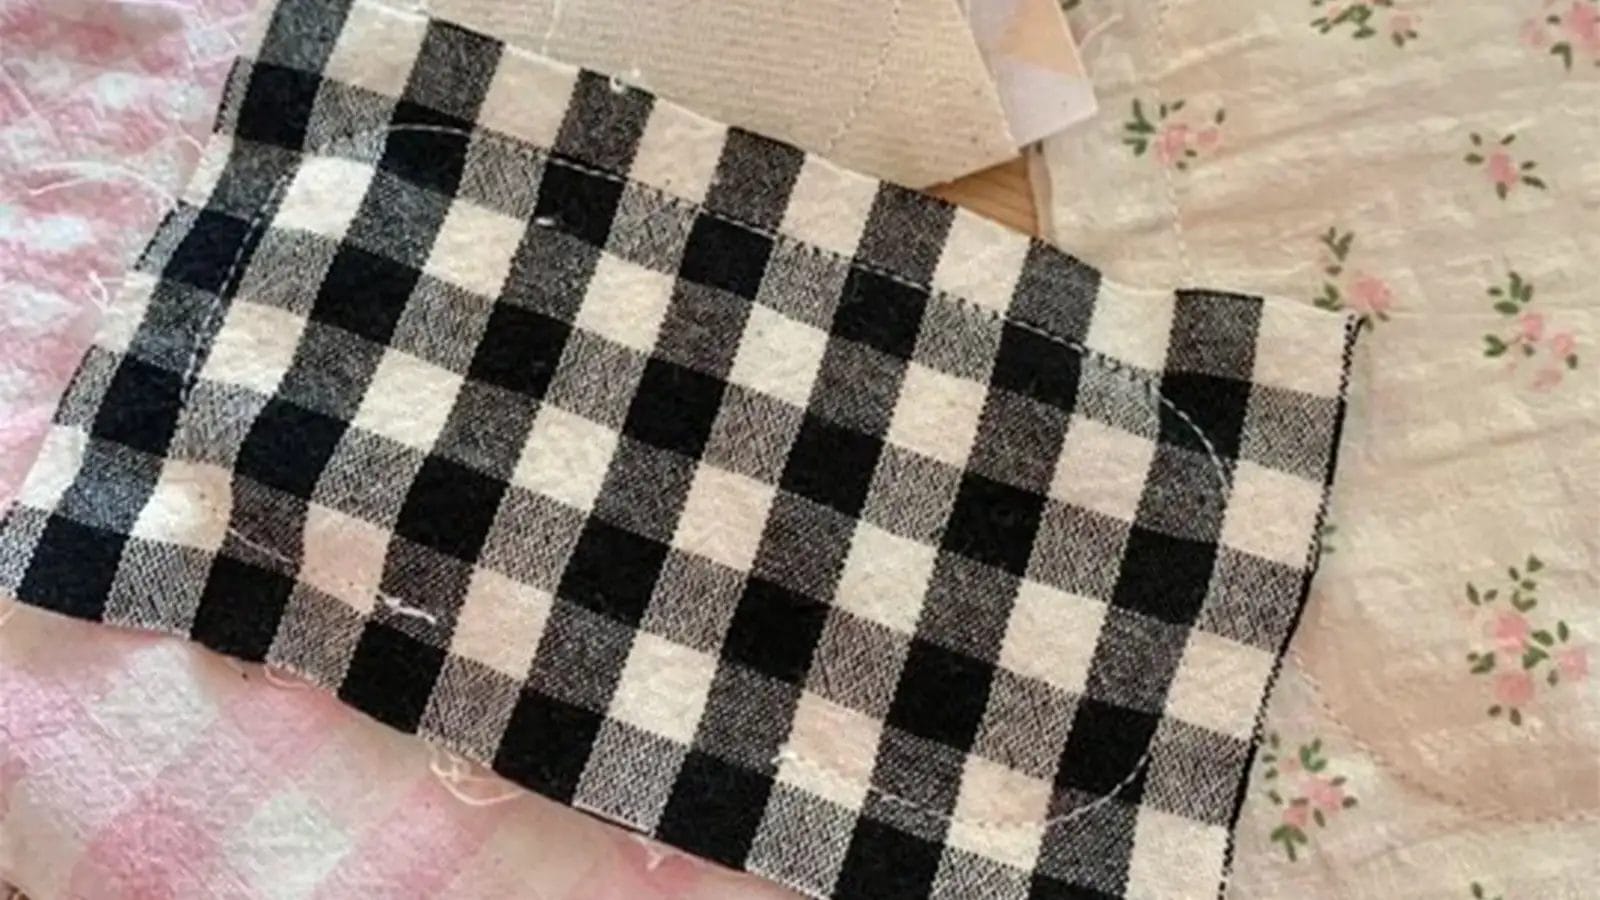
Start by measuring the length and width of your scrap fabric, taking into account the size of the cables you'll be organizing. Use a ruler or measuring tape to get accurate dimensions.
For this DIY project, cut two pieces of the same rectangular fabric wide enough to hold multiple cables comfortably.
Once measured, use sharp fabric scissors to cut the fabric precisely.
Step 2: Sew the Edges, Leaving One End Open
With the right sides together, sew the edges of your fabric pieces together, leaving one end open. You can use a sewing machine for a quick and sturdy finish or hand stitch if you prefer a more hands-on approach.
After sewing, cut the four corners, but be careful not to cut the stitches.
Step 3: Turn the Fabric Inside Out and Sew Again
Gently turn the fabric inside out through the open end, ensuring all seams are completely tucked inside. Then, sew the four edges again to close the opening.
Step 4: Add a Snap Closure
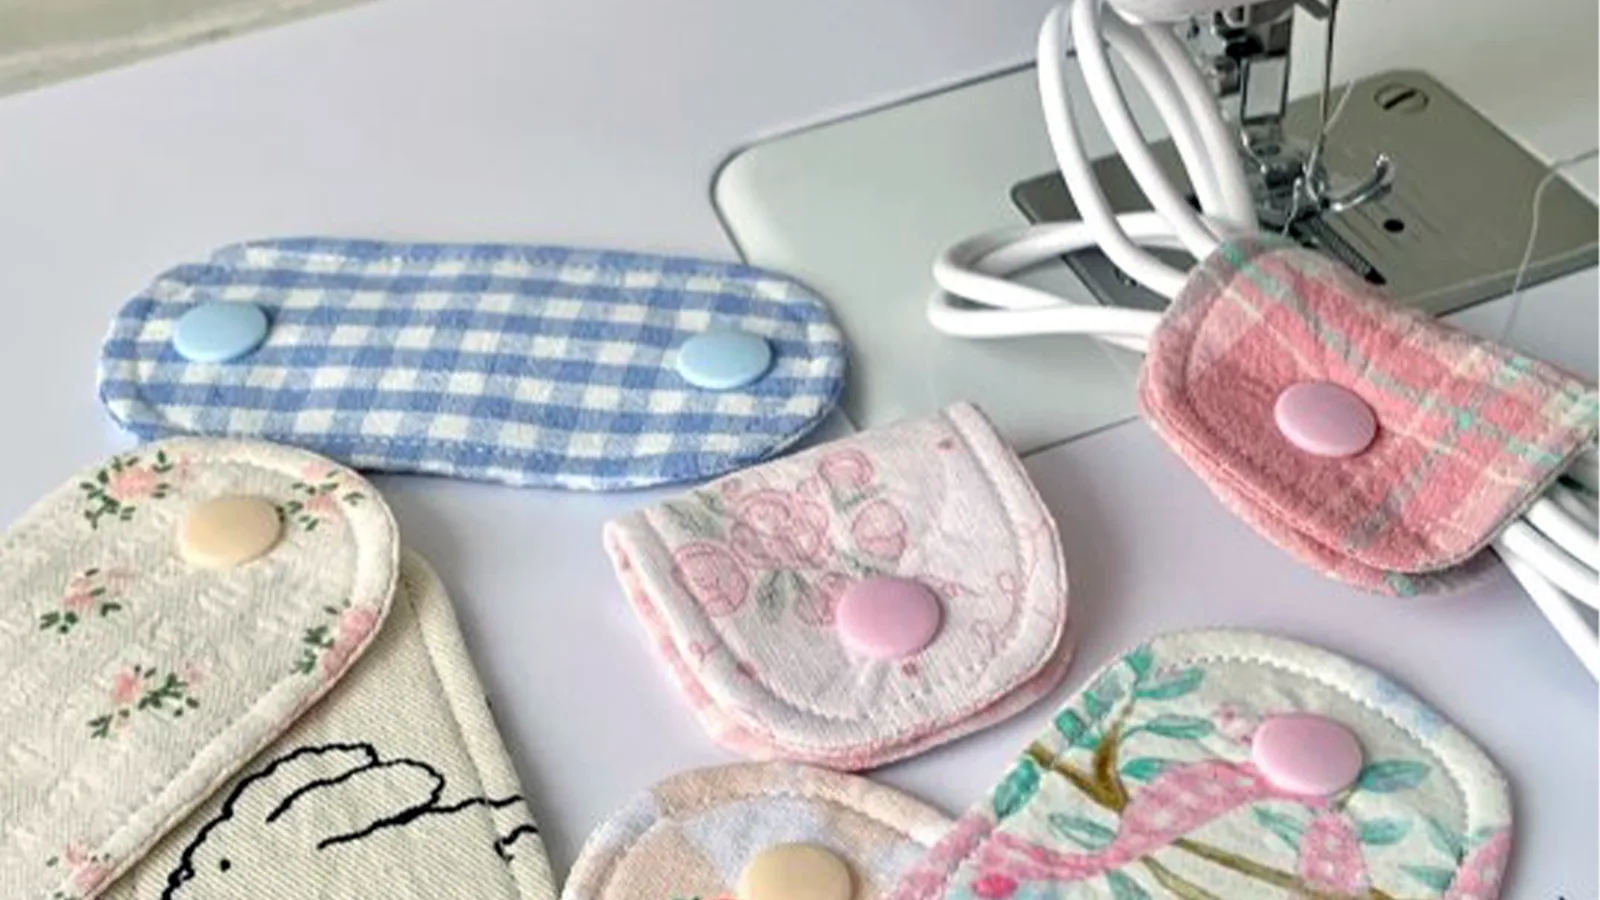
To add a snap closure, start by aligning the two pieces of the snap—one with the protruding knob (the stud) and the other with the corresponding socket.
Position the stud part on one side of the rectangle. Apply firm pressure to press the stud through the fabric, ensuring it is fully attached. Repeat this process for the socket part on the other side, aligning it with the stud.
Once both parts are in place, bring them together and press until you hear a click, indicating that the snap has securely closed.
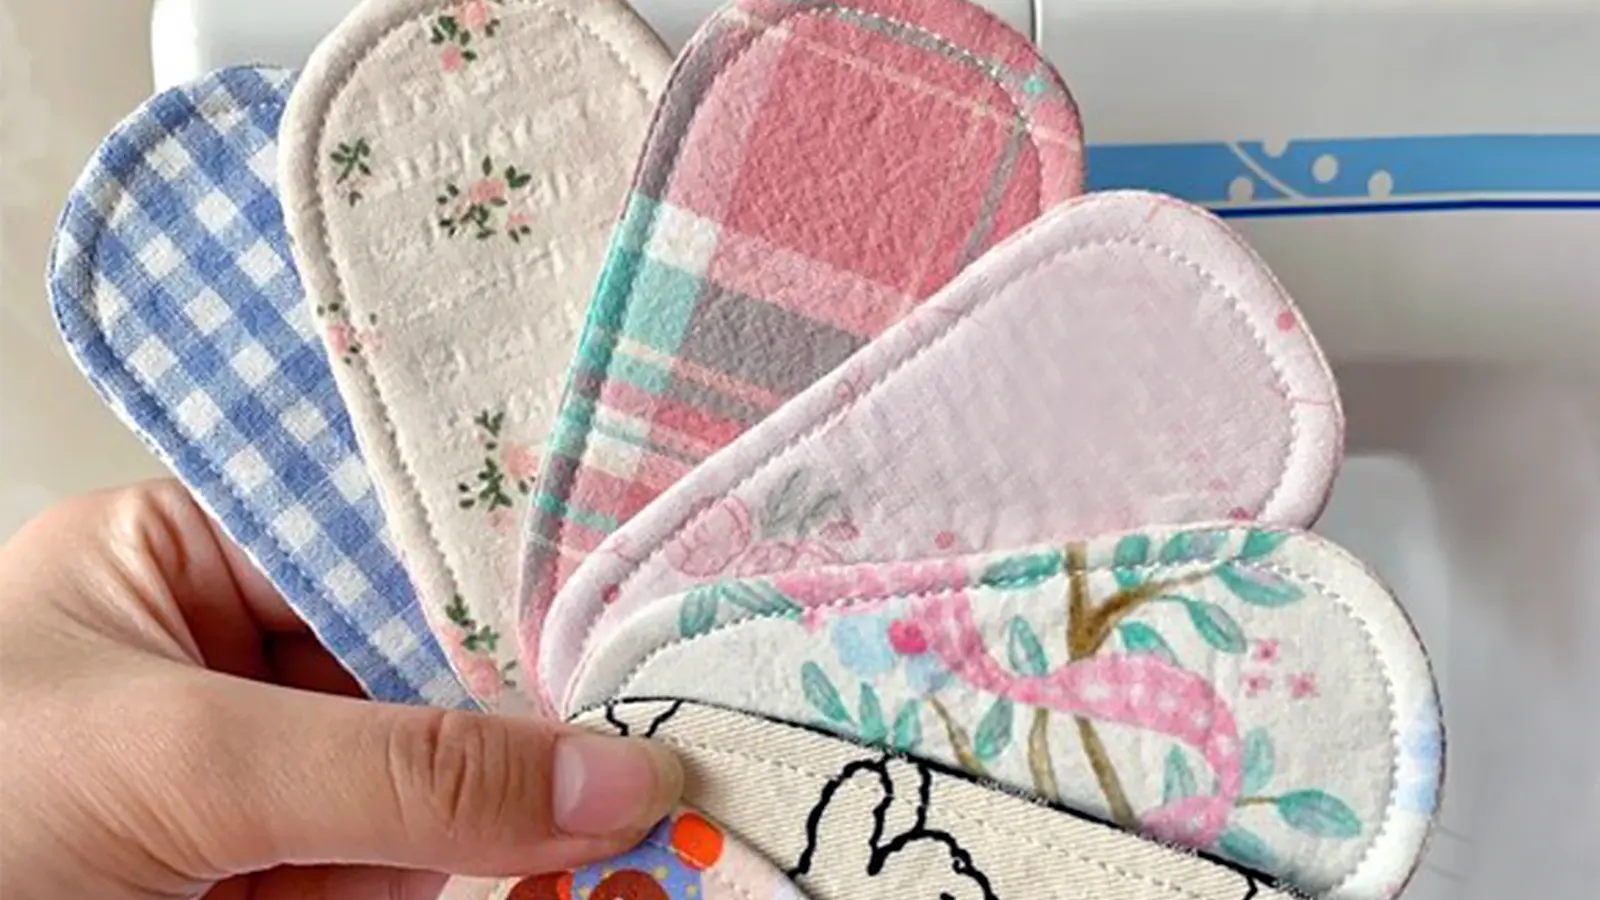
Step 5: Customize the Organizer with Decorations
Personalizing your DIY cable organizer with decorations adds a touch of your unique style.
Adding decorations, such as patches or small fabric flowers, can make the organizer visually appealing and fun to use.
Customizing your organizer transforms it from a simple storage solution into a unique and functional addition to your workspace or home.
Final Words
Congratulations! You've just created a personalized cable organizer that's both functional and stylish. With just a few materials and a bit of effort, you've managed to declutter your space and keep your cables neat and untangled.
Plus, you've added a touch of creativity with custom decorations. Now, every time you reach for a cable, you'll appreciate the organization and personal touch you've brought into your home or office.
Enjoy your clutter-free, organized space!
Learn more DIY projects from the Longan Craft Blog, and dive into the fabric world with Longancraft!
0 comments