Transform your holiday season with a festive, functional DIY Christmas tree cat bed. This project lets you craft a cozy hideaway for your cat while adding charm to your holiday decor.
Imagine your feline friend curling up in a snug, tree-shaped bed that you made yourself. It's not just a bed; it's a special gift for your pet that blends creativity and comfort.
Plus, this cat bed becomes a delightful centerpiece that keeps your cat entertained and away from your actual Christmas tree.
Key Takeaways
- Create a sturdy cardboard structure for the bed, ensuring it is spacious yet snug for your cat.
- Cover the cardboard with soft green fabric to give it a festive look and make it comfortable for your pet.
- Add decorative elements like ornaments and ribbons to enhance the appearance while ensuring they're safe for your cat.
- Include a soft cushion or blanket in the bed to make it cozy. This will encourage your cat to use the bed as its new hideaway.
Gather Necessary Materials
Before you start making a Christmas tree cat house, gather all the materials. Here's a list of what you'll need:
- Cardboard: Use sturdy cardboard to create the base and structure of your Christmas tree.
- Green Fabric or Felt: Choose a soft material in a classic green color to cover the structure.
- Hot Glue Gun and Glue Sticks: These will help you securely attach the fabric to the cardboard and assemble the structure.
- Scissors or Craft Knife: Use these tools to cut the cardboard and fabric into the desired shapes.
- Ruler and Pencil: These will help you measure and mark the cardboard for precise cuts.
- Decorative Items: Add festive touches like small ornaments, ribbons, or felt snowflakes.
- Soft Cushion or Blanket: Place this inside the bed to make it extra comfortable for your cat.
Step-by-Step Guide to Making a DIY Christmas Tree Cat Bed
After getting all the materials, let's dive into the steps to bring the Christmas cat house to life.
Step 1: Create the Christmas Tree Structure

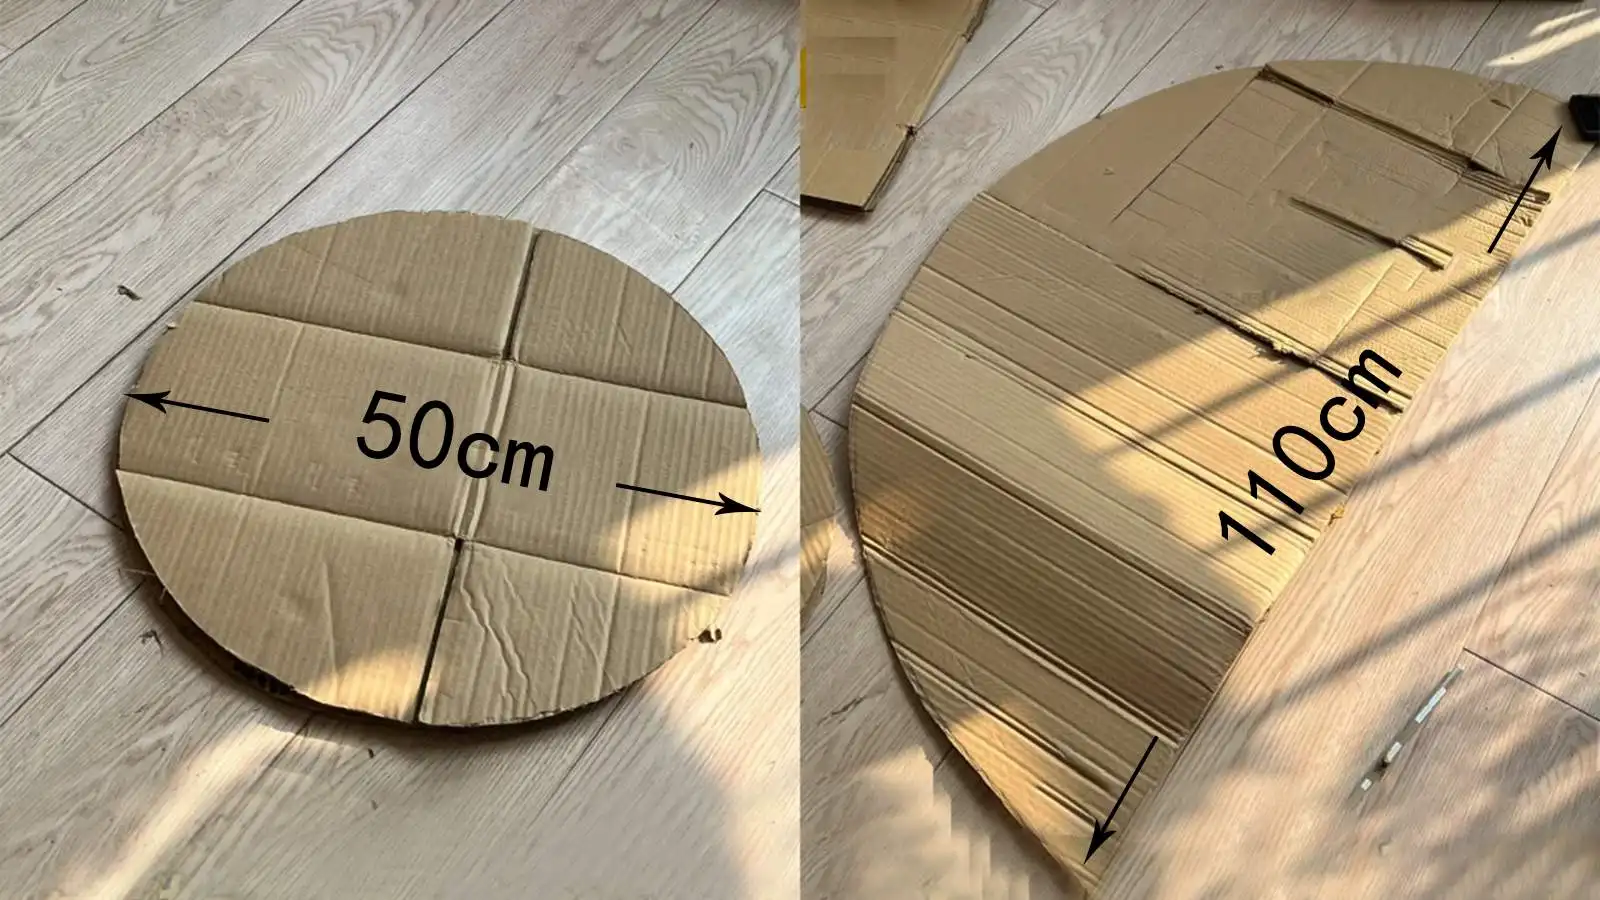
Start by drawing and cutting a 50-cm-diameter circle on a large, sturdy piece of cardboard as the bottom. Then, cut a 110-cm-diameter semicircle. If you don't have that large cardboard, you can create the same effect by combining several pieces.
Step 2: Assemble the Cardboard Pieces

To successfully assemble the cardboard pieces, it's better to fold the semicircular cardboard several times to make it softer for easier assembly.
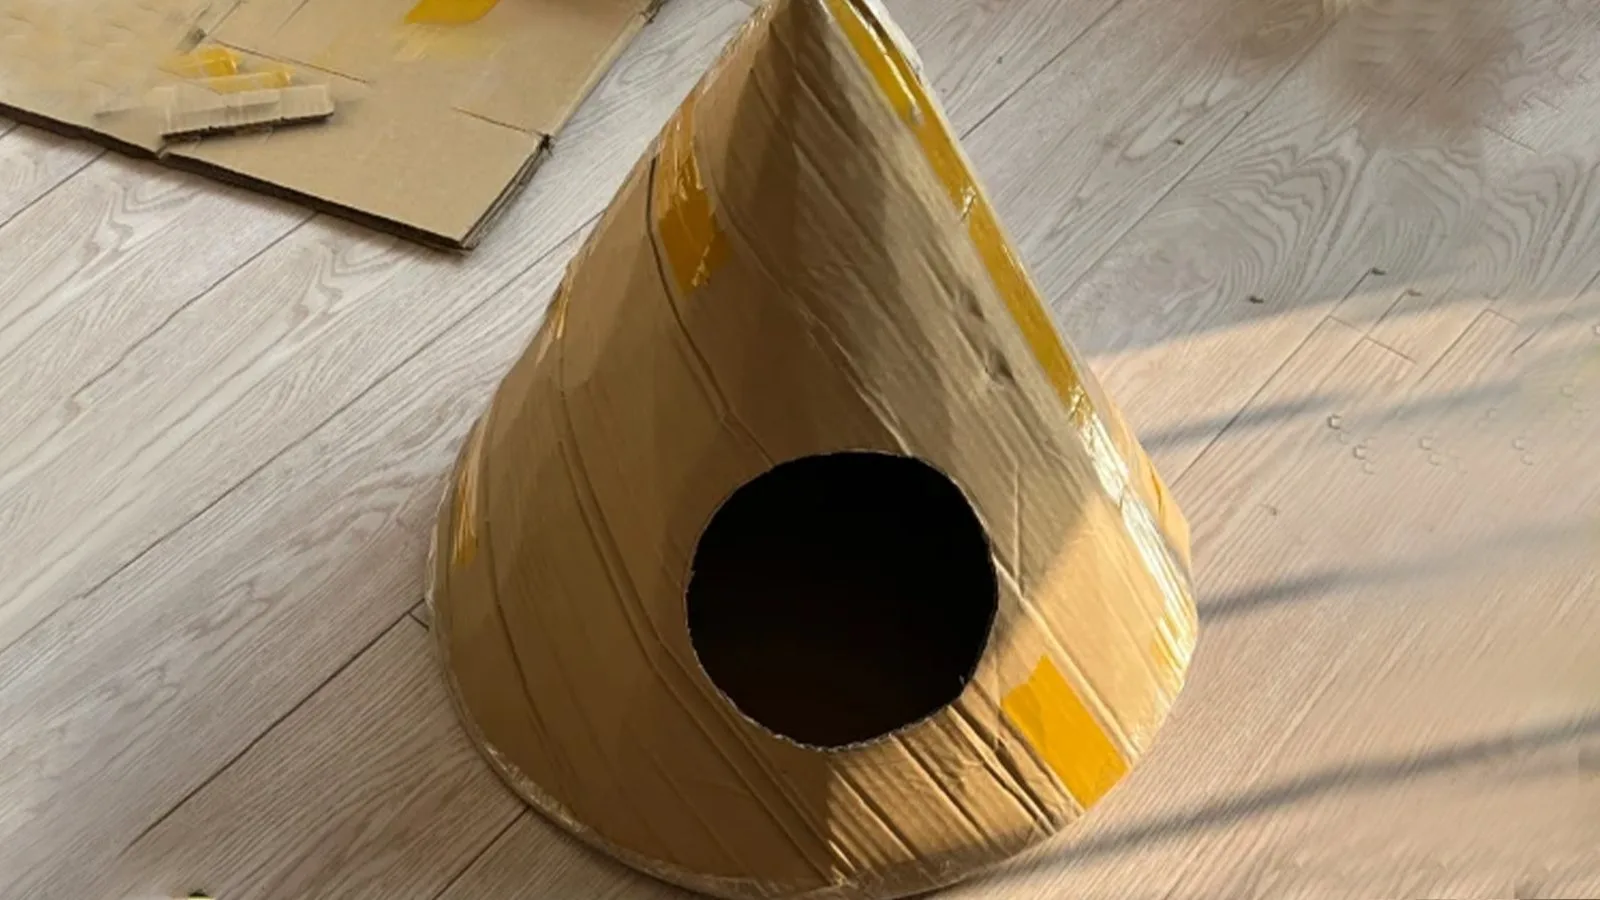
Next, combine the semicircle with the circular bottom to form a cone. Secure the edges firmly with a hot glue gun. Remember to cut out a cat's entry in advance.
Step 3: Cover the Tree with Fabric

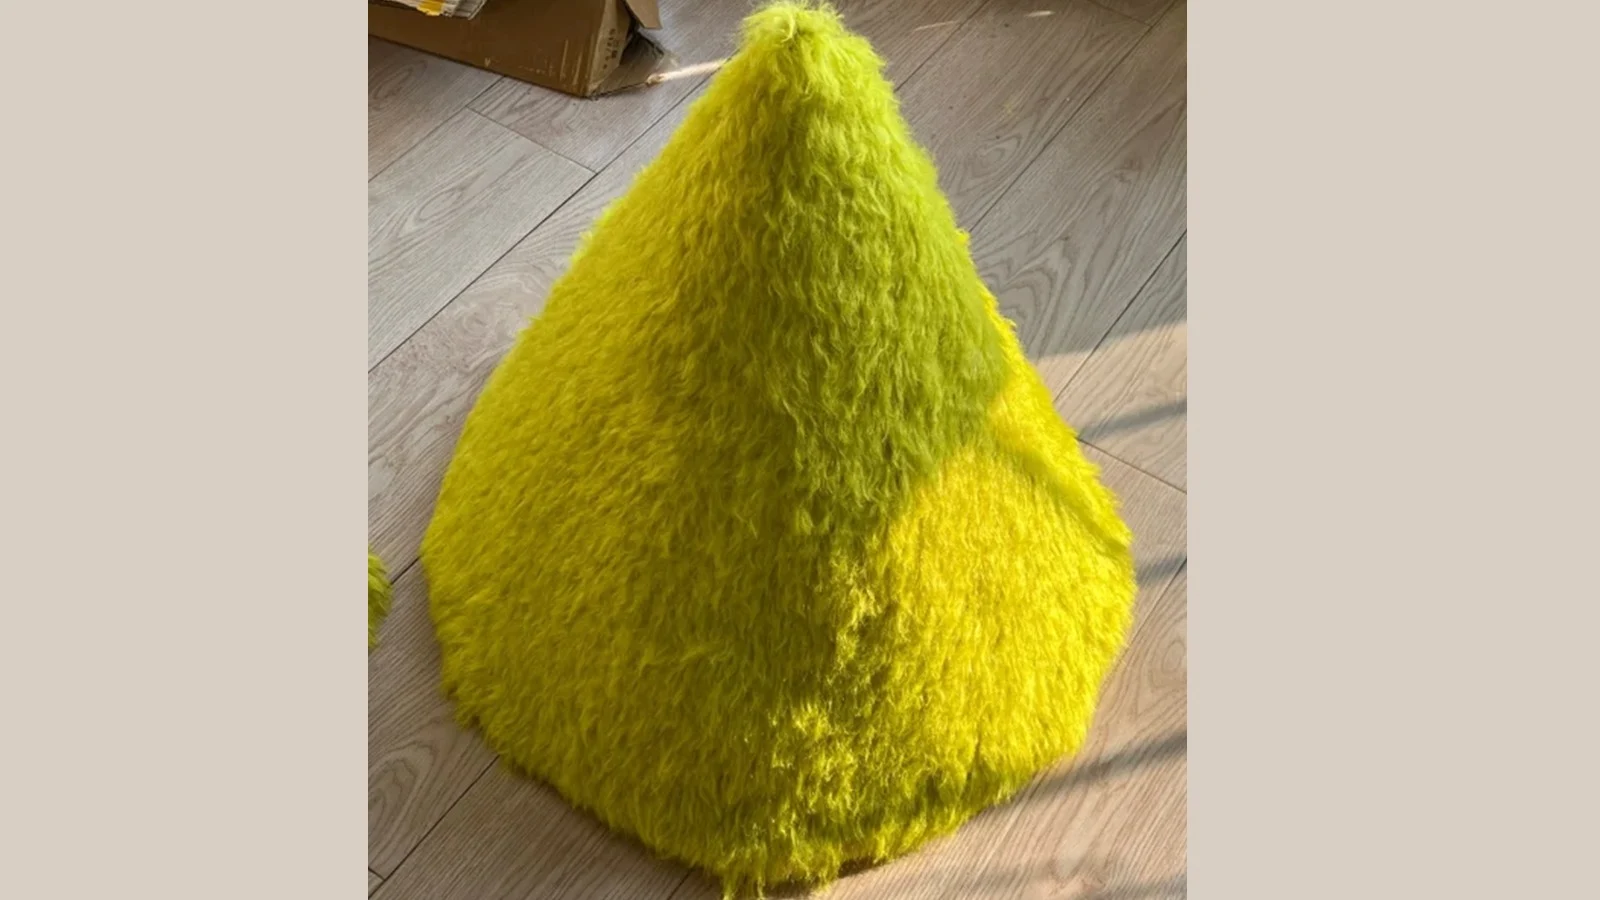
Take your green fabric or felt and glue it to the Christmas tree. Cover the entire tree, including the sides and base, for a polished look.
For the entry hole, cut a small circle in the front panel of the fabric. This will serve as the doorway for your cat to enter the bed. Make sure the hole is large enough for your cat to pass through comfortably. Glue the edges of the fabric around the hole to keep it neat and secure.
Step 4: Decorate Your Cat Christmas Tree

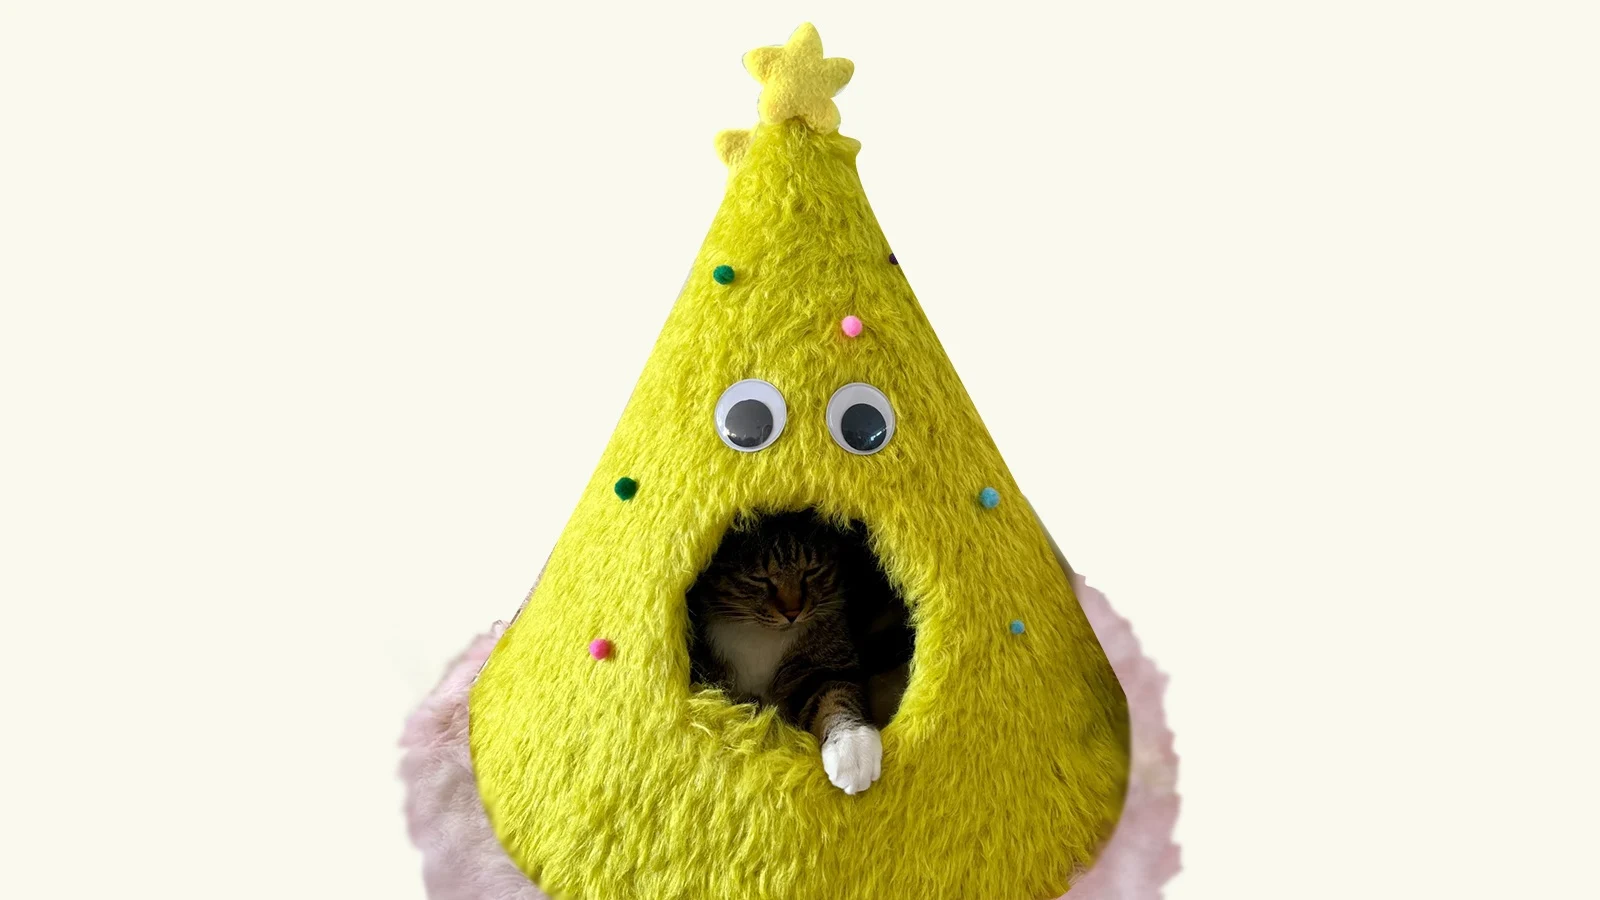
Here's where the fun begins! Decorating your DIY cat tree lets you get creative and festive. Use small ornaments, ribbons, or colorful pom poms to mimic the look of a real Christmas tree. Attach these decorations with hot glue, ensuring they're secure so your cat can't easily pull them off.
For a playful touch, consider adding hanging ornaments inside the bed. These can double as cat toys for your kitten to bat around.
Step 5: Add Comfort and Invite Your Cat
The final step is all about making the bed cozy and inviting for your cat. Place a soft cushion, plush blanket, or even a piece of your cat's favorite bedding inside the structure. This will create a snug and comfortable space where your cat can relax.
Once everything is set up, introduce your cat to its new hideaway. Sprinkle a little catnip inside or place a favorite toy to encourage exploration. Give your cat some time to get used to the bed. Your cat might be curious initially, but it'll love its new cozy spot soon enough.
Conclusion
You've just created a unique Christmas tree cat bed that's both festive and functional. This project not only gives your cat a cozy spot to relax but also adds a charming touch to your holiday decor. Your creativity has turned simple materials into something truly special for your feline friend.
Now it's your turn to inspire others! Share your masterpiece with friends and family or on Instagram or YouTube. Encourage fellow cat lovers to try this fun and rewarding DIY project. Who knows? Your creation might spark a wave of festive, pet-friendly designs!
Learn more sewing projects on the Longan Craft Blog, and dive into the fabric world with Longan Craft!
FAQ
What size should the DIY Christmas tree cat bed be?
The size of your cat bed depends on its size. Measure your cat while it's lying down to determine the ideal dimensions. Make sure the bed is spacious enough for your cat to stretch out but snug enough to feel cozy.
Can I use other materials besides cardboard?
Yes, you can! While cardboard is lightweight and easy to work with, you can also use plywood or foam board for a sturdier structure. Just ensure the material is safe for your cat and free from sharp edges.
Is it safe to use hot glue for this project?
Hot glue is safe to use if you carefully handle it during assembly. Ensure the glue fully dries and cools before allowing your cat to explore the bed. If you're concerned about safety, opt for non-toxic glue or pet-safe adhesives.


0 comments