

Unlock your creativity with a stylish DIY denim bracelet that’s as unique as you are! This fun and easy project allows you to repurpose an old pair of jeans or leftover fabric into a fashionable accessory that adds a touch of bohemian flair to any outfit.
Perfect for beginners and seasoned crafters alike, this bracelet not only showcases your style but also promotes sustainability by giving new life to worn materials. Let’s dive into the world of DIY fashion and create something beautiful together!
Key Takeaways
- Use worn-out jeans as a canvas to craft a unique bracelet.
- Cut and prepare denim strips based on your wrist size.
- Embellish the bracelet creatively with fabric scraps and optional beads.
- Securely sew or glue strips together, finishing with a button closure.
What Materials Are Needed?
To make a denim bracelet, you'll need the following materials:
- Old Jeans or Denim Leftovers: Use old jeans or denim leftovers as the main material for your bracelet.
- Scissors: For cutting the denim into strips or desired shapes.
- Needle and Thread: For sewing and securing pieces together.
- Fabric Glue: As an alternative to sewing, if preferred.
- Measuring Tape: To measure your wrist and cut the denim to the correct length.
- Buttons: As a closure and embellishments for the bracelet.
- Decorative Elements: Optional embellishment items like beads, studs, or embroidery thread.
- Iron (optional): To press and flatten the fabric, making it easier to work with.
Easy DIY Denim Bracelet: Step-by-Step Instructions
Let's get crafty and start transforming those old blue jeans with this tutorial! Crafting upcycled denim cuffs is both fashionable and environmentally friendly, breathing new life into old denim.
Step 1: Measure Wrist Size and Cut Two Denim Strips
Grab a cloth tape measure and wrap it snugly around your wrist to accurately measure your wrist size. Once you've got your measurement, add 2 cm for later button closure.
Cut two denim strips based on your measurements. Use sharp scissors to make clean, straight cuts, aiming for a width of about 3/4 inch.
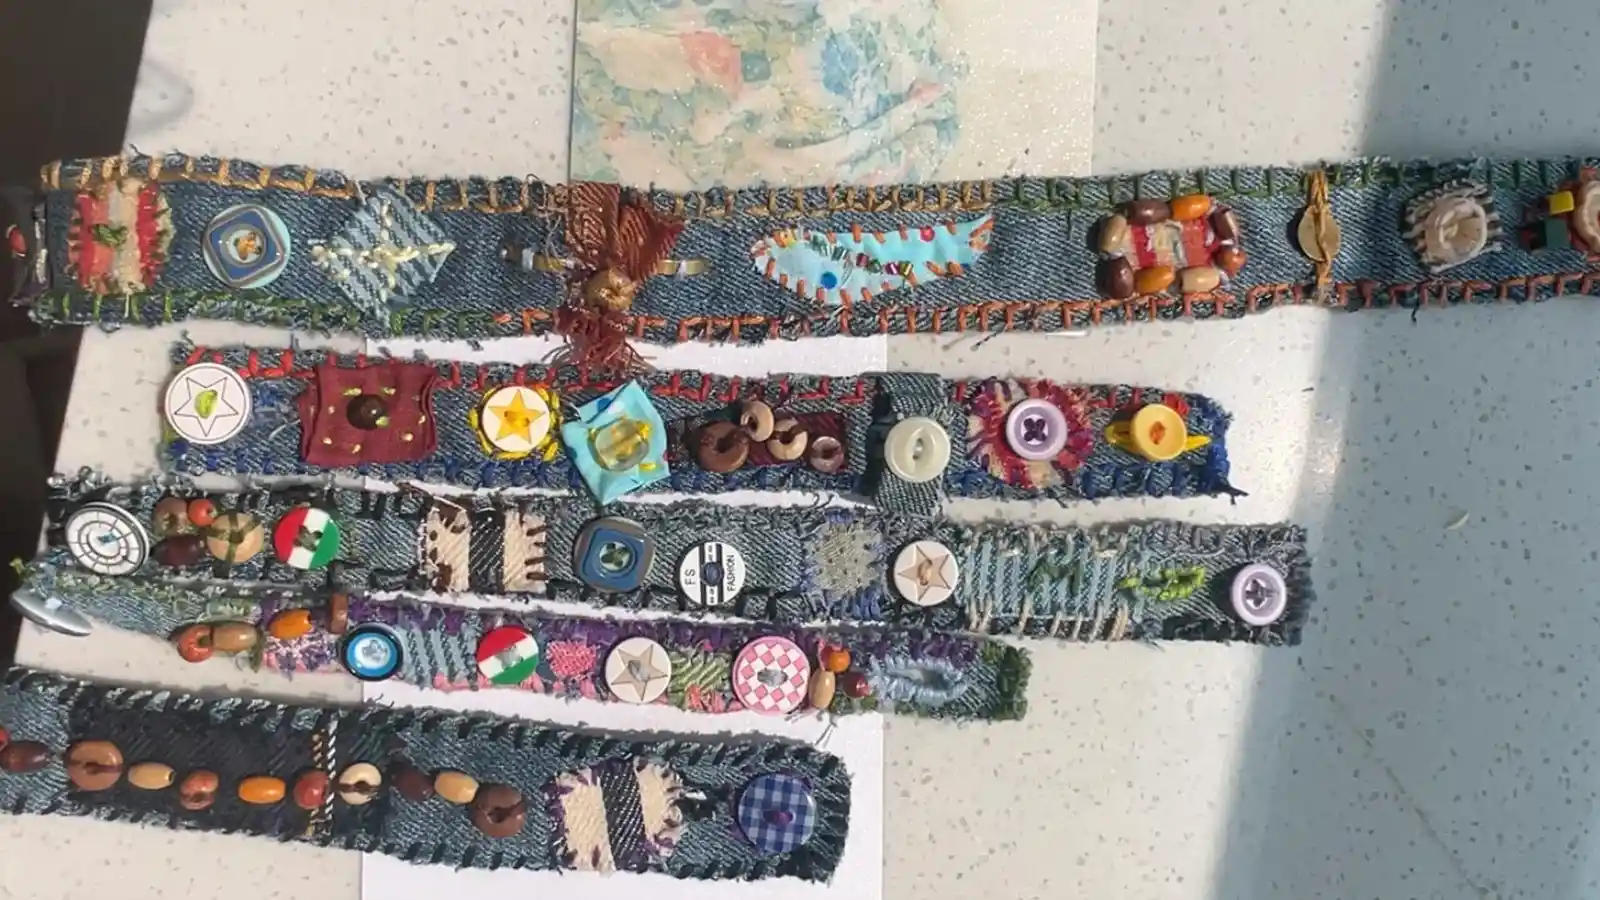
Step 2: Add Fabric Scraps as Embellishments to One Strip
Gather a handful of vibrant fabric scraps to bring life to your bracelet. Choose a mix of colorful cotton, patterned materials, or even textured lace and felt.
This is your chance to play with creative layering! Lay one denim strip flat and begin arranging your fabric scraps on top. Think about how they interact. Mix textures and colors to create unique contrasts for a visually striking look.
Secure each piece with fabric glue or a needle and thread. Don't be afraid to experiment with different shapes and sizes; balance is key for a cohesive design.
Let the glue dry completely before proceeding to guarantee your embellishments are set and ready to dazzle.
Step 3: Sew the Two Strips
Lay the denim strips with the wrong sides facing together. Grab a needle and strong thread, and sew them together using a simple running stitch.
If sewing isn't your thing, a no-sew option involves applying super glue along the seam and pressing firmly until the strips are securely bonded.
Step 4: Add More Embellishments
Release your creativity by adding extra embellishments to your bracelet. Consider using rhinestone buttons or vintage clip-on earrings as spectacular focal points.
Experiment with fabric paints to introduce striking decorative patterns or use embroidery thread for stitching initials.
Secure charms and cabochons with E6000 glue, adding a whimsical touch. Don't forget to allow adequate drying time for maximum hold.
To create depth, layer different embellishments like sequins or beads, ensuring they harmonize in color and style.
Step 5: Sew the Edges using decorative stitches
Grab your sewing machine and select a decorative stitch pattern like zigzag or scallop to boost the bracelet's visual appeal. If you prefer a hands-on approach, use a needle and strong thread for more control.
Opt for contrasting thread colors to make those stitches pop against the denim backdrop. Once stitched, carefully trim any excess fabric without cutting into your beautiful decorative stitches.
Step 6: Fastening Options
With your denim strip ready, let's tackle the fastening options to complete your chic bracelet.
- Wrap the bracelet around your wrist and mark where you want the button to be placed on one end.
- Sew the button onto the marked spot using a needle and thread. Make sure it's securely attached.
- On the opposite end of the denim strip, make a small slit for the buttonhole. The slit should be just large enough for the button to fit through snugly.
- Reinforce the buttonhole by sewing around its edges with a tight stitch to prevent fraying.
Finally, your bracelet made from old jeans is complete! Try it on and showcase your creativity.
Tips for Working with Denim Fabric
Working with denim fabric to create a bracelet can be a fun and rewarding project. Here are some tips to help you craft a stylish bracelet:
- Select the Right Denim: Choose denim that is not too thick or stiff, as it will be easier to work with and more comfortable to wear.
- Finish the Edges: Prevent fraying by hemming the edges or using a fabric glue or fray check.
- Sewing Techniques: Use a strong needle suitable for denim. Employ thick thread or embroidery floss for durability and decorative stitching.
- Test Fit: Before finalizing everything, test the bracelet on your wrist to ensure it fits comfortably and securely.
- Take Care: If needed, spot-clean your bracelet with mild detergent to maintain its appearance.
Conclusion
You've now transformed a forgotten pair of jeans into a trendy, all-your-own bracelet. As you fasten it around your wrist, you'll feel the satisfaction of wearing something uniquely you—crafted with care and creativity. This chic accessory isn't just a style statement; it's a nod to sustainability and personal flair.
So go ahead, flaunt your masterpiece, and inspire others to upcycle their fashion. Your denim journey doesn't end here—it's just the beginning!
Learn more sewing projects on the Longan Craft Blog, and dive into the fabric world with Longan Craft!
FAQs
What Can I Use for a Homemade Bracelet?
For a homemade bracelet, you can use leather cords, colorful beads, and charms. Embroidery threads and sequins add a splash of personality. Secure everything with ribbon crimps and clasps for a trendy, personalized accessory that stands out.
How Do You Make a Flower Bracelet at Home?
Start by picking your favorite fabric flowers. Attach them to a ribbon or elastic cord with hot glue or stitching. Add beads for flair. Secure it with a clasp or knot, ensuring everything's snug and stylish.
How to Make a Bracelet Out of Recycled Materials?
You can craft a stunning bracelet from recycled materials by weaving fabric strips or threading beads. Mix textures and colors for a bold look. Attach a clasp for closure and flaunt your eco-chic accessory with pride!
0 comments