Are you ready to unleash your creativity and add whimsy to your home decor? Dive into the exciting DIY world with our guide to crafting a cute dog-shaped plush floor pillow! Not only will this fun project provide a cozy spot for lounging or playtime, but it also allows you to express your love for your furry friends.
With a few simple materials and imaginative flair, you can create a delightful addition that will brighten any space. Let's get started on this pawsitively charming adventure!
Key Takeaways
- Sketch and cut out paper templates of the dog's body, ears, tail, and nose.
- Fold the fabric in half to cut two body pieces, four ear pieces, two tail pieces, and two nose pieces.
- Sew the body pieces together, attach features, and leave an opening for turning.
- Turn the pillow inside out, fill it evenly with stuffing, and securely close the opening.
- Add facial details using embroidery or markers for a personalized touch.
Prepare Materials Needed
You'll need to gather a few essential materials to get started on your DIY dog-shaped plush pillow.
- Fabric: Soft plush fabric or fleece for the outer layer and details like ears, nose, and tail. Choose colors that match the dog design you have in mind.
- Stuffing: Use polyfill stuffing or foam beads to fill the pillow.
- Thread and Needles or Sewing Machine
- Sharp Scissors
- Clips or Pins
- Pattern Paper: Large sheets of paper or pattern paper to draw and cut out the template of your dog shape.
- Embroidery Floss: For detailing features like eyes and mouth.
- Zipper or Velcro (Optional): If you want a removable cover for easy washing, consider adding a zipper or Velcro closure.
- Fabric Marker or Chalk
DIY Floor Pillow: A Step-by-Step Sewing Tutorial
To start your easy DIY dog-shaped floor pillow, create a template that fits your chosen dog breed.
Next, carefully cut the fabric according to your template, ensuring precision for a perfect fit.
Then, sew the main body and features, fill them with stuffing, and assemble everything to complete your plush creation.
Step 1: Create a Template
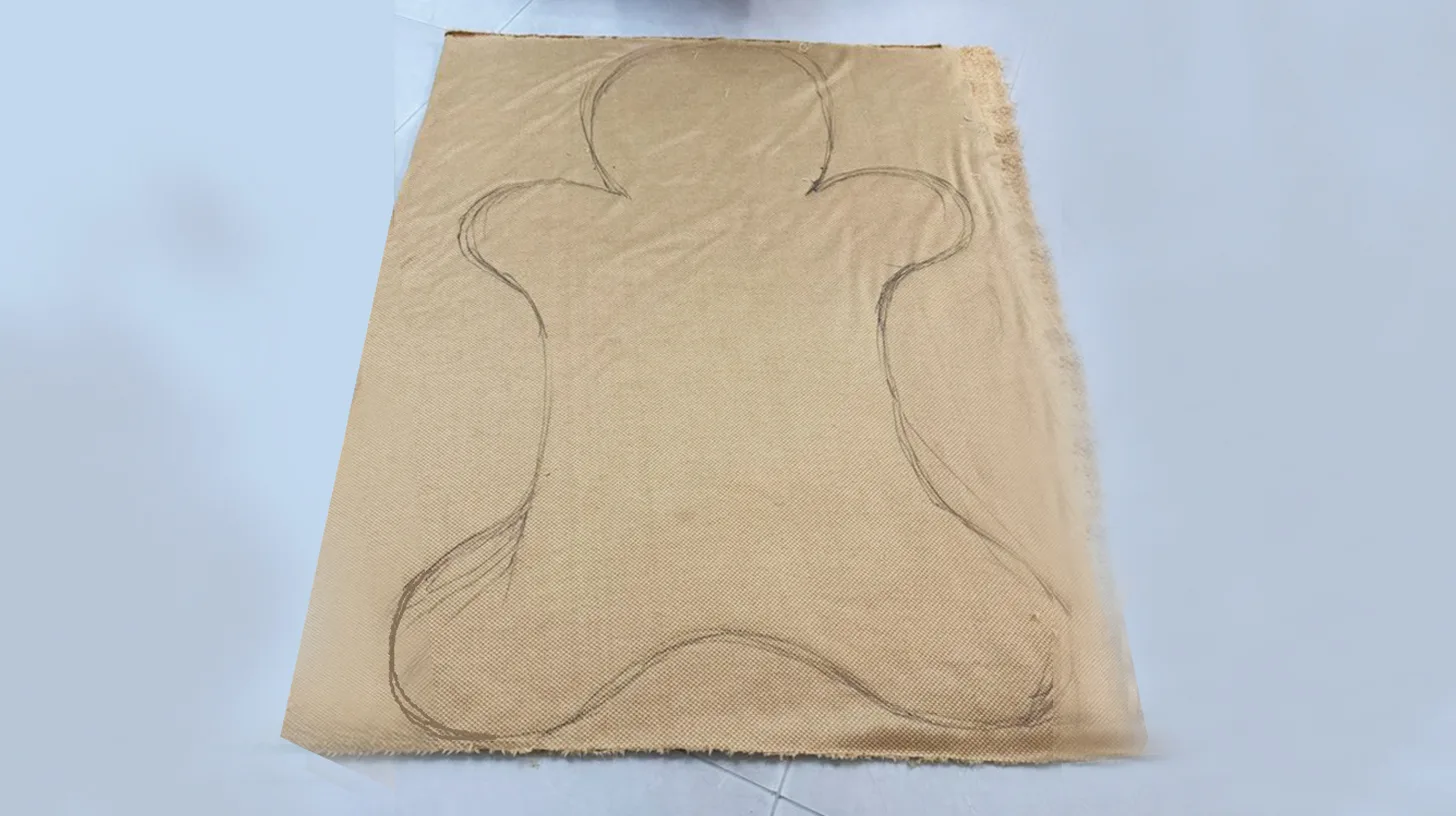
Start by sketching a dog's body, ears, tail, and nose on paper, ensuring the dimensions match your desired pillow size. Then, carefully cut out the paper templates.
Remember to add seam allowance around each shape to ensure smooth sewing later.
Consider using inexpensive materials or muslin first to test the fit and adjust if necessary.
Step 2: Cut the Fabric
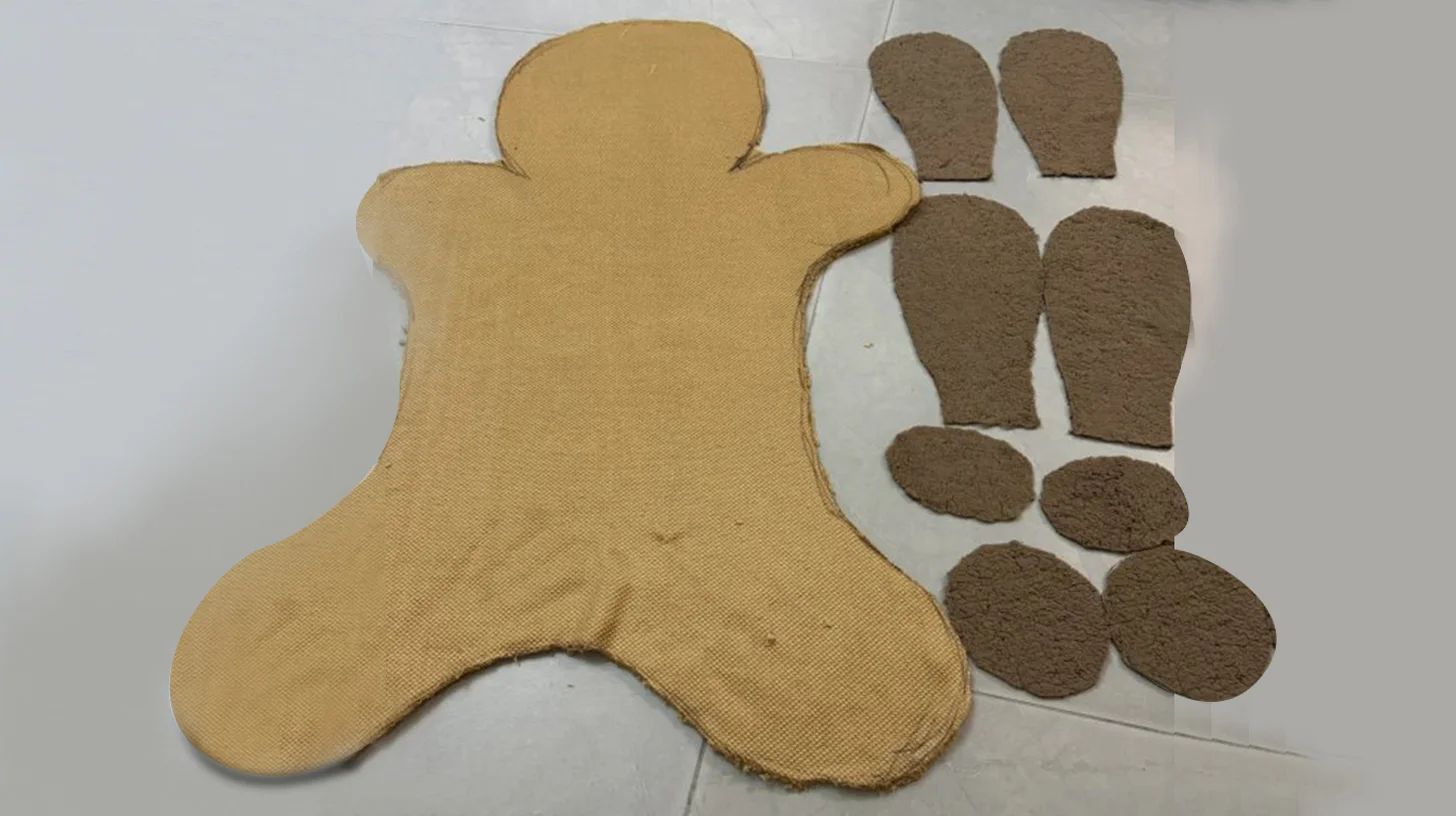
With your template ready, it's time to cut the fabric. First, fold your chosen plush fabric in half and cut two identical pieces for the body.
Next, cut out four pieces for the ears, two pieces for the tail, and another two pieces for the nose.
Adjust if needed, ensuring all pieces are uniform for a neat finish.
Remember to mark the ears, tail, and nose on one body piece for later stitching.
Step 3: Sew the Pieces
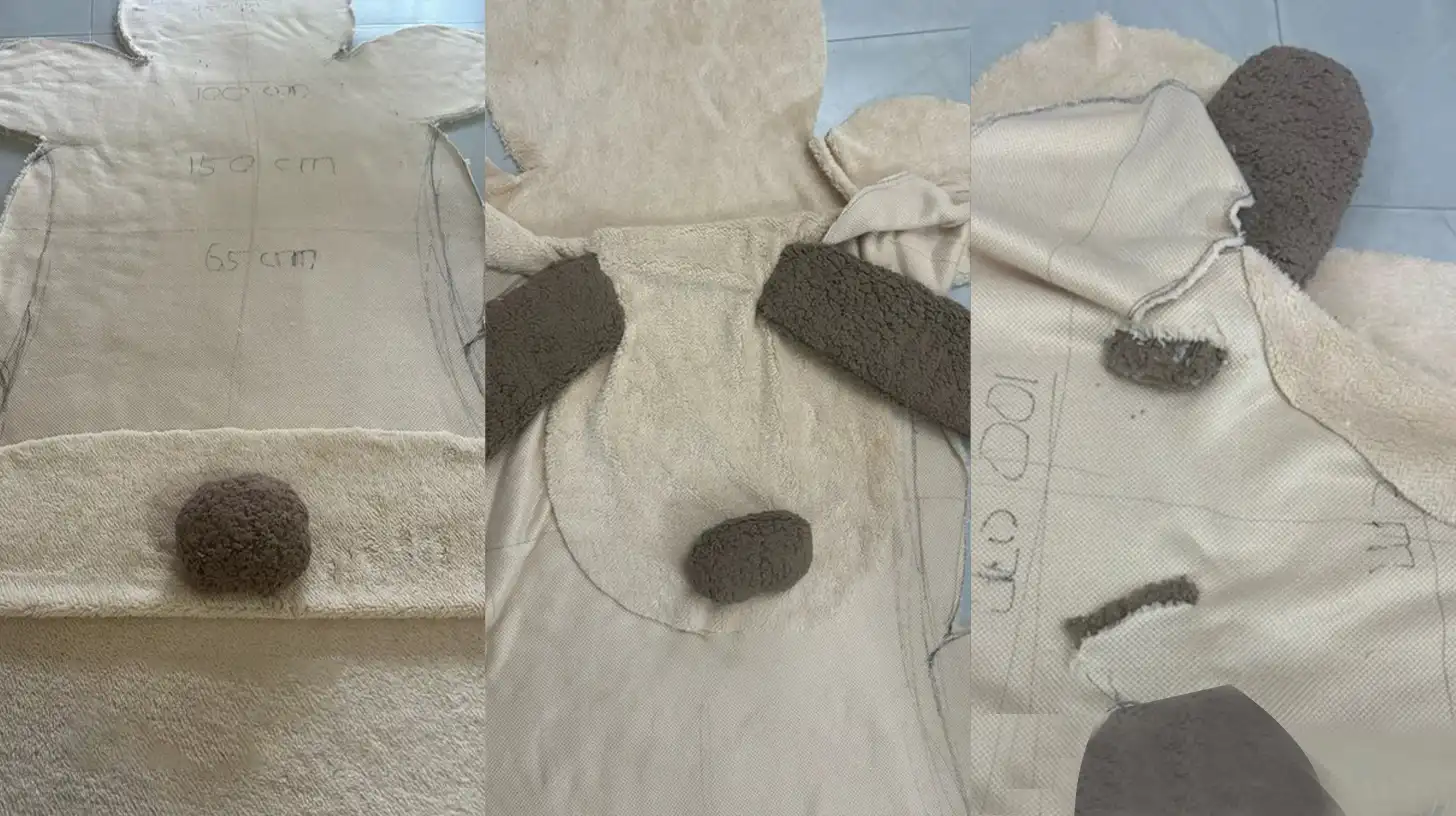
Place the two main body pieces with the right sides together and begin by sewing features, including ears, a tail, and a nose.
Next, stuff and sew the tail and nose onto the marked spots of the same body piece. For the ears, cut small holes at the marked locations. Insert the bottoms of the ears through these holes and sew them securely to the body piece. You don't have to stuff the ears, just a little if you desire.
With all features attached, sew along the edges, leaving a small gap for turning. Make sure to reinforce seams, especially where features are attached.
Step 4: Fill the Body
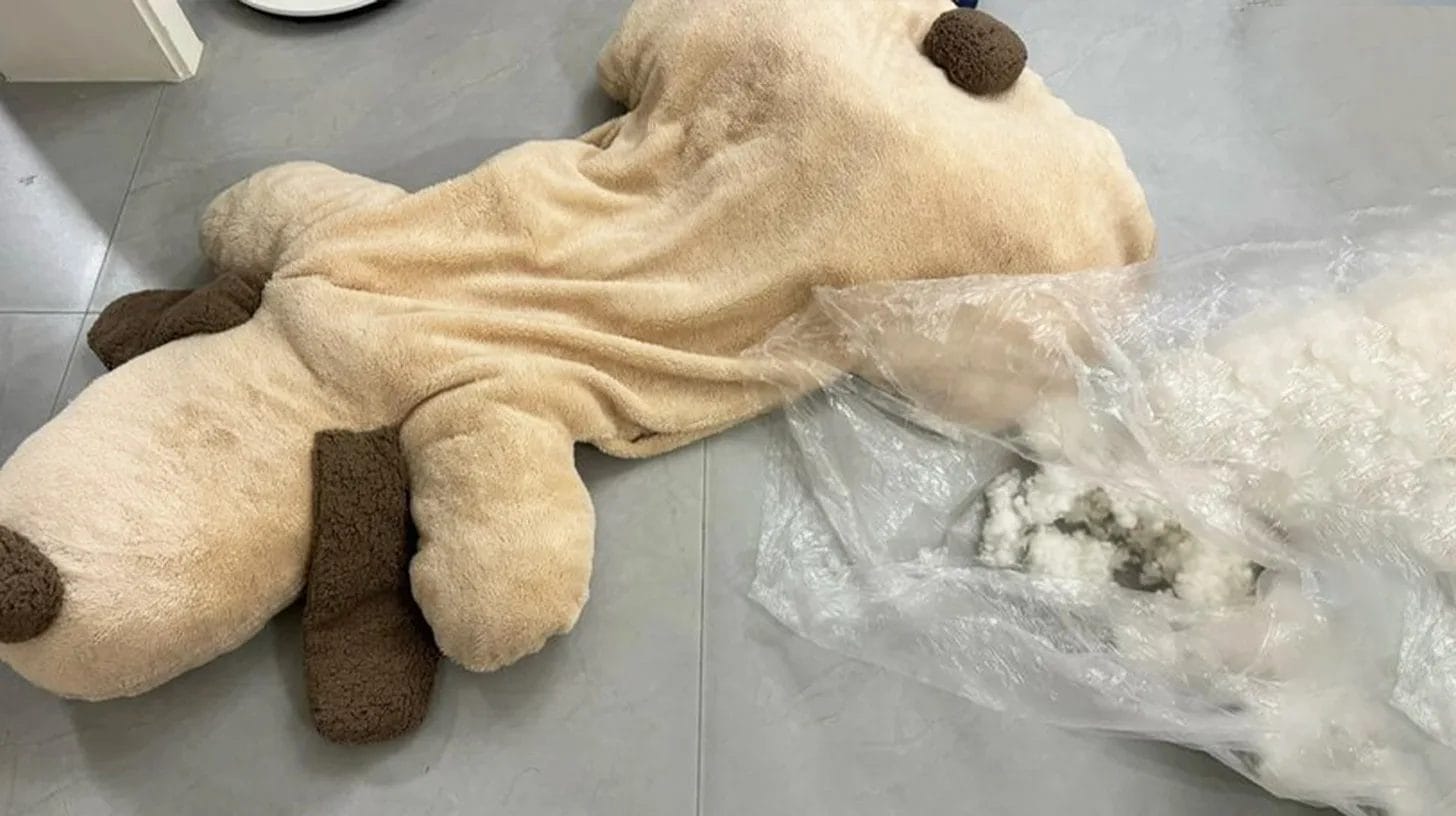
Now, turn the body piece inside out through the small opening and start filling it with a generous amount of polyester stuffing or recycled materials. Make sure the filling is evenly distributed for a balanced shape.
Once satisfied with the firmness and shape, sew the openings securely to keep the stuffing in place and maintain the pillow's plush appearance.
Step 5: Finishing Touches
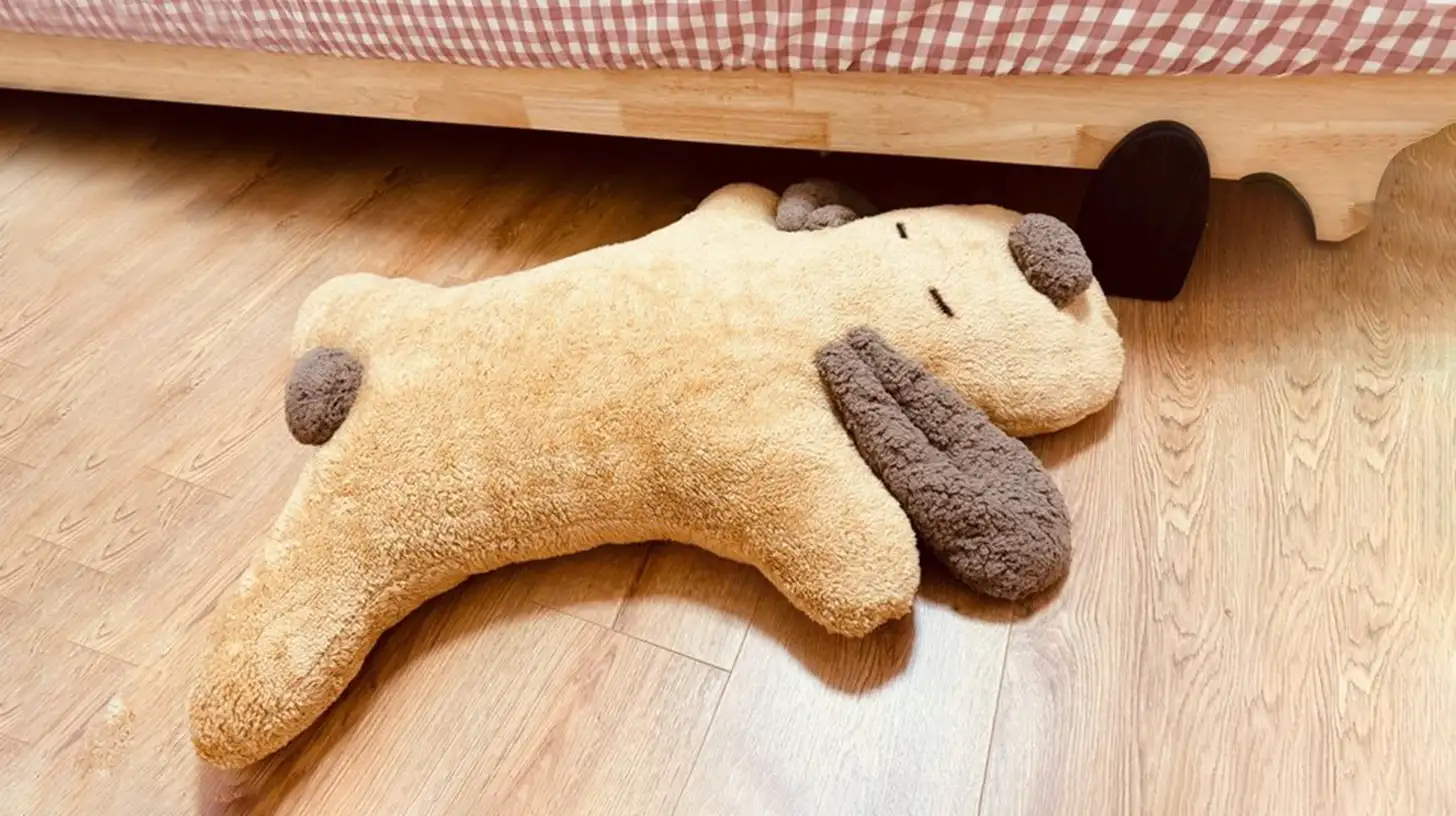
Once you have stuffed and closed the opening, you can add some extra facial details to your cute plush floor pillow.
Using embroidery floss, you can stitch on the eyes and mouth. Alternatively, you can simply draw the eyes and mouth directly onto the pillow for an easier option.
Now, your adorable dog-shaped plush pillow is ready to use!
Care and Maintenance Tips for Your Floor Pillow
Keeping your DIY dog-shaped plush pillow in top condition requires simple care and maintenance.
To maintain its shape and plushness, regularly fluff the pillow by shaking and redistributing the filling. If you encounter stains or spills, spot-clean them using a mild detergent and a damp cloth, taking care not to soak the pillow to avoid damage.
When not in use, store your pillow in a dry, cool place to prevent moisture buildup and mold growth.
Also, routinely inspect it for wear and tear, promptly repairing any seams or spots to extend its lifespan.
Conclusion
You've now crafted a unique, cozy floor pillow that everyone will love. Following these steps, you've combined creativity with functionality, creating a personalized piece for your home.
Remember, with a little care and maintenance, this plush floor cushion will remain a beloved hangout spot for your home for years. Enjoy the satisfaction of your DIY creation!
Learn more sewing projects on the Longan Craft Blog, and dive into the fabric world with Longancraft!
FAQs
Can I Use Recycled Materials for Stuffing the Cushion?
You can use recycled materials for stuffing. Gather old clothes, fabric scraps, or shredded paper. Ensure they're clean and free of any sharp objects. This eco-friendly approach reduces waste and gives your project a sustainable twist.
What Dog Breed Shapes Are Easiest for Beginners to Sew?
Since their bodies are less complex, you should start with simpler shapes, like a Dachshund or Beagle. Avoid breeds with intricate details, like Poodles or Bulldogs. Focus on smooth lines for easier sewing and assembly.
Are There Any Safety Considerations for Children Using the Cushion?
Ensure the cushion's seams are secure to prevent stuffing hazards. Use non-toxic materials and avoid small detachable parts that could pose choking risks. Regularly inspect for wear and tear to maintain safety for children using the cushion.


0 comments