

Charming DIY pear pin cushions can transform your sewing station from basic to delightful. They're not just practical holders for your pins and needles. They'll add a touch of whimsy to your crafting space.
With just a few fabric scraps and basic sewing skills, you can create these adorable accessories in under an hour. Whether you're making one for yourself or as a thoughtful gift, there's more to these fruity cushions than meets the eye.
Key Takeaways
- Make Fabric Rectangles: Gather fabric scraps and sew or patch them together to create four identical rectangular fabric blocks.
- Cut Pear Shapes: Use a pear-shaped template to trace and cut out four identical pear shapes from the rectangular fabric pieces.
- Sew and Stuff the Pear Body: Pin two pear pieces together with right sides facing, sew along the edges, turn them right side out, and stuff with fiberfill.
- Add Stem and Leaf: Create the stem from a long strip of fabric, and cut and stuff two leaf shapes. Attach both securely to the top of the pear pin cushion.
What Materials Are Needed?
Every crafter needs just a handful of basic supplies to bring these adorable pear pin cushions to life!
- Fabric scraps for the pear body, leaf, and stem;
- Thread in matching or contrasting colors;
- Needle for hand sewing;
- Stuffing material such as polyester fiberfill, cotton batting, or fabric scraps;
- Scissors for precise cuts;
- Sewing pins to hold fabric pieces in place;
- Paper template for pear, leaf, and stem shapes;
- Marker or chalk to trace templates onto fabric;
- Decorative buttons and other embellishments for added details.
DIY Pear Pin Cushions: Easy and Fun Instructions
Ready to try your hand at sewing something fun? Let’s make these delightful pear pin cushions step by step.
Step 1: Make 4 Rectangular Pieces with Fabric Scraps
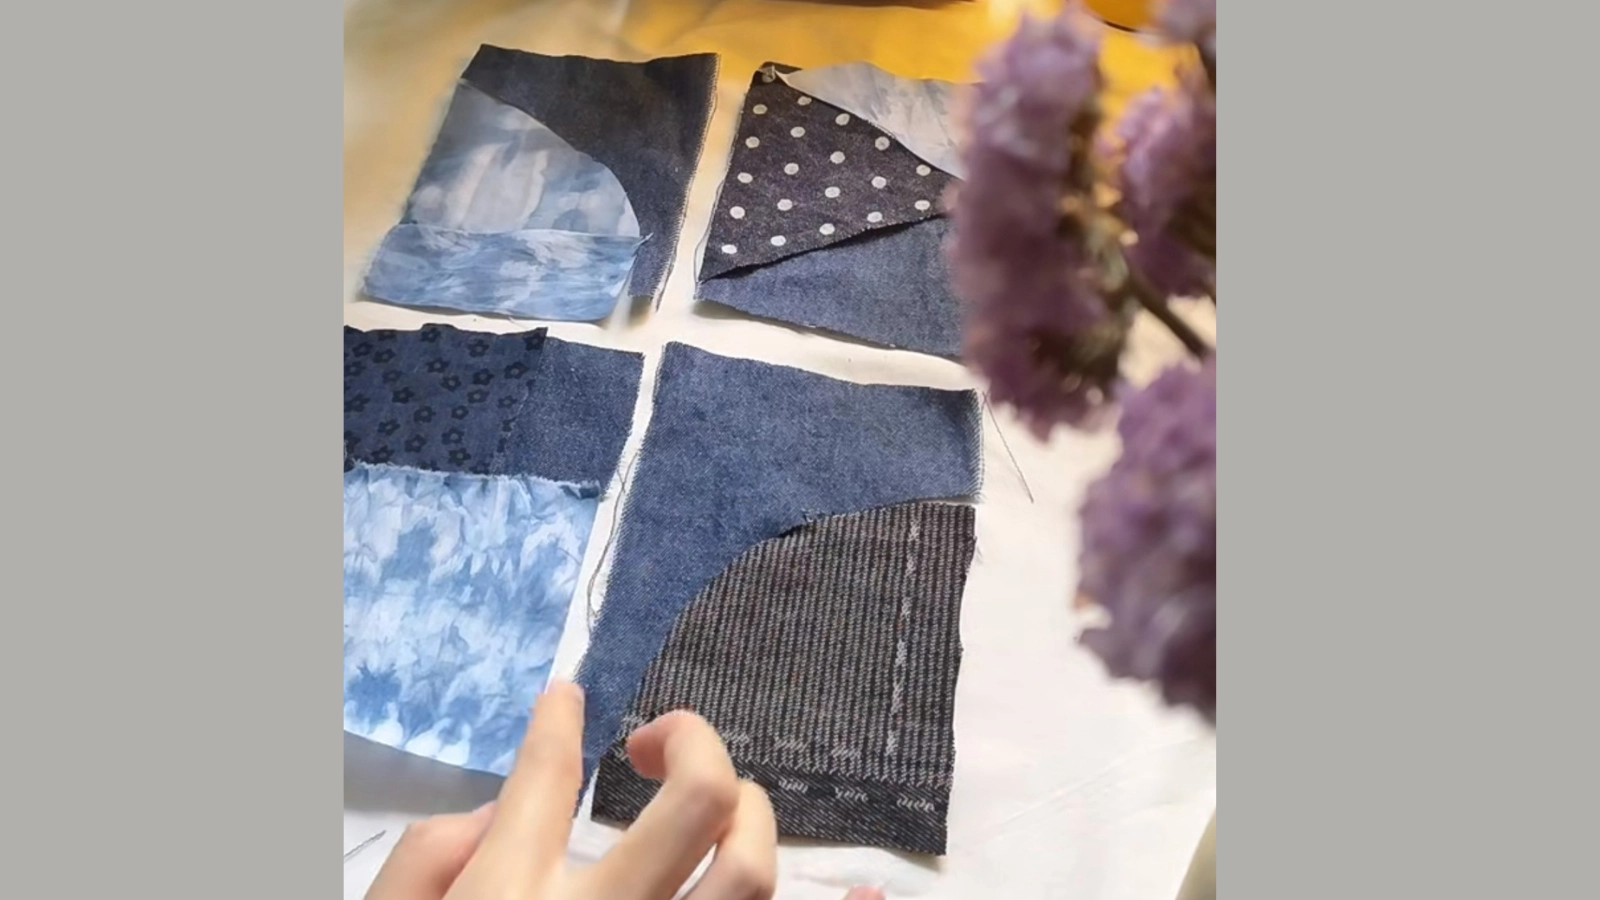
Gather fabric scraps in various colors and patterns to start creating your pear pincushions. Select pieces that complement each other, then sew or patch them together to form rectangular fabric blocks of equal size.
Ensure the edges are neatly aligned and secure the seams tightly to prevent fraying. Repeat this process until four identical rectangular pieces are ready for the next steps.
Step 2: Cut Out 4 Pear Body Pieces
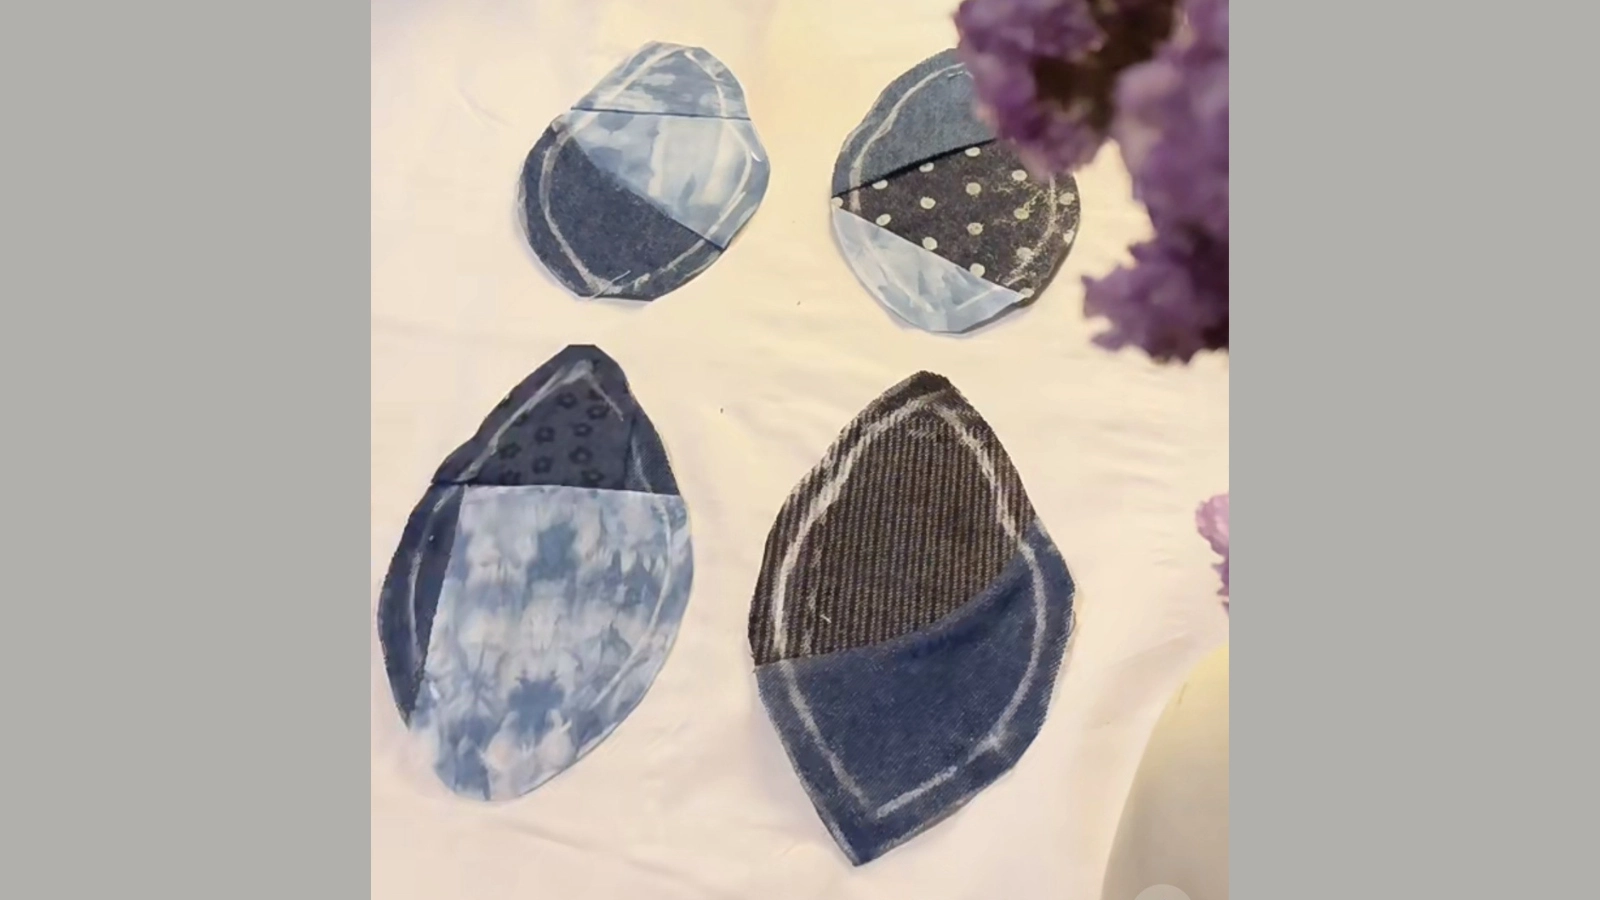
Next, use a pear-shaped template to cut identical pear shapes from each of the four rectangular fabric pieces.
Lay the template on top of each fabric piece and trace its outline, including the seam allowance. Then, carefully cut along the traced lines.
Ensure all four pear-shaped fabric pieces are uniform in size and shape to guarantee a seamless assembly when sewn together later.
Step 3: Sew and Stuff the Pear Body
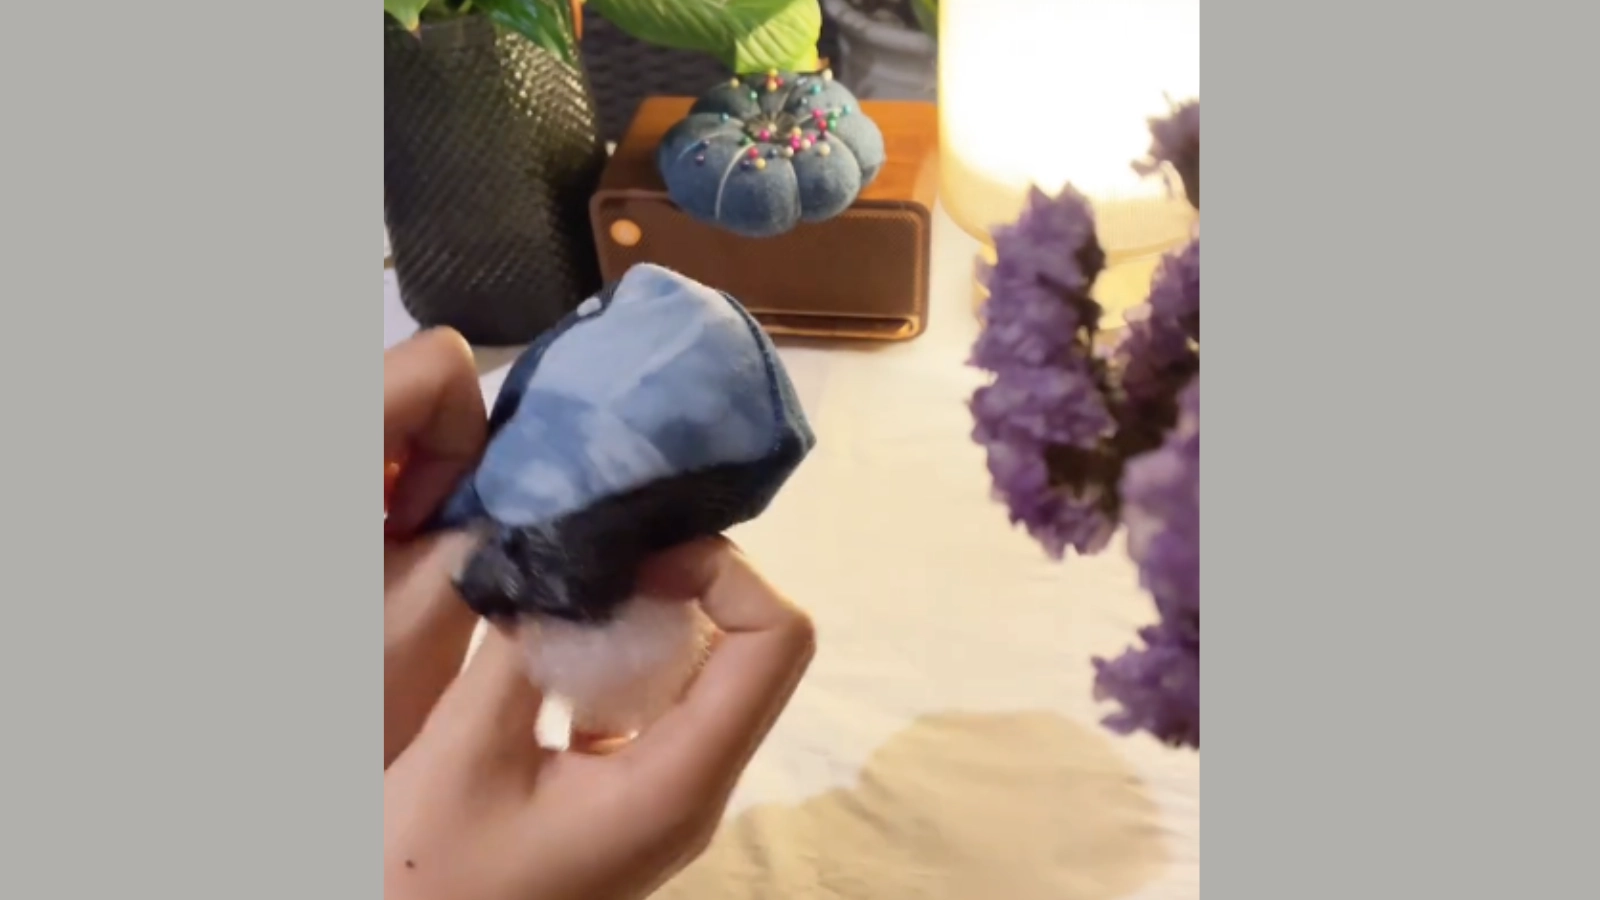
Now that your four pear body pieces are neatly cut, let's bring them together to create your adorable pin cushion!
Start by pinning two fabric pieces together with right sides facing each other. Sew along the edges, leaving a small opening for turning at the top.
Repeat with the remaining pieces. Trim the excess fabric and press the seams flat for a crisp look.
Turn your pear right side out through the opening and start stuffing with polyester fiberfill. For extra stability, first add some crushed walnut shells at the bottom.
Keep stuffing until you reach your desired firmness.
Step 4: Add the Stem and Leaf
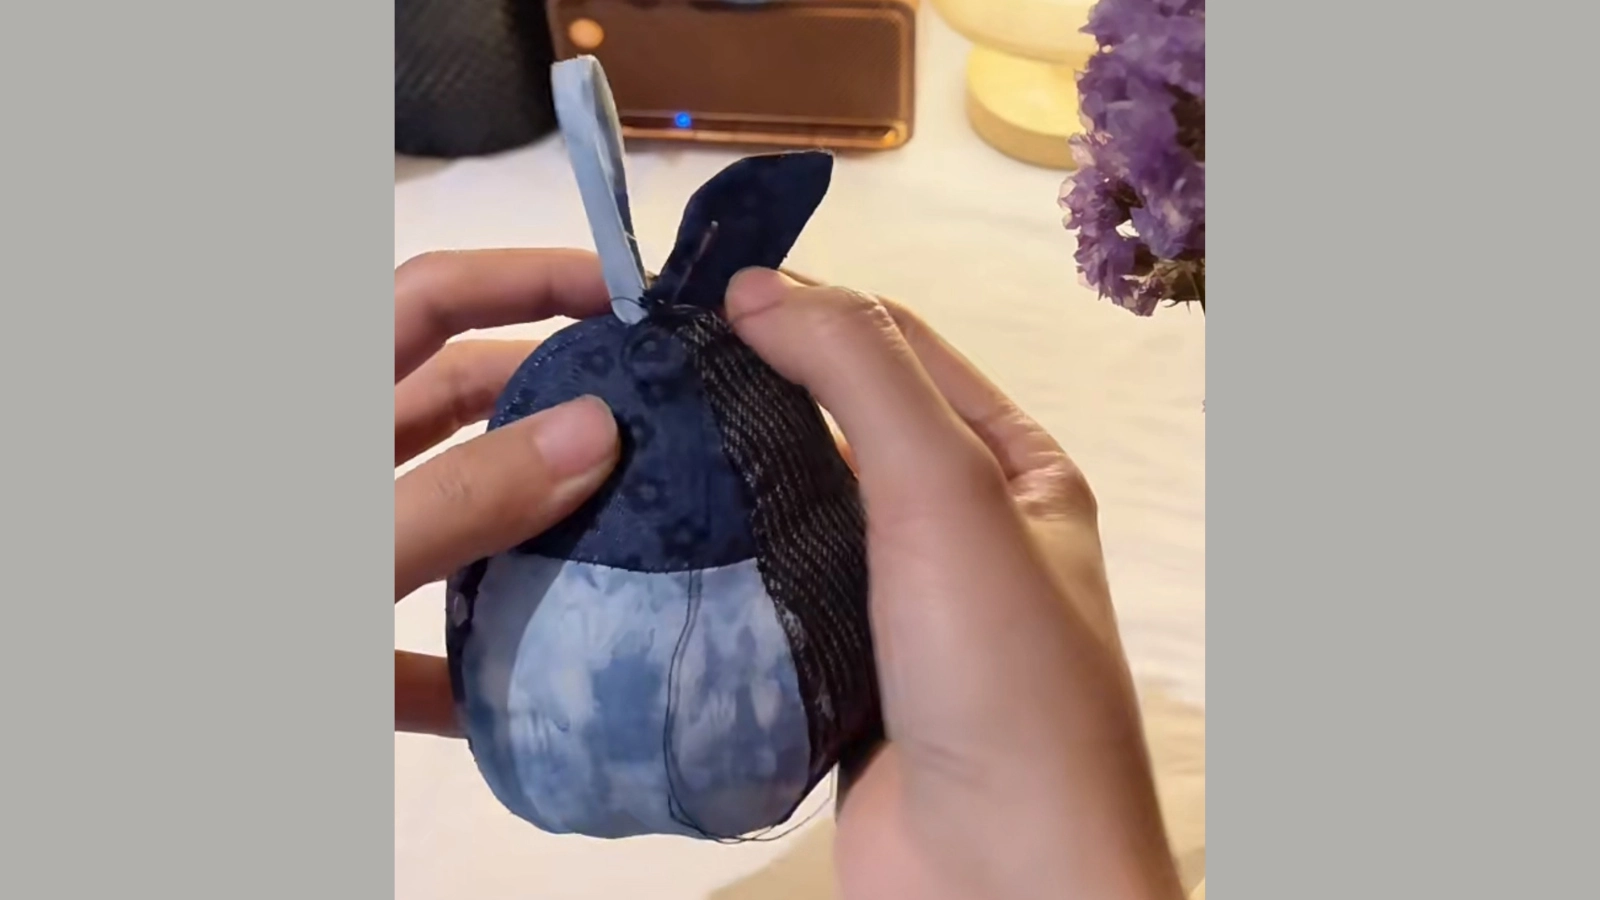
Ready to give your pear pin cushion its crowning touch?
Cut a long strip of fabric for the stem, roll or fold it tightly, then sew along the edge to keep it in shape.
Next, cut two matching leaf shapes from fabric. Stitch them together, leaving a small opening. Turn the leaf right side out and add a touch of stuffing. Don't forget to sew the opening closed.
Attach the stem and leaf securely to the top opening of the pear pincushion with stitches.
Double-check that both the stem and leaf are firmly attached to guarantee your pin cushion stays beautiful.
Conclusion
You'll love displaying these charming DIY pear pin cushions in your craft room! They're not just practical but also add a sweet touch to your sewing space. Don't forget to make extras! They make perfect handmade gifts for your crafty friends. You can also use this tutorial to make DIY apple pin cushions.
Whether you've chosen vintage prints or modern patterns, each fruity pin cushion you've created is uniquely yours. Now you're ready to start your next sewing project with style!
Learn more sewing projects on the Longan Craft Blog, and dive into the fabric world with Longan Craft!
FAQs
What Is the Best Filling for Pin Cushions?
Use crushed walnut shells, which keep pins sharp, and top them with polyester fiberfill for softness. Don't forget you can also use emery for extra pin-sharpening power!
What Is the Best Fabric for a Pin Cushion?
Cotton and felt are your best fabric choices for pin cushions! They're durable, easy to work with, and won't fray easily. Cotton's breathability and felt's thickness make them perfect for holding pins securely.
What Is in the Middle of a Pin Cushion?
Fill your pin cushion with polyester fiberfill for shape, and you can add crushed walnut shells or emery for weight. Don't forget that these fillings help keep your pins sharp and secure!
How to Make a Pincushion by Hand?
Cut your fabric pieces, pin them right sides together, and sew around the edges. Leave a small opening, turn it right side out, stuff it with fiberfill, and whipstitch the opening closed. You're done!
0 comments