

Using felt to create your own Polaroid photo frame is a fun and creative way to display your favorite memories. Not only does it add a personal touch to your photos, but it's also an easy and affordable project that anyone can do.
In this guide, we'll walk you through the steps to make a charming felt photo frame that perfectly fits your Polaroid pictures. Whether you're looking to decorate your room or create a unique gift, this DIY project is sure to impress. So, gather your materials and start making a beautiful felt photo frame!
Key Takeaways
- Create a unique DIY Polaroid photo frame using felt sheets and a sturdy string or ribbon to hang it.
- Cut out two identical pieces of felt to the desired size according to your photo. Then, punch holes for hanging and cut the frame window.
- Customize the frame by decorating it with personalized hashtags, dates, or names using hot glue and embellishments.
- Glue the felt pieces together, starting with one edge and pressing firmly until the glue sets, to ensure a seamless border.
Gather the Necessary Materials
To get started on your DIY Polaroid photo frame, gather the necessary materials:
- Felt Sheets: Choose colors that you like for the frame and background.
- Polaroid Photo: The photo you want to frame.
- Scissors: For cutting the felt.
- Ruler: To measure and cut precise pieces.
- Pencil or Fabric Chalk: For marking measurements on the felt.
- Hot Glue Gun and Glue Sticks: To assemble the felt pieces.
- Needle and Thread (optional): For added detail or if you prefer sewing.
- Decorative Items (optional): Buttons, beads, ribbons, etc., for embellishing the frame.
With these materials, you'll be ready to create a one-of-a-kind DIY Polaroid photo frame that adds a personal touch to any room.
How to DIY Polaroid Photo Frame: A Step-by-Step Tutorial
Now it's time to bring your DIY Polaroid photo frame to life!
You'll start by preparing two felt pieces, punching them for hanging and cutting out the frame window.
From there, you'll decorate the frame and glue the felt pieces together, and you'll be on your way to creating a unique and personalized photo display.
Step 1: Prepare Two Felt pieces
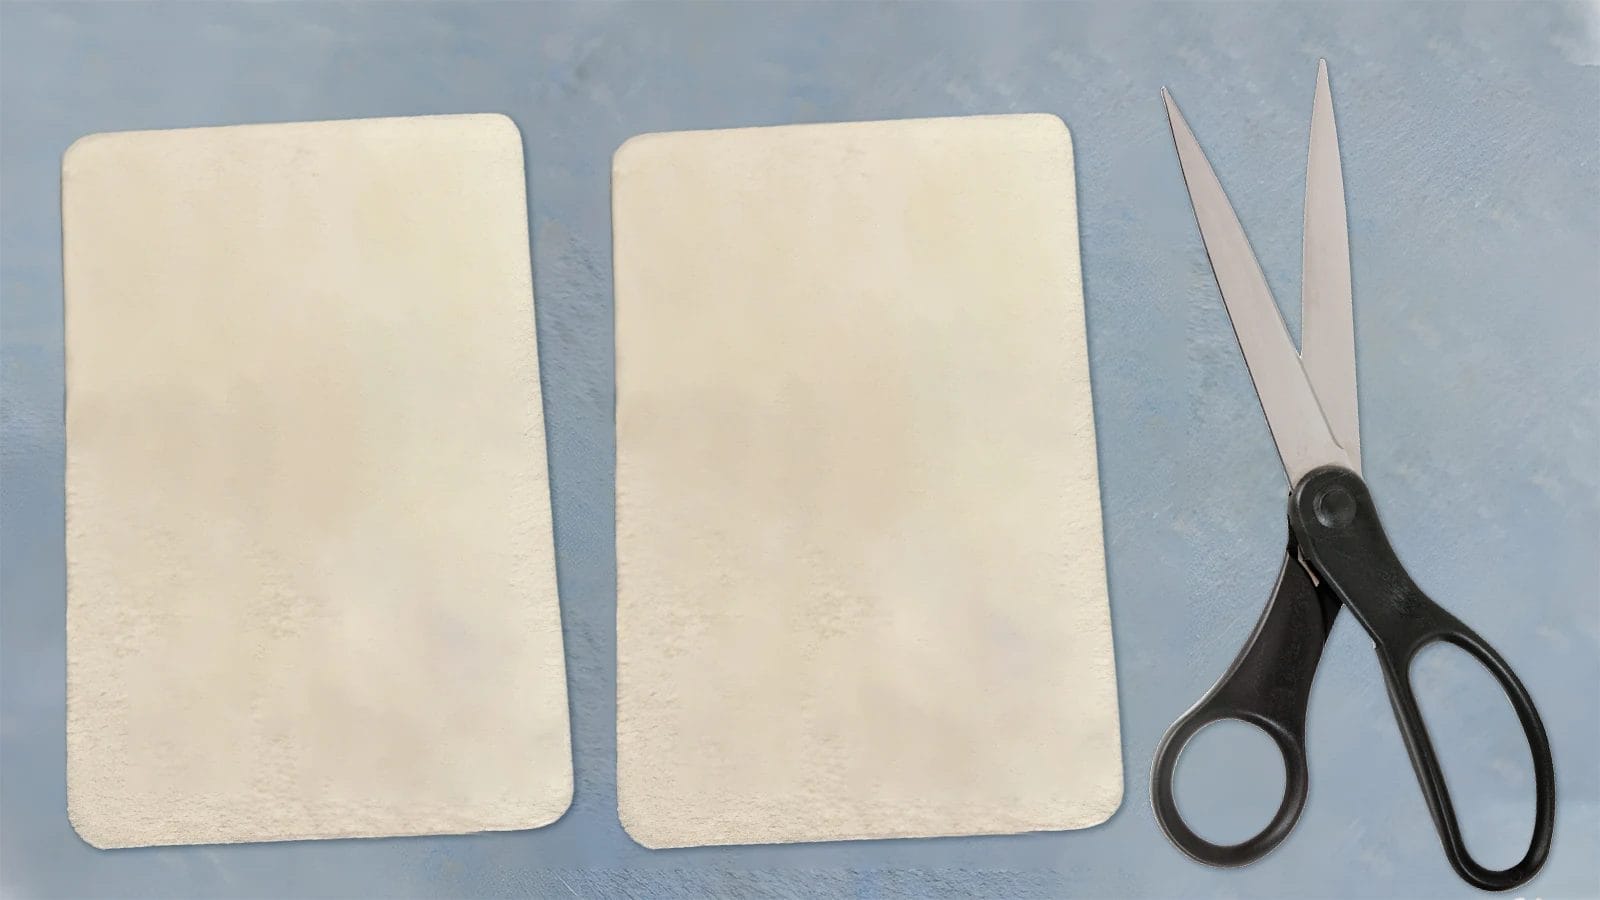
Start by cutting two identical pieces of felt to the desired size for your Polaroid frame. Make sure they're symmetrical to create a visually appealing design. Use sharp scissors or a rotary cutter to achieve clean, precise cuts.
Consider using contrasting colors for the felt pieces to add an extra pop of visual interest. Felt is an excellent material to work with, providing a soft texture for your frame.
Take your time and carefully cut out the felt pieces, ensuring they're identical in size and shape. This will lay the foundation for a beautiful and unique DIY Polaroid photo frame.
Step 2: Punch the Felt Pieces for Hanging
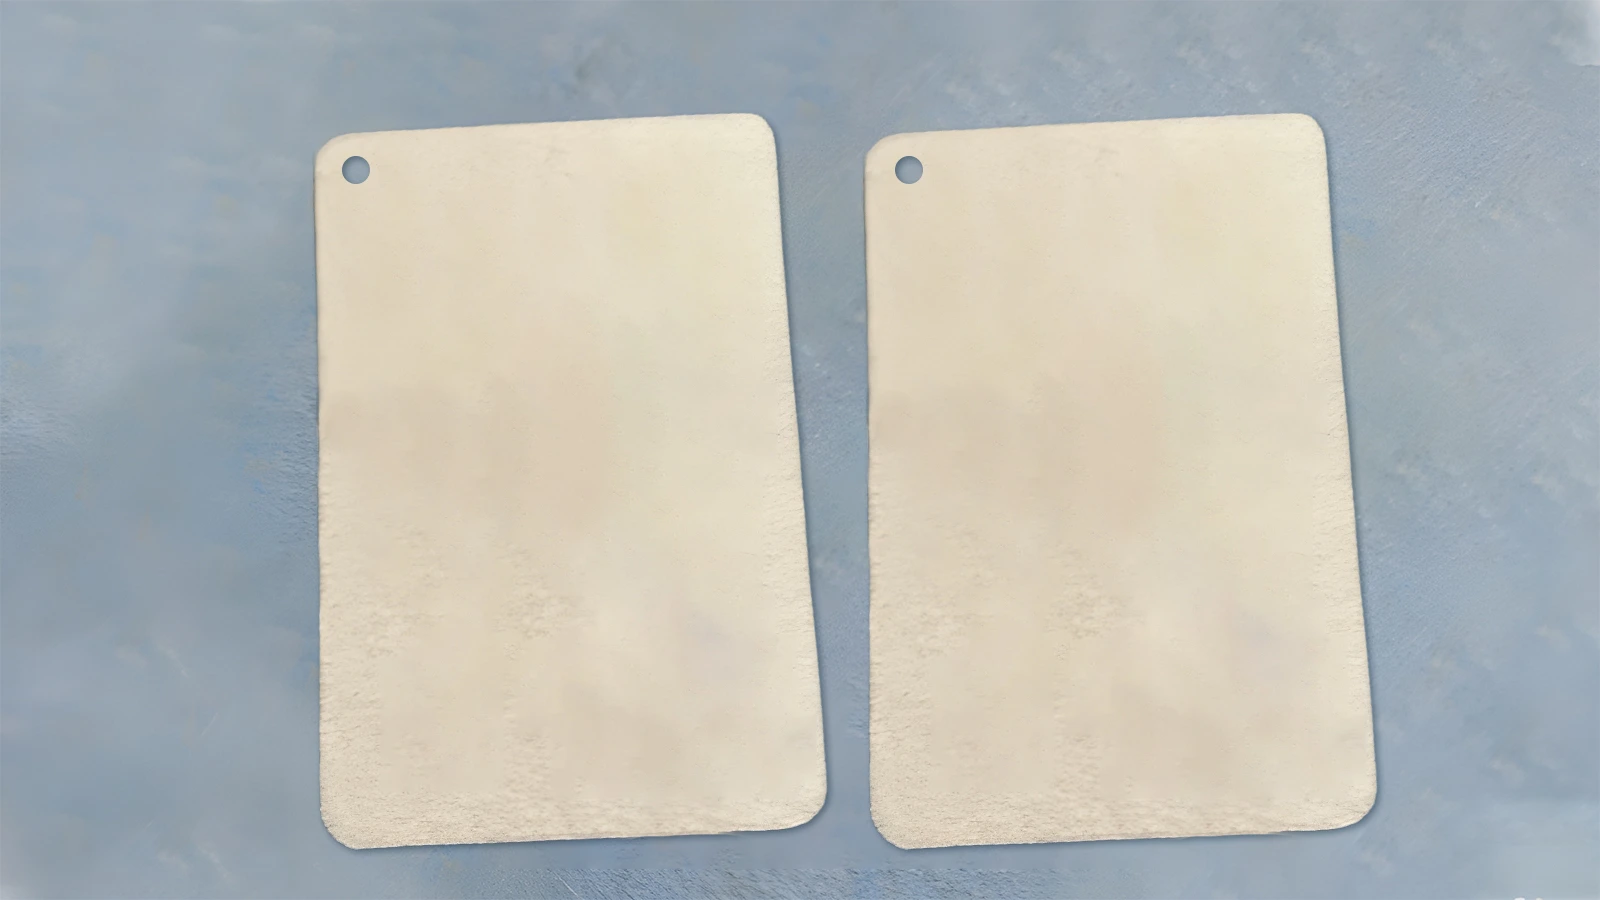
Use a hole punch to create holes that are large enough to accommodate the string or wire for hanging. Consider the weight of the frame and adjust the size and number of holes accordingly. Typically, one hole is enough. Properly punched felt pieces will provide a secure and stable hanging solution for your Polaroid frame.
Step 3: Cut the Frame Window
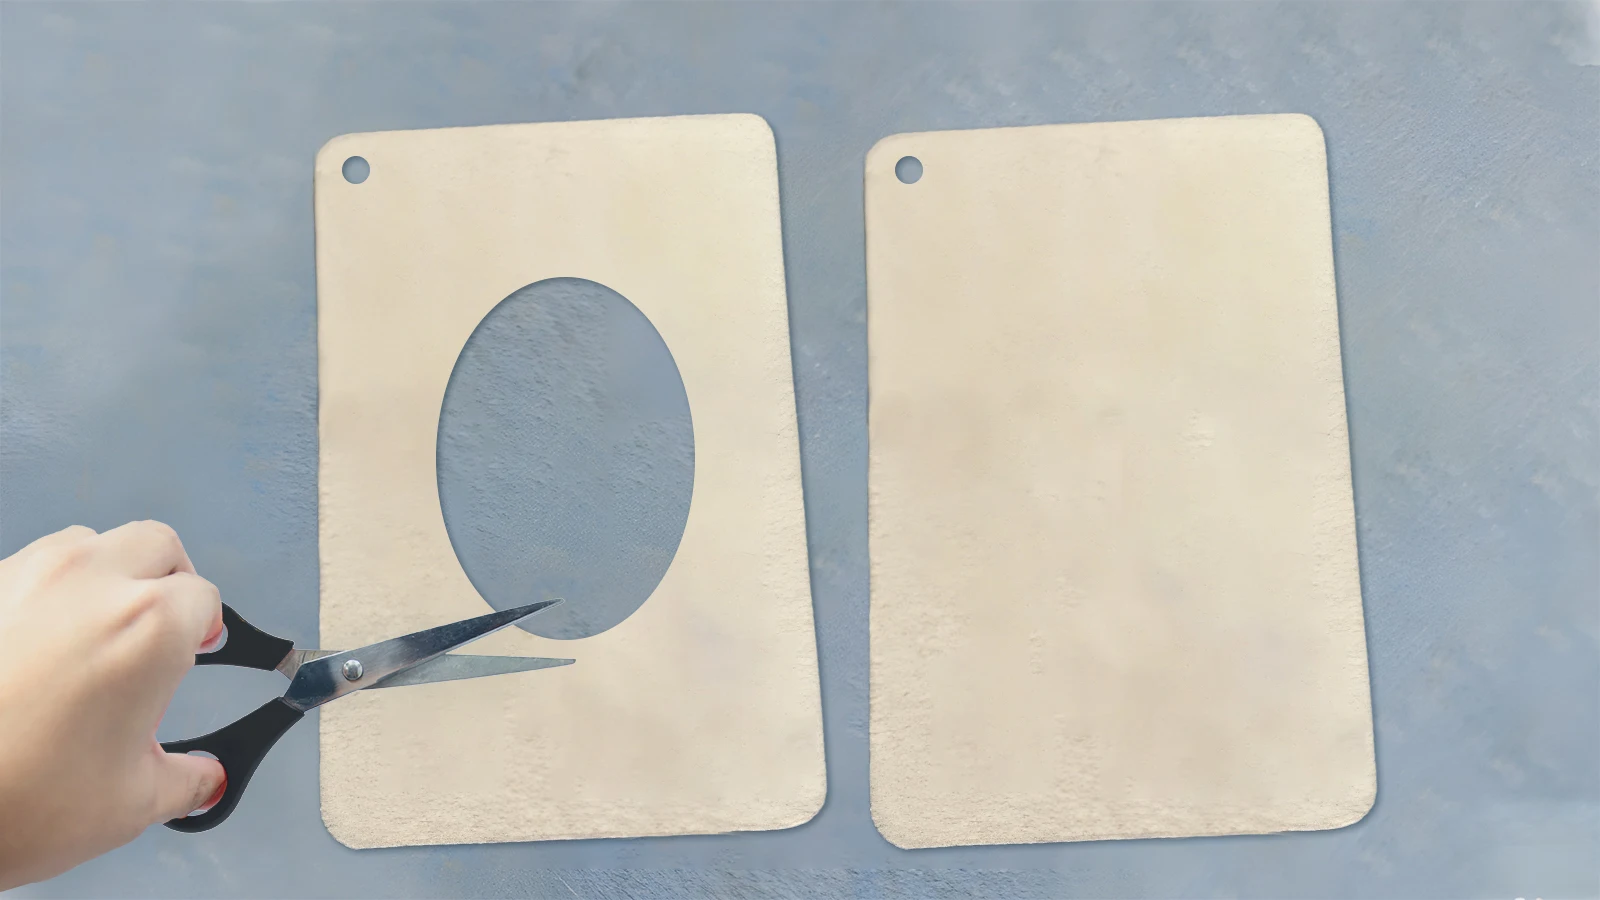
To create the frame window, carefully cut out the center of the felt piece using a craft knife or scissors. Maintain precise dimensions for a balanced look. The frame window can be any shape according to your preferences.
Precision is key when cutting the frame window, so take your time to create a clean and straight cut along the edges. Use a ruler to guide your craft knife or scissors, and don't rush the process.
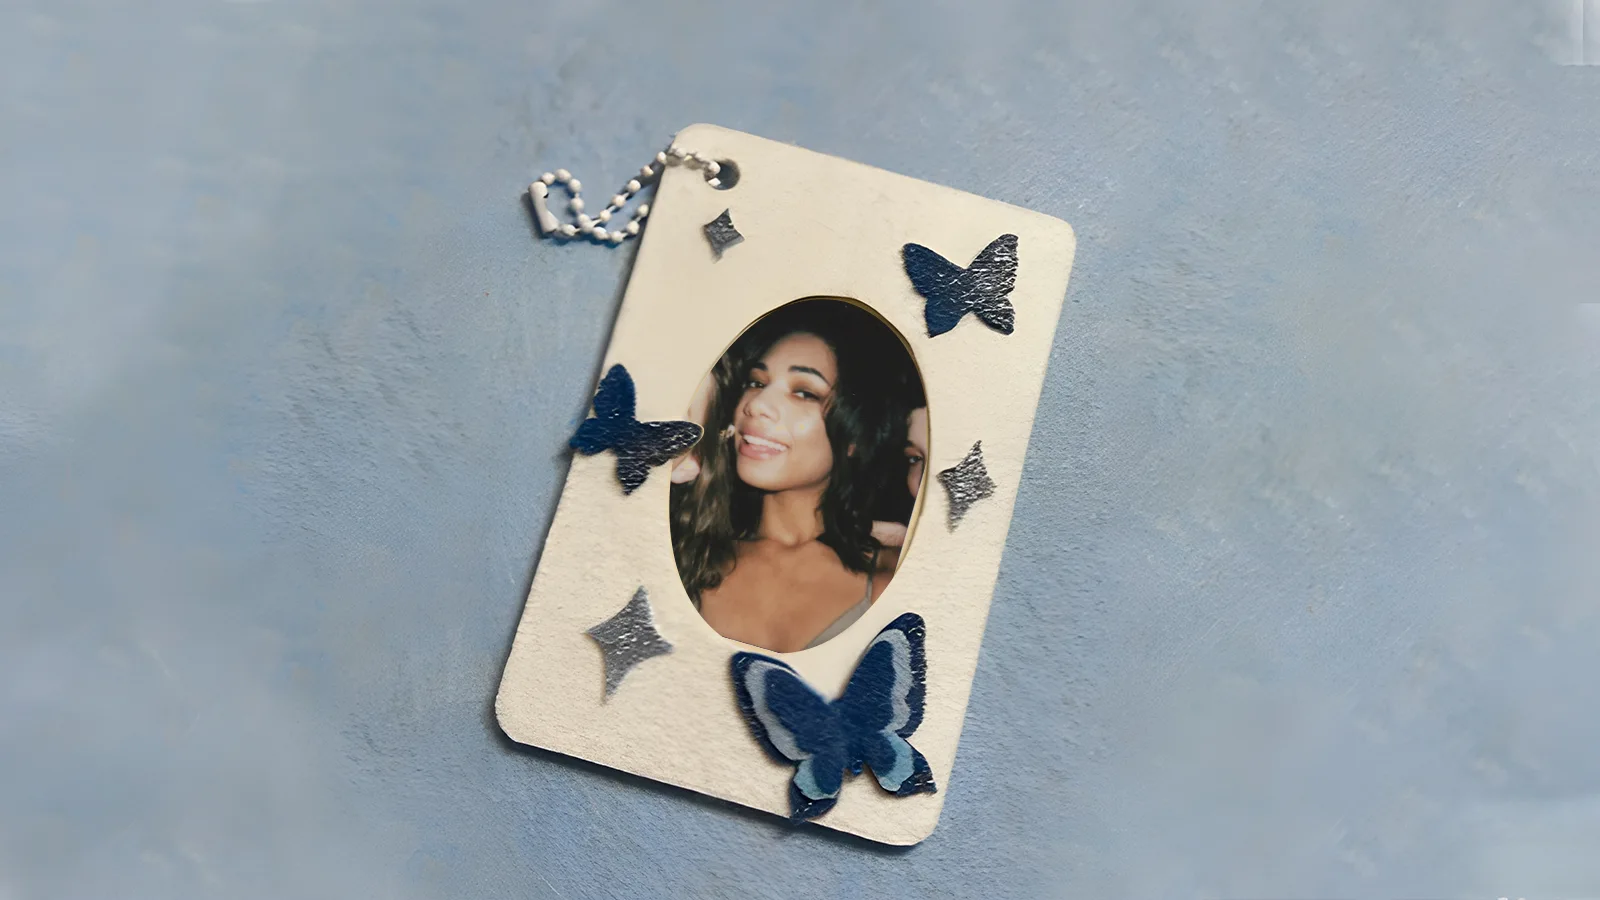
Step 4: Decorate the Frame
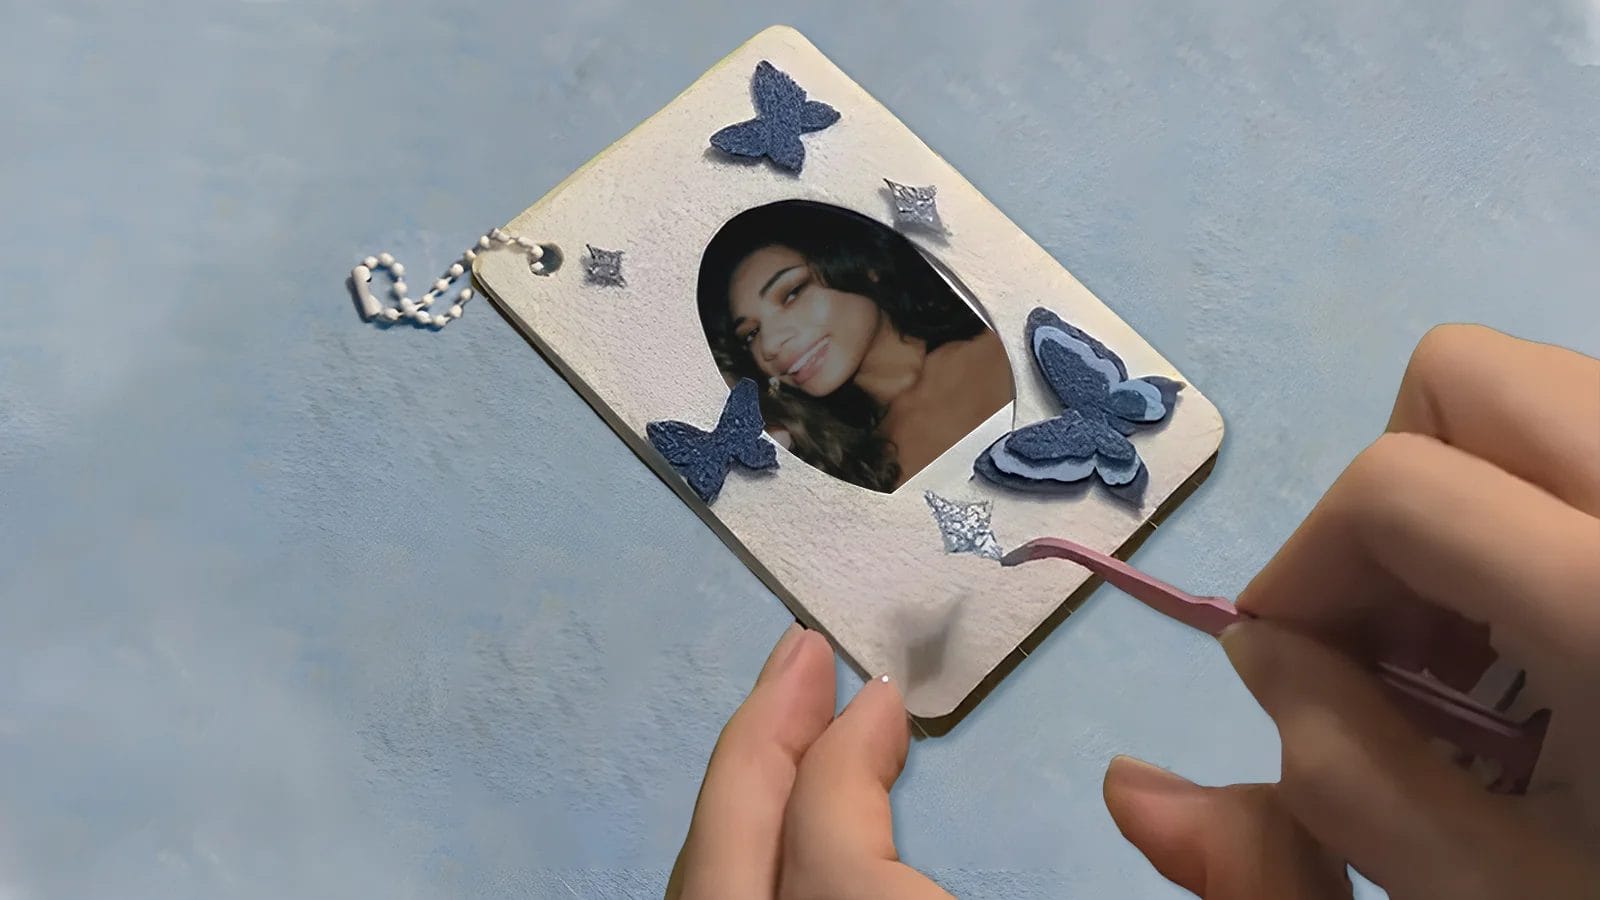
Now that you have accurately cut out the frame window, it's time to personalize your DIY Polaroid photo frame by embellishing it with creative decorations.
Using markers or paint pens, you can personalize your frame by adding a hashtag, date, or name. Customize it with wallpaper cutouts or other creative embellishments to add a stylish touch. Use hot glue to secure decorative elements like faux flowers onto the frame. Incorporate different textures and colors in the decorations to ensure the frame is visually appealing and unique.
Step 5: Glue the Felt Pieces Together
Assemble the frame's border by attaching the felt pieces together, starting with one edge. Using a glue gun, apply a thin line of hot glue along the edge of one felt piece.
Then, press the second felt piece onto the glued edge, aligning them carefully. Hold the pieces together firmly until the glue sets, ensuring a secure bond.
Repeat this process for three sides, leaving one top edge for sliding the Polaroid photo.
Step 6: Add the Photo and String for Hanging
Now it's time to add the finishing touches to your DIY photo frame. Insert your favorite Polaroid photo into the frame through the open side.
Next, use a sturdy string or ribbon for hanging. This will allow you to easily hang your photo frame on a wall or fridge, showcasing your favorite memory. You can even hang it in your bag as a unique accessory.
With these final steps, you'll have a unique and customizable DIY photo frame that adds a personal touch to any space.
Conclusion
You've created a one-of-a-kind DIY Polaroid photo frame that showcases your favorite memories in style.
With its customizable design and colorful embellishments, this frame is sure to be a conversation starter.
Hang it proudly, and relive the joy of your cherished moments every day.
Your creativity and personal touch have resulted in a truly unique piece that celebrates your individuality.
Learn more DIY projects from the Longan Craft Blog, and dive into the fabric world with Longancraft!
FAQs
How to Make a DIY Polaroid Frame?
Start by choosing a material, like magnetic sheets or plywood, and decide on a design, then use a Cricut machine or craft knife to cut out the frame's shape.
How Can I Turn My Photos Into Polaroids?
You can turn your photos into Polaroids using online tools like Canva, Picmonkey or apps like Polamatic or InstaLab. You can also opt for a Polaroid printer or photo editing software like Adobe Photoshop to achieve the desired effect.
How to Make a Polaroid Photo Wall?
Remove the back cardboard and glass from the frames, arrange the photos in columns and rows, and hang them with string and mini clips for a unique display.
Can You Frame Polaroid Pictures?
You can definitely frame your Polaroid pictures, and you've got options: magnetic frames, DIY frames, or custom frames that match your style or event theme.
0 comments