

Creating a braided rug using towels is a rewarding project that adds a personal touch to your home. You'll start by cutting old towels into strips and then sorting them by color for a cohesive look. The key is maintaining even tension while braiding the strips tightly. After braiding, you'll coil the strips into your desired shape and secure them with tapestry needles and thread. Proper stitching ensures the rug stays stable and durable.
Are you interested in learning how to keep your creation in top shape and add those final touches? Let's explore the next steps.
Key Takeaways
- Cut long strips of fabric, each 2-3 inches wide, to create the braid.
- Sort the strips by color to achieve a cohesive and intentional design.
- Braid the strips tightly using a three-strand braid technique.
- Coil the braided strips into the desired rug shape, keeping them flat and even.
- Stitch the coils together securely with a needle and thread to prevent unraveling.
Prepare Materials and Tools
To make a braided rug, you'll need a few essential materials to get started.
- Old towels: Choose towels that you no longer need or use. Different colors and patterns can add a unique look to your rug.
- Scissors: For cutting the towels into strips.
- Needle and thread: For sewing the ends of the strips together.
- Pins: To hold the braids in place as you work.
- Non-slip rug pad (optional): To prevent the rug from slipping on hard floors.
With these materials ready, you'll begin crafting a beautiful, homemade braided rug that adds a cozy touch to any room.
A Tutorial for How to Make a Braided Rug Using Old Towels
To start making your braided towel rug, cut your towels into long strips, sorting them by color if you plan to create a pattern.
Braid the strips tightly and then begin coiling them into your desired shape.
Step 1: Cut the towels into long strips
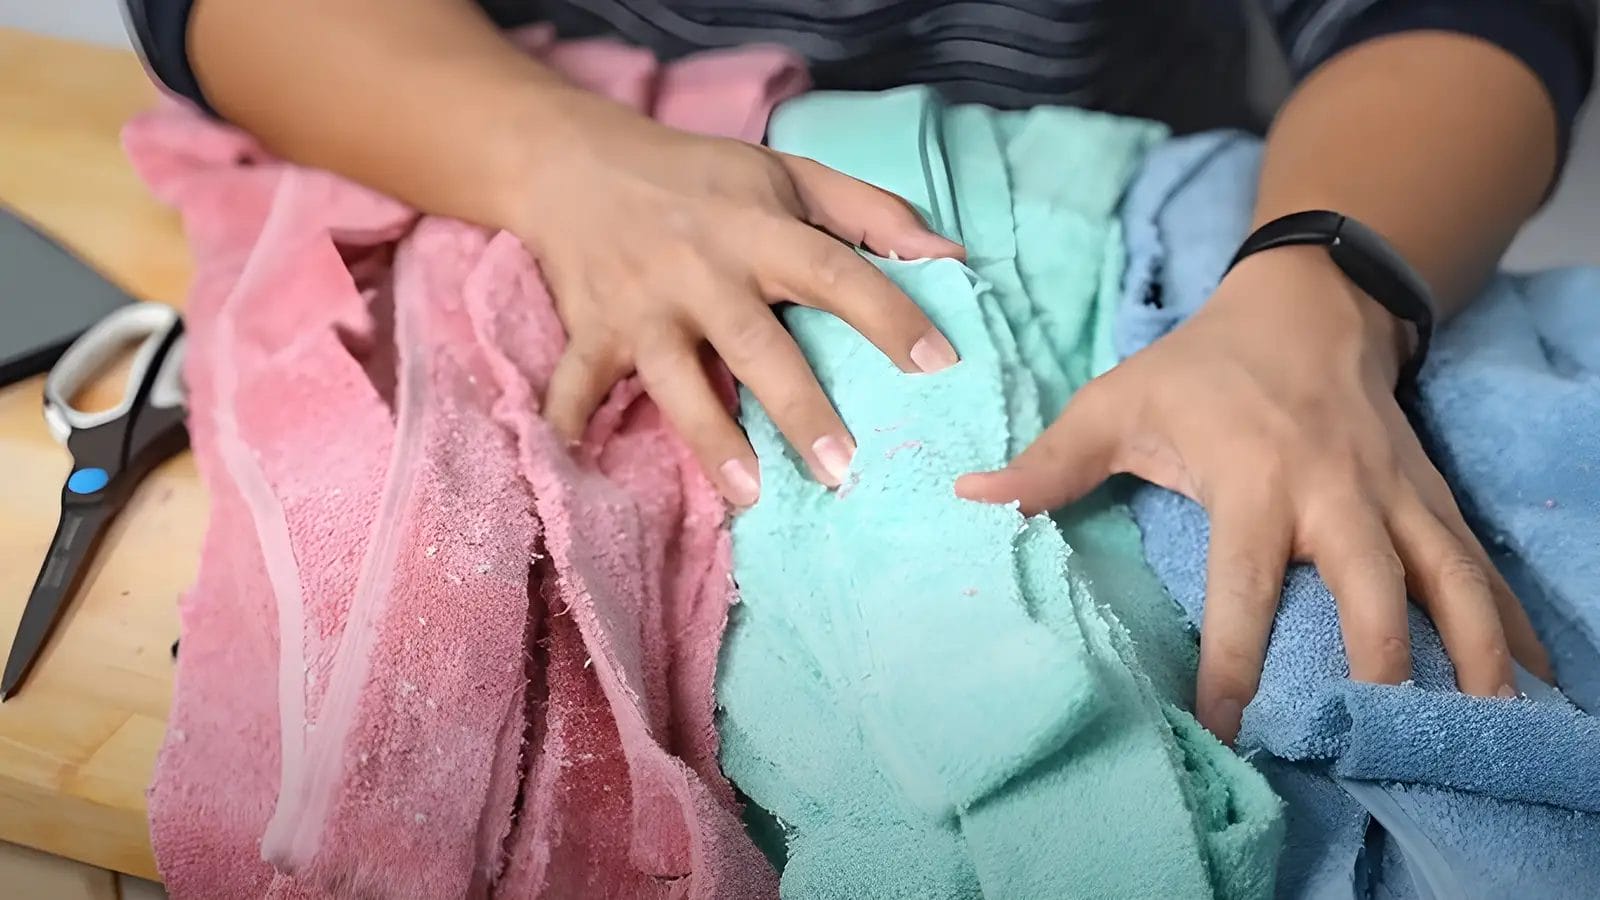
Begin by cutting old towels into 2-3 inch wide strips using fabric scissors or a rotary cutter for precise edges. Make sure the strips are long enough to ensure a continuous braid.
If you want a chunkier braid, opt for thicker strips; go with thinner strips for a more intricate design.
Using towels of different colors can add a unique and colorful touch to your braided rug. With all your strips cut and ready, you're ready to move on to the next step in your rug-making journey.
Step 2: Sort the strips by color
Frequently, sorting the fabric strips by color early on ensures your braided rug will have an organized and visually pleasing pattern. By choosing a color scheme beforehand, you can create a beautiful and cohesive patterned design.
Step 3: Braid the strips tightly
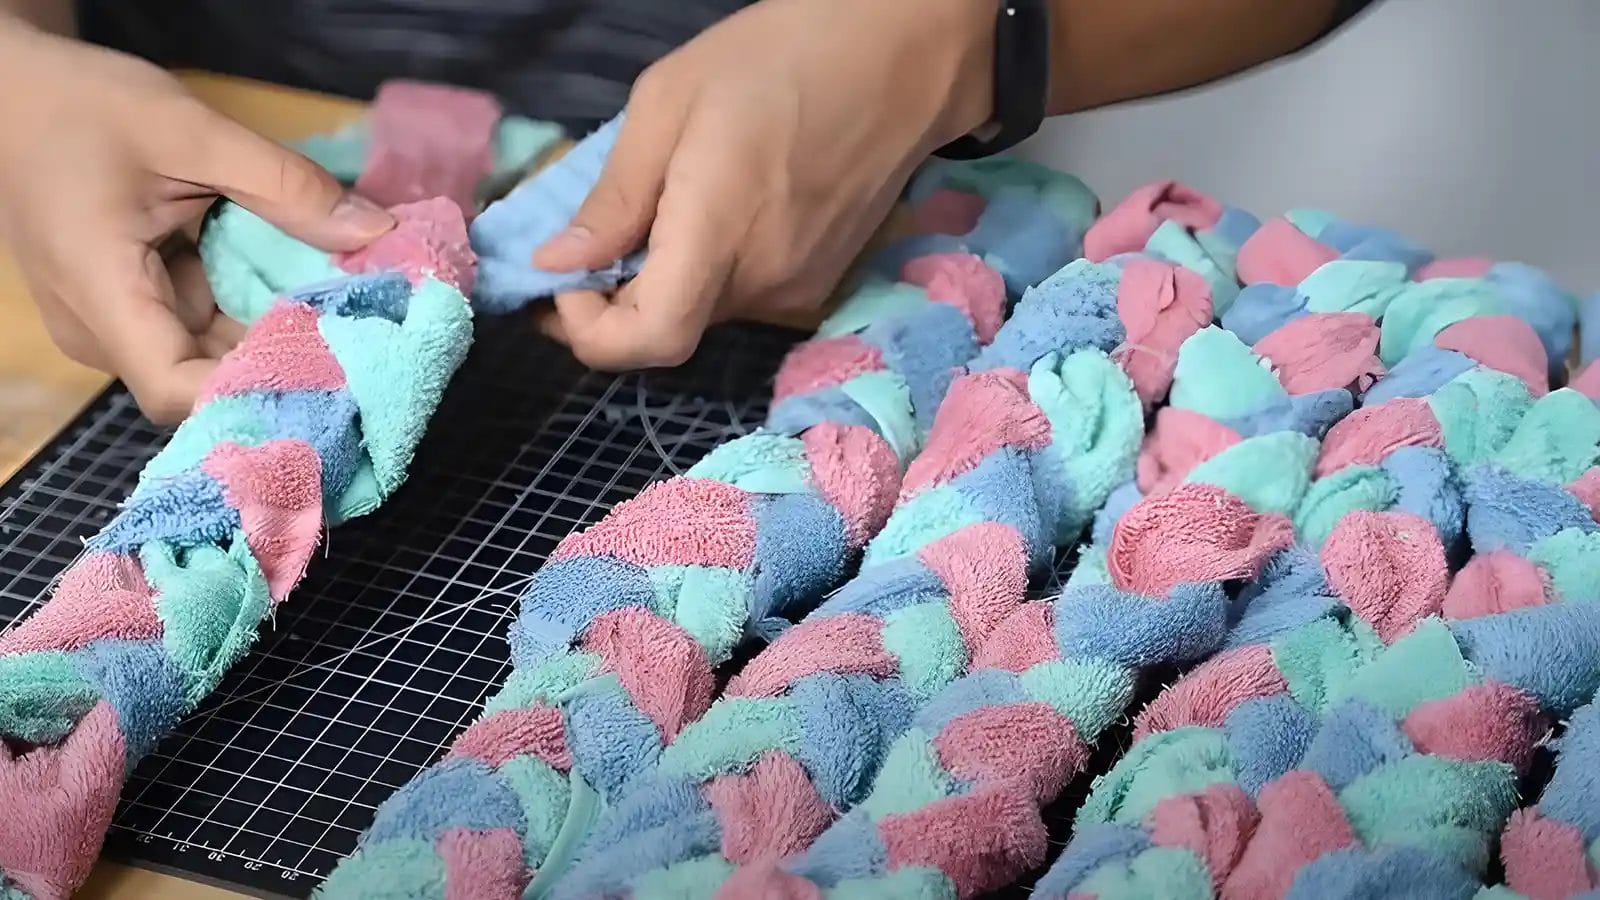
Braid the fabric strips tightly so your braided rug stays sturdy and durable. Begin by taking three strips and securing them together with a stitch or knot.
Use the technique of braiding three strands, keeping the tension tight and even throughout.
As you work, frequently check your braid to ensure it's consistent and uniform. If the braid loosens, your rug might lose its shape over time.
Secure the ends of the braids with additional stitches or knots to prevent unraveling.
Step 4: Coil the braided strips into a circular or oval shape
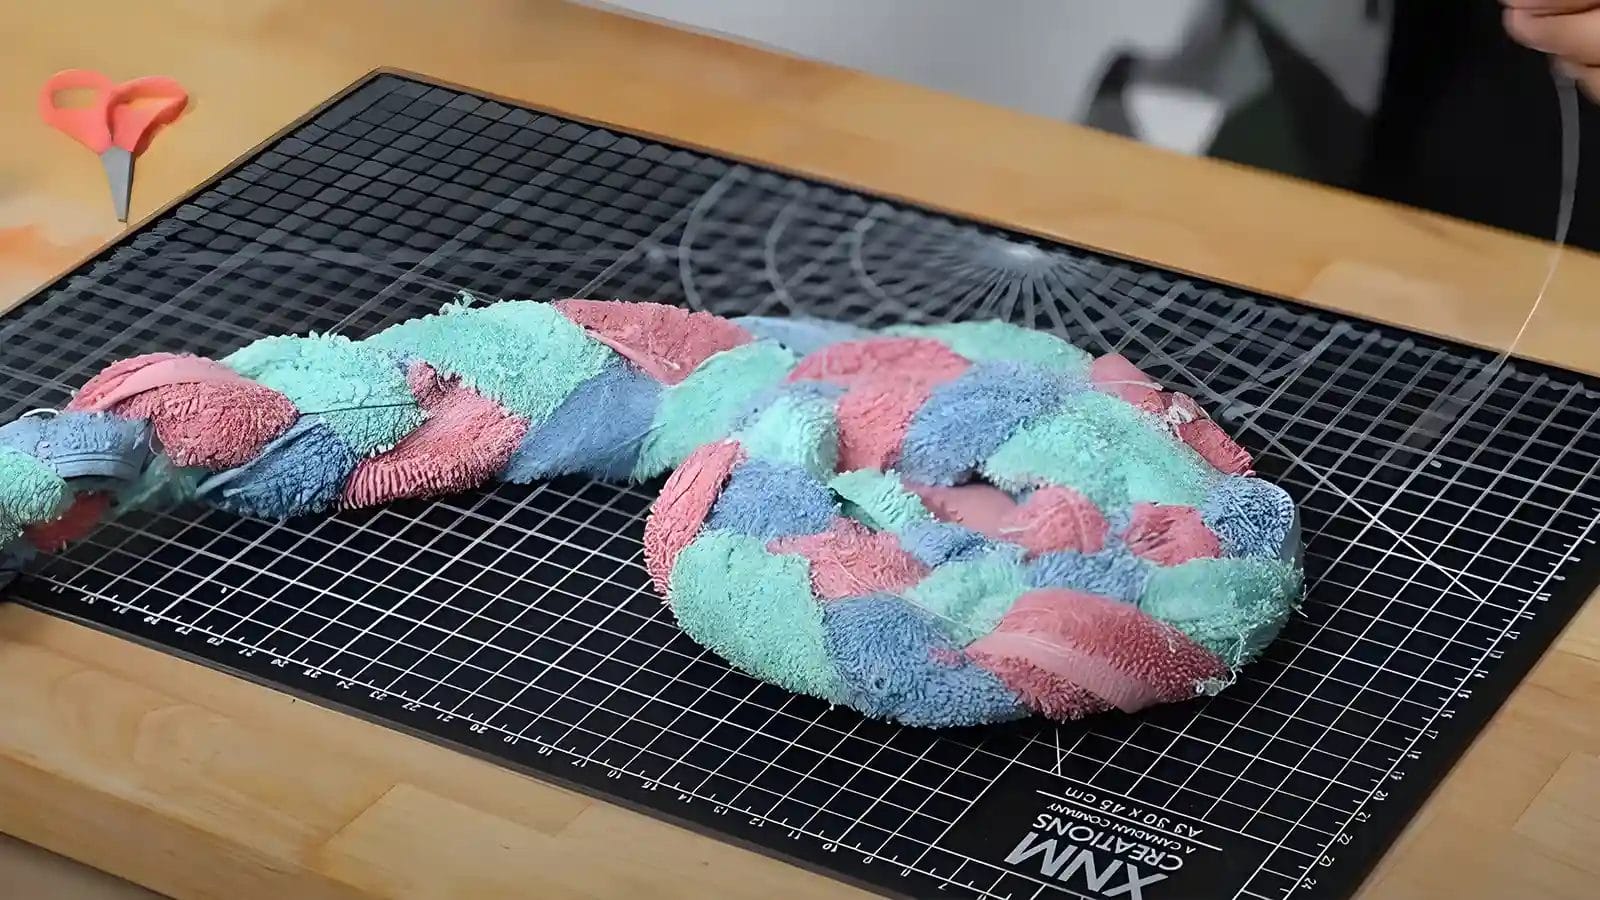
Start by placing the end of your tightly braided strips at the center and beginning to coil them outward into your desired shape. Whether you choose a circular or oval shape, make sure the braided strips lay flat even as you coil them. This keeps the rug's shape uniform.
Use tapestry needles and thread to secure the coiled braids together as you go. Pay attention to the tension to avoid any gaps or uneven spots. Adjust the tension carefully, ensuring the braids are snug but not too tight.
Continue coiling the braided strips tightly and neatly, maintaining the shape until your braided rug reaches the desired size.
Step 5: Finishing Touches
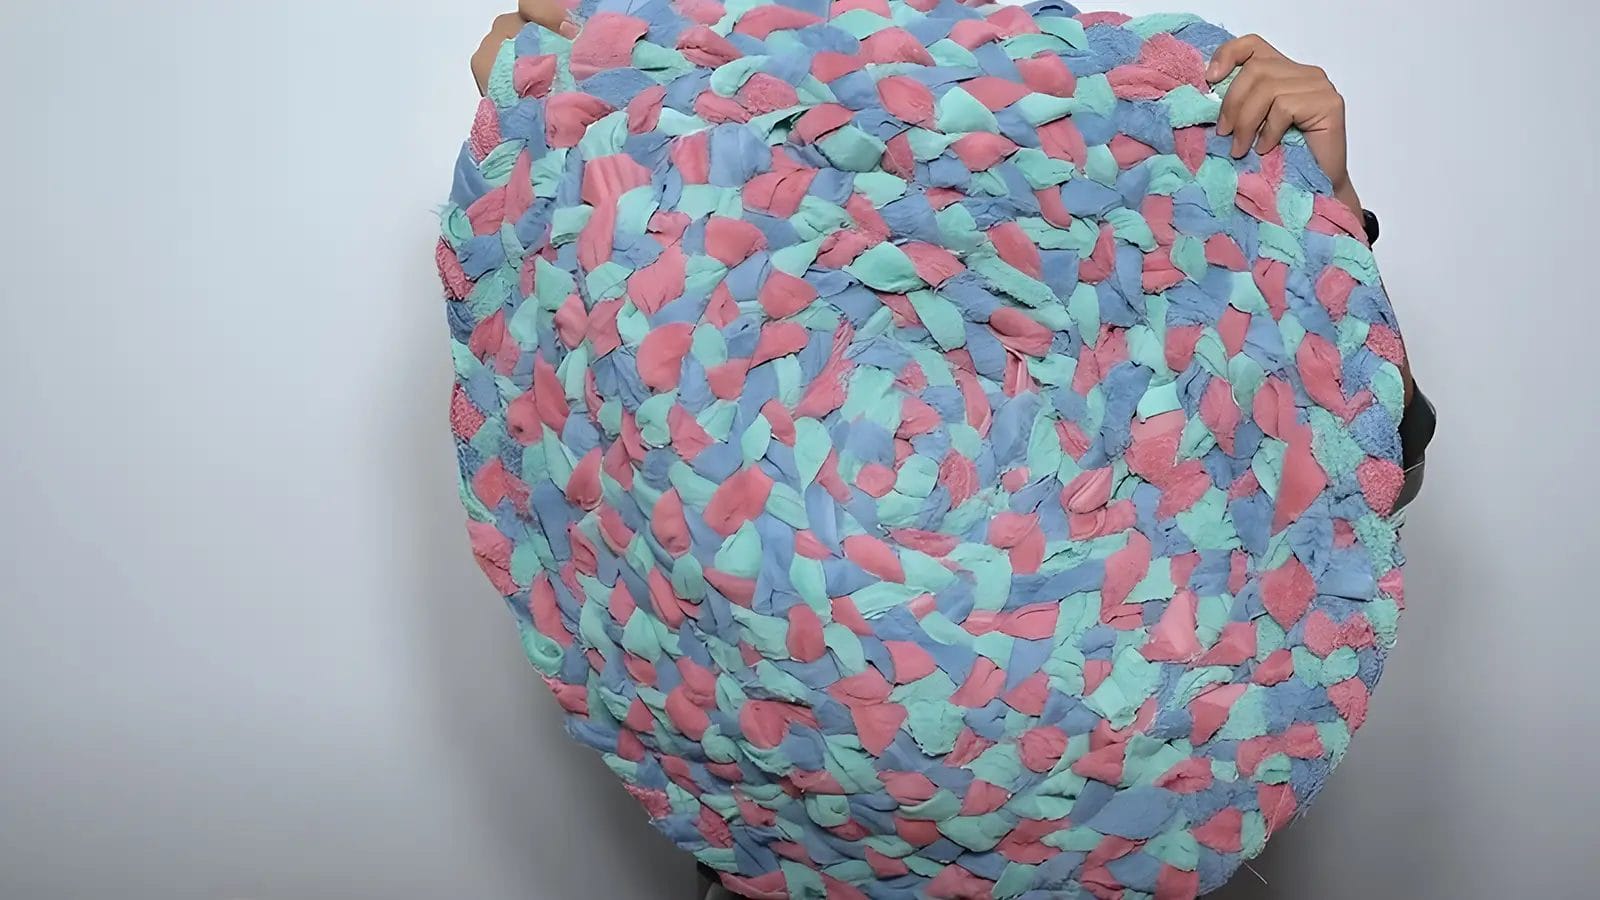
To complete your braided towel rug, tuck the end of the braid under the finished rug and sew it in place securely. This step ensures a clean and durable final product.
Next, trim excess fabric to remove any frayed edges, giving your rug a polished appearance. Double-check all edges to make sure they're neat and tidy.
Sew securely throughout the rug to prevent any sections from unraveling. Pay attention to these finishing touches, as they significantly enhance the rug's durability and visual appeal.
Once everything is tidied and sewn, your braided towel rug will be ready to add a cozy touch to your space.
Maintenance Tips for Braided Towel Rugs
To keep your braided towel rug looking its best, follow some simple washing instructions and repair tips.
You should wash it gently using mild detergent and water. Fix any loose braids or stitches promptly.
Regular maintenance will ensure your rug stays clean and durable for years to come.
Washing instructions
Maintaining the beauty and longevity of your braided rug requires careful hand washing using mild detergent and lukewarm water. Start by gently scrubbing the rug with the detergent, ensuring you cover all areas. Avoid harsh chemicals and bleach, as they can damage the fibers.
After washing, gently squeeze out excess water without wringing or twisting the rug. Lay it flat to air dry, which helps maintain its shape and color. Regular maintenance, like shaking out dirt and vacuuming, will keep your rug looking fresh.
Tips for repairing any loose braids or stitches
When you notice any loose braids or stitches in your braided rug, grab a needle and thread to secure them promptly. Start by threading your needle and knotting the end to prevent future unraveling.
Carefully stitch the loose braids back into place, ensuring each stitch is tight and secure. Check the entire rug for any other loose areas and reinforce them with additional stitching as needed. Once you've finished, trim any excess thread to keep your rug looking neat.
Regularly inspect your braided rug for loose braids or stitches, and address them immediately to prolong its lifespan and maintain its appearance. By staying vigilant, you'll keep your braided rug in excellent condition for years to come.
Final Words
You've now got all the know-how to create a beautiful braided rug. With just some old towels, a bit of time, and a touch of creativity, you can craft a cozy addition to any room.
Remember to keep the tension even, stitch the coils securely, and maintain your rug with gentle care.
Enjoy the process and the unique, personal touch it brings to your space. Happy crafting!
Learn more DIY projects from the Longan Craft Blog, and dive into the fabric world with Longancraft!
FAQs
How Do I Make a DIY Braided Rug at Home?
You'll start by cutting old bedsheets into strips and rolling them into balls. Start braiding these strips, sewing them with loose tension. Finally, wet and stretch the rug to reshape it. Enjoy your cozy creation!
What Is the Best Material for Braided Rugs?
For the best material for braided rugs, consider cotton for softness, wool for insulation, synthetic fibers for outdoor use, and jute for sustainability. Your choice depends on the intended use, texture preference, and maintenance needs.
How Much Material Does It Take to Make a Braided Rug?
For a braided rug, you'll need 20-30 T-shirts or 3-4 bedsheets. For a standard-sized rug, plan on using 8-10 yards of fabric strips. Always have extra material to avoid running out mid-project.
How to Hand Sew a Braided Rug Together?
To hand sew a braided rug together, overlap the braid ends and use a strong thread with a large needle. Sew through the overlapping sections multiple times, ensuring the rug stays flat to avoid puckering.
0 comments