

Making a fabric book cover from old clothes is a great way to breathe new life into your favorite but worn-out garments. This easy sewing project not only gives your books a unique and personalized touch but also promotes sustainability by recycling materials you already have.
This simple and creative craft can be a fun afternoon activity whether you want to protect your textbooks, journals, or novels. Let's dive in and transform those old shirts, dresses, or jeans into beautiful book covers that stand out on your shelf!
Key Takeaways
- Measure and cut old clothes, adding extra width and height for seam allowance and flaps.
- Create flaps by folding each end of the main fabric piece over 3 inches.
- Sew the fabric cover with an ¼ inch seam allowance, then turn the right side out and iron.
- Add optional embellishments like pockets, closures, and decorative elements to personalize and enhance the book cover.
Prepare the Necessary Materials
To get started, you'll need to prepare some necessary materials and tools:
- Old Clothes: Any fabric from your old clothes that you want to repurpose.
- A Pair of Sharp Scissors
- Measuring Tape or Ruler
- Pins: To hold the fabric pieces together while you sew.
- Needle and Thread
- Iron: To press the fabric and make it easier to work with.
- Chalk or Fabric Marker: For marking measurements on the fabric.
- Decorative Elements (Optional): Pockets, closures, buttons, patches, or embroidery threads to personalize your book cover.
How to Make a Fabric Book Cover from Old Clothes
Let's get started with this step-by-step sewing tutorial to create your fabric book cover. With this easy fabric book cover tutorial, you're going to make a unique and stylish book cover!
Step 1: Select and Prepare the Fabric
Start by choosing a piece of fabric from your old clothes, such as a shirt, dress, or jeans, that you want to repurpose.
Next, wash the fabric to remove any debris or stains. After drying, place it on the ironing board and iron out any wrinkles for clean, precise cuts.
Now, you're ready to move on to measuring and cutting the fabric.
Step 2: Measure and Cut the Fabric
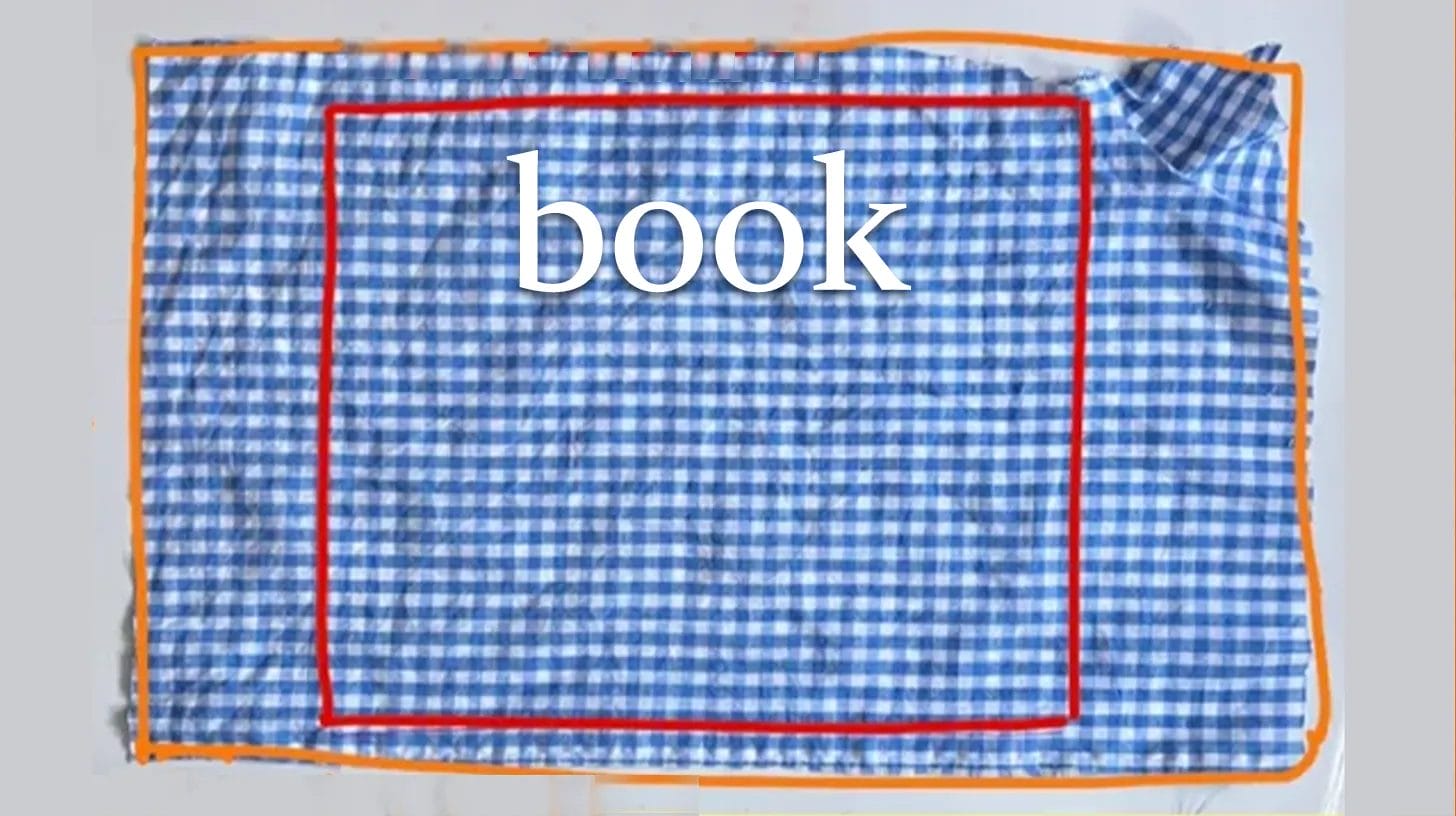
With your fabric prepped and ready, grab your measuring tape or ruler to measure the book's height and width accurately.
Place the book open on the fabric, preferably with all the pages held up for more precise measurements. Then, carefully trace the outline using a fabric marker.
Next, add 1 inch to the height measurement for seam allowance. For the width, add 6 inches, 3 inches for each side flap. According to these measurements, use sharp fabric scissors to cut the fabric piece.
Step 3: Create Flaps of the Book
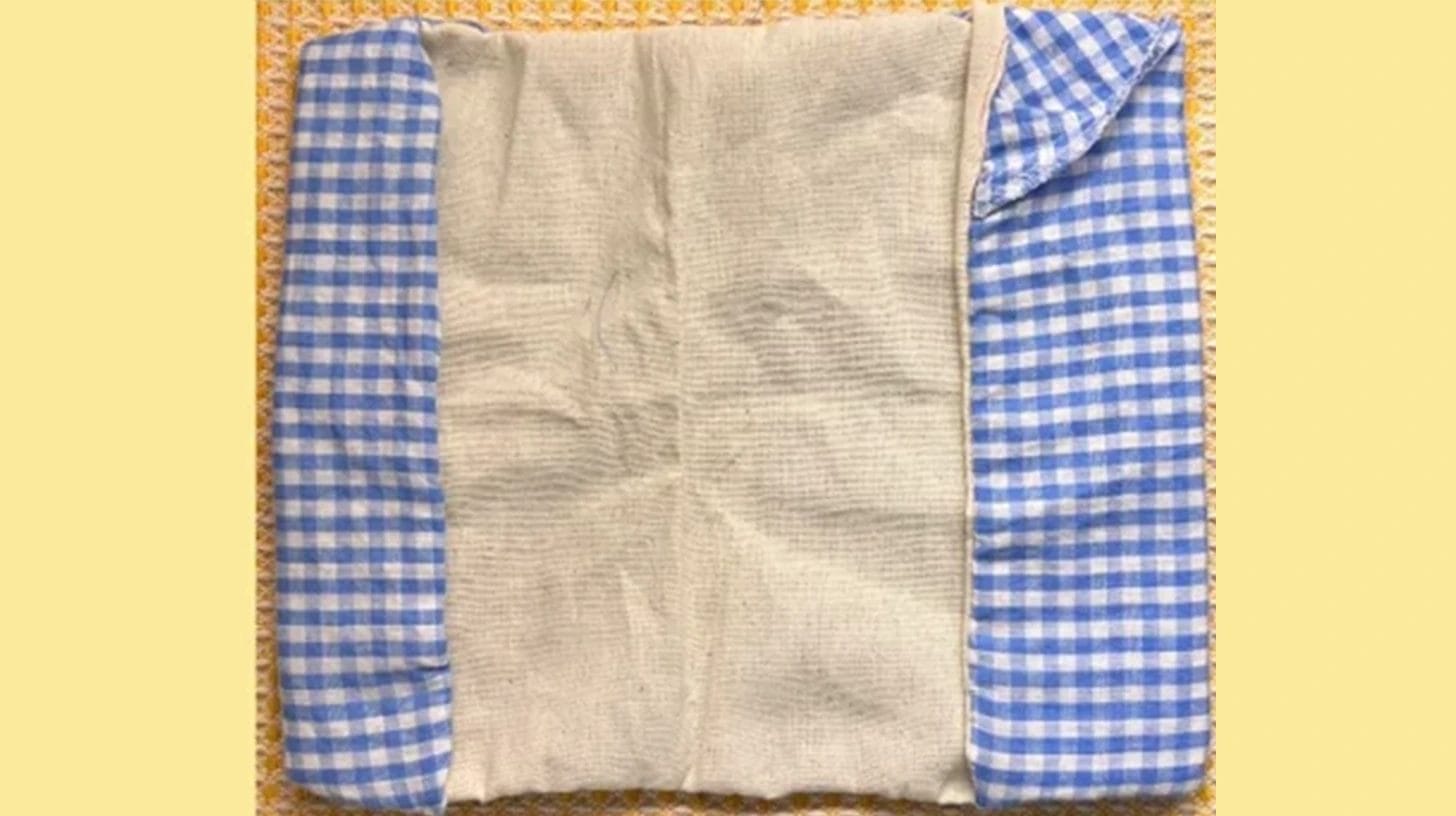
Fold 1/4 inch of each short edge towards the right side of the fabric and iron to crease.
Fold each short edge of the book cover again by 3 inches and iron to crease, creating pockets for the book covers.
Stitch along the 1/4-inch folded lines of each folded flap to secure it. This will create pockets for the book covers.
Step 4: Sew the Top and Bottom Edges
Fold 1/4 inch of the top and bottom edges towards the right side of the fabric and iron to crease. Pin these edges in place. Then, stitch along the top and bottom edges to finish the cover.
Step 5: Turn and Iron
Now that you've sewn the edges, turn the fabric cover right side out through the flaps, ensuring all corners are pushed out neatly.
Use a dowel or pencil end to gently poke out the corners for a crisp finish.
Once turned, lay the cover flat and iron it, focusing on the seams and edges to remove any wrinkles.
For added structure and durability, consider using fusible interfacing. It will reinforce the cover while maintaining a neat appearance.
Now, your fabric book cover looks polished and professional.
Step 6: Final Assembly

Now, for the final assembly, carefully slip the cover onto your favorite book, ensuring it fits snugly and all edges are correctly aligned.
Check for any adjustments before using or gifting your beautifully crafted fabric book cover.
Your project is now complete and ready for use!
Optional Embellishments for Fabric Book Covers
You can add pockets to your fabric book cover for storing bookmarks or notes.
Consider closures like buttons or elastic bands to keep your book securely closed.
Don't forget to personalize with decorations such as embroidery, beads, or fabric paint for a unique touch.
Pockets
Adding pockets to your fabric book cover is a great way to make it more functional and personalized. You can use old clothes to repurpose pockets and sew them onto the fabric cover. For added style, consider using decorative stitching.
Closures
Adding a closure to your fabric book cover can enhance both its functionality and aesthetic appeal.
- Consider using a button-and-loop closure for a classic look. Sew a button onto the cover and create a loop from elastic or fabric to secure it when closed.
- Magnetic snaps offer a clean, modern option; sew one part onto the cover and the other onto the flap.
- For a whimsical touch, try a fabric tie closure. Attach a long strip of fabric to one side and wrap it around the book.
- Velcro is a practical choice, providing an adjustable fit by attaching strips on the flaps and cover.
Each of these closures adds a unique touch to your book cover.
Decorations
When decorating your fabric book cover, embellishments like embroidery, beads, and fabric paint offer countless ways to infuse personal flair and creativity.
Consider using quilting techniques to add texture and durability. You can also incorporate decorative stitches along the edges or across the surface for a professional touch.
Appliqués are another fantastic option. They serve as eye-catching elements and functional pockets for bookmarks or notes.
Don't underestimate the power of contrasting fabrics, either. Using different colors or patterns can create striking visual effects that elevate your book cover's overall look.
With these embellishments, your fabric book cover can be as unique and expressive as you want.
Conclusion
With your new fabric book cover, you've given your book or notebook a stylish and protective makeover.
Remember, you can always add pockets, closures, or decorations to make it uniquely yours. The process is straightforward and leaves plenty of room for creativity.
Now, slip the book over the cover and enjoy the personalized touch you've created.
Each time you open your book, you'll appreciate the effort and love you've put into making it special.
Happy reading!
Learn more sewing projects on the Longancraft Blog, and dive into the fabric world with Longancraft!
FAQs
How to Make a Book Cover Using Fabric?
You'll start by measuring your book and cutting the fabric accordingly. Hem the edges, fold the fabric over the book, and pin. Sew along the folds, trim the corners, turn it right-side out, and iron for a polished look.
What Is the Fabric Used to Cover Books?
You'll usually use cotton for book covers because it's durable and easy to handle. Duck cloth offers water resistance and sturdiness. Scrap fabrics add vibrant prints, while heavyweight fabric prevents transparency and enhances structure.
0 comments