Are you ready to unleash your creativity and craft a stunning handbag that reflects your unique style? Making a DIY handbag using just fabric is not only a fun and fulfilling project, but it also allows you to express your personality and fashion sense.
Whether you're a seasoned seamstress or a beginner eager to learn, this guide will walk you through the process step-by-step. Get ready to transform simple fabric into a beautiful accessory you can carry with pride and show off to the world!
Key Takeaways
- Choose a durable fabric and cut a rectangle measuring 30 by 75 cm.
- Fold and stitch the long edges inward (1 cm), ensuring the backstitch at both ends for security.
- Fold the rectangle lengthwise, mark the center, gather the fabric at the center, and tie a knot to secure the gathers.
- With the right sides together, fold the fabric, mark a 1 cm seam allowance, and sew along the marked lines.
- Align seam allowances at the top and sew about 1 cm, again backstitching for security.
- Turn the handbag right side out, push out corners to shape it, and press with a low-temperature iron for a polished look.
Prepare Materials and Tools Needed
To make this easy and lovely handbag, you'll need to prepare the materials in advance.
- Fabric: Great options include cotton, denim, faux leather, and more. Choose a color and pattern that match your style.
- Sewing Thread
- Sewing Machine or Hand-Sewing Supplies
- Sharp Scissors
- Measuring Tape or Ruler
- Fabric Markers or Chalk
How to Make a Handbag: A Step-by-Step Tutorial
Now, let's learn to make this cute handbag in minutes! Follow these easy steps and tips for a successful bag making experience.
Step 1: Prepare a Rectangle Fabric
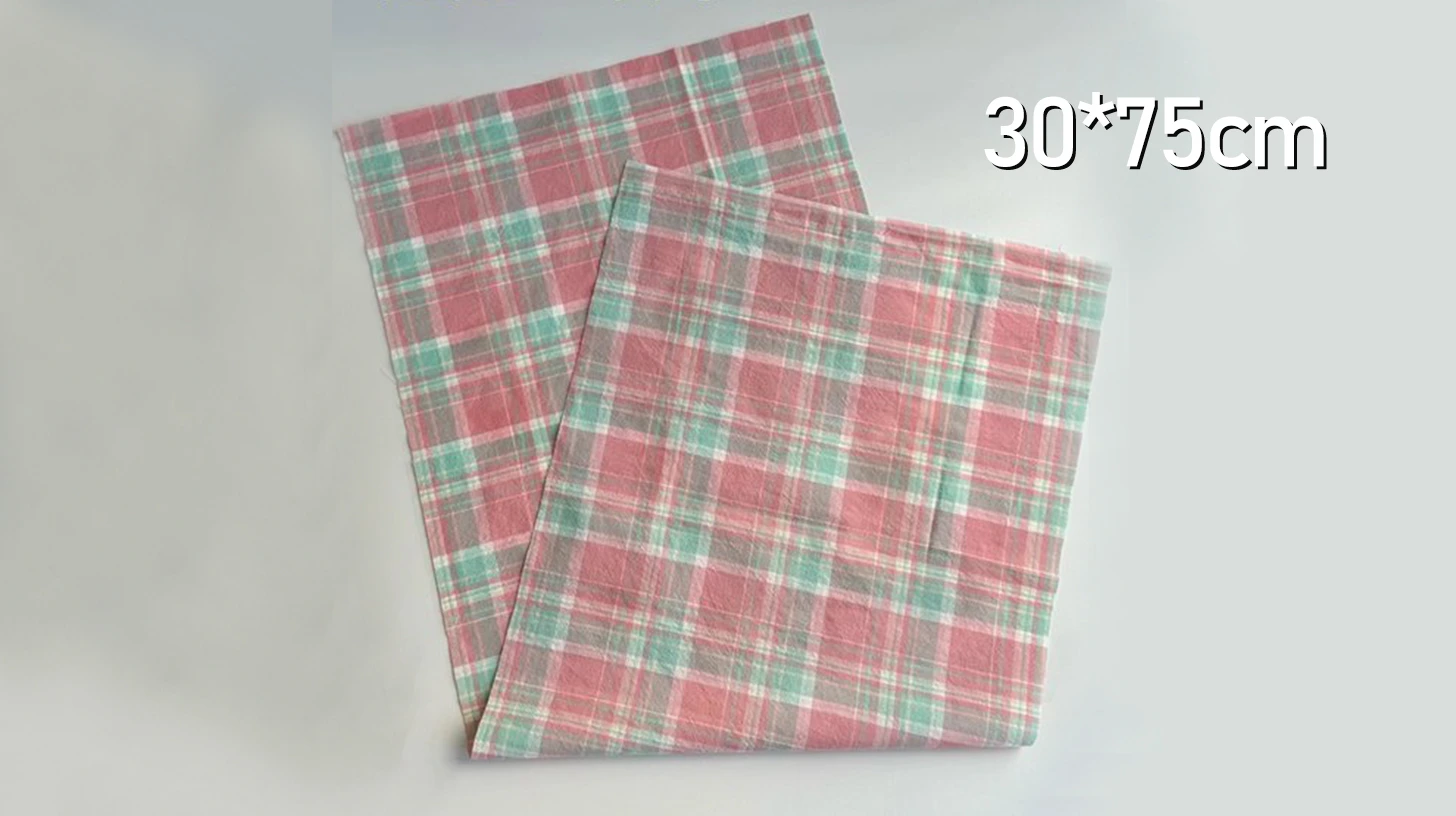
Before sewing a hand bag, select a durable fabric that'll provide longevity and a stylish look.
Begin by cutting a rectangle measuring approximately 30 by 75 cm. Use a ruler and fabric chalk to mark these dimensions accurately on the fabric. This precision is crucial for constructing a symmetrical handbag.
If you want added support, apply interfacing to the back of the fabric rectangle. It'll enhance the structure, making your creation more robust.
Step 2: Stitch Along the Long Edges
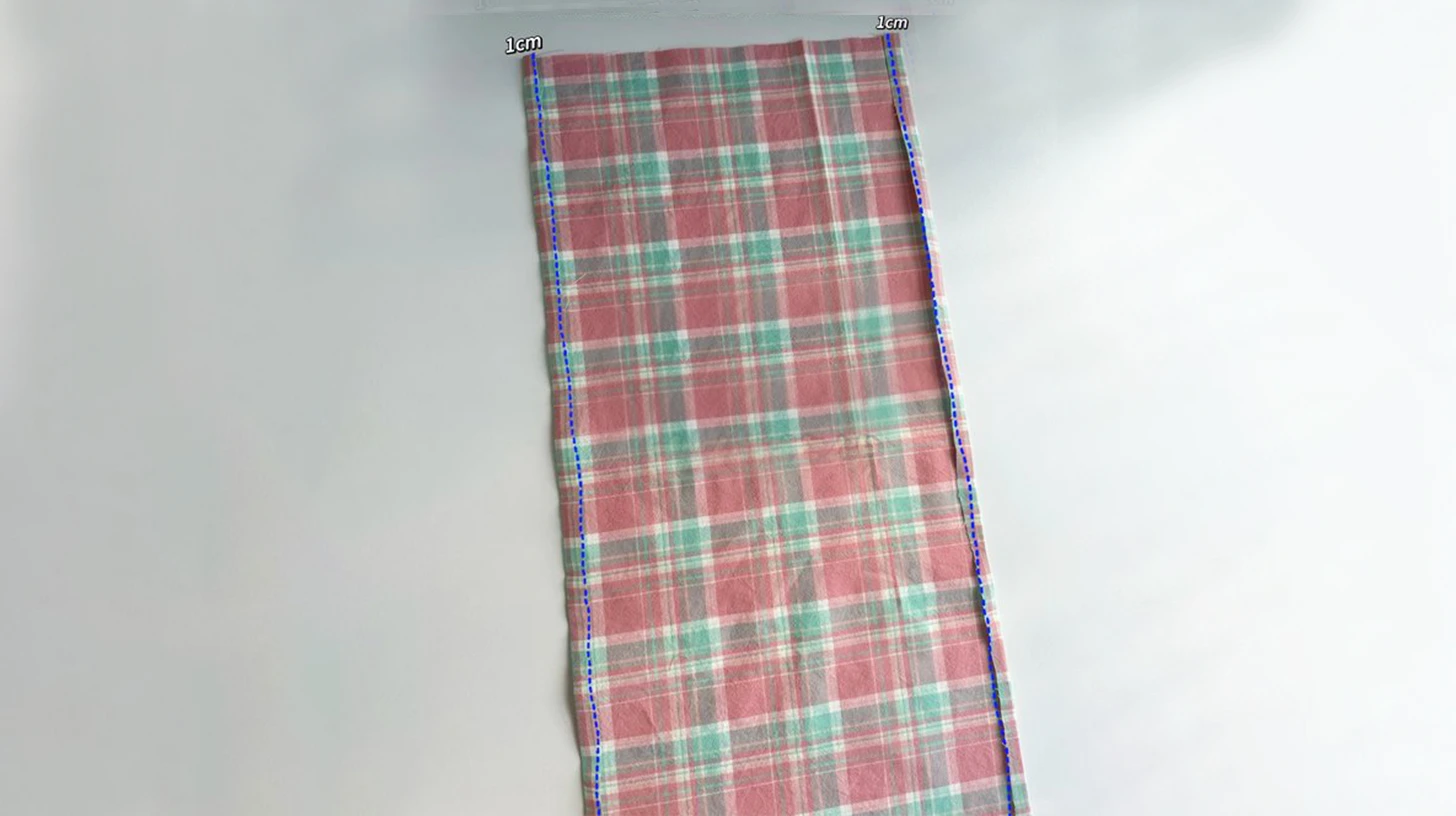
With the wrong side upward, fold the two long edges inward about 1cm. Then, stitch along the two edges.
Don't forget to backstitch at the beginning and end to secure your seam.
Step 3: Gather the Fabric and Tie a Knot in the Center
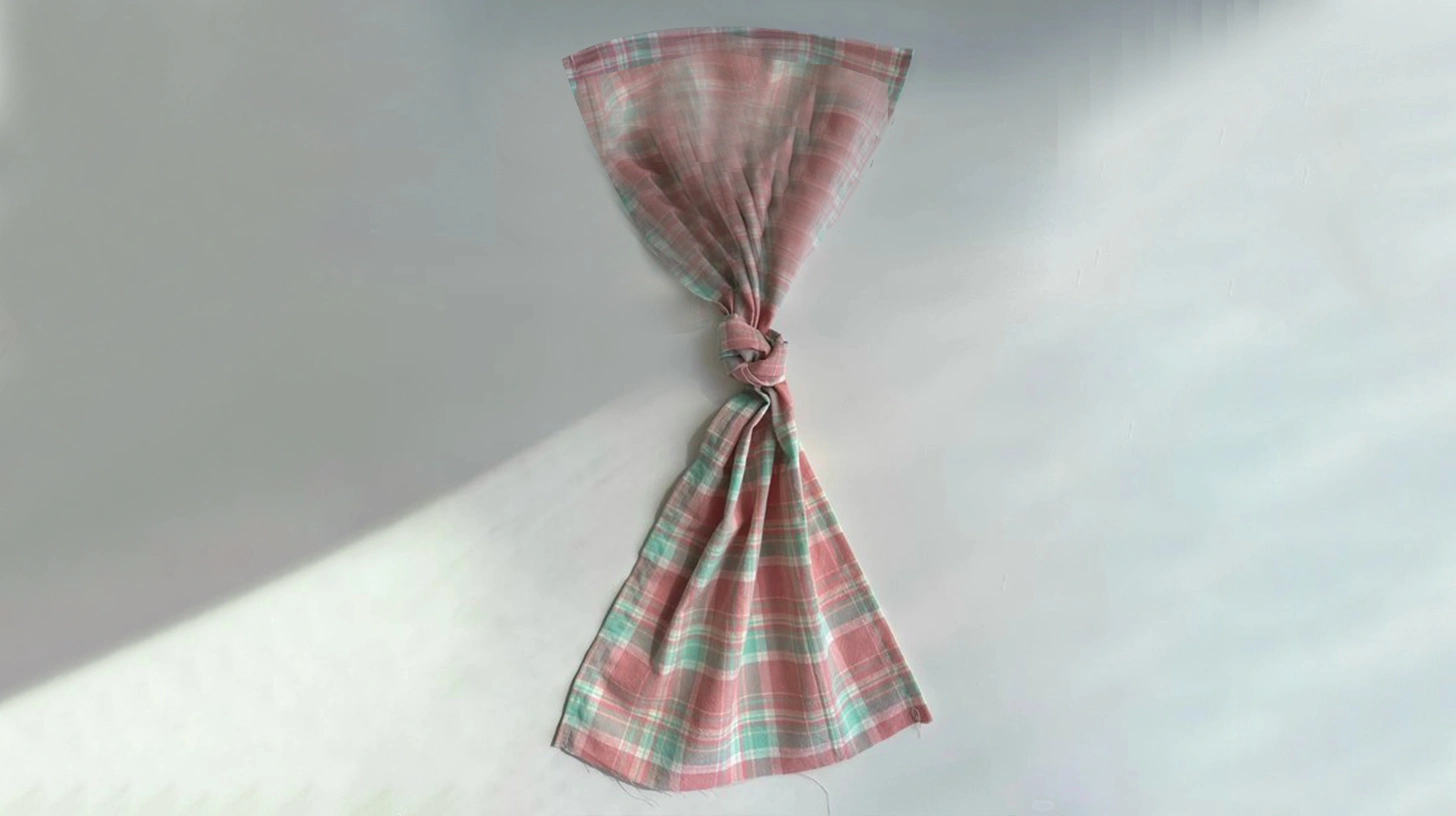
After stitching the long edges, fold the rectangle half lengthwise and mark the center. Unfold the fabric and turn the right side upward.
Next, gather the fabric to the center you marked, then tie a knot, ensuring the gatherings are neat.
Step 4: Fold the Fabric and Stitch Again
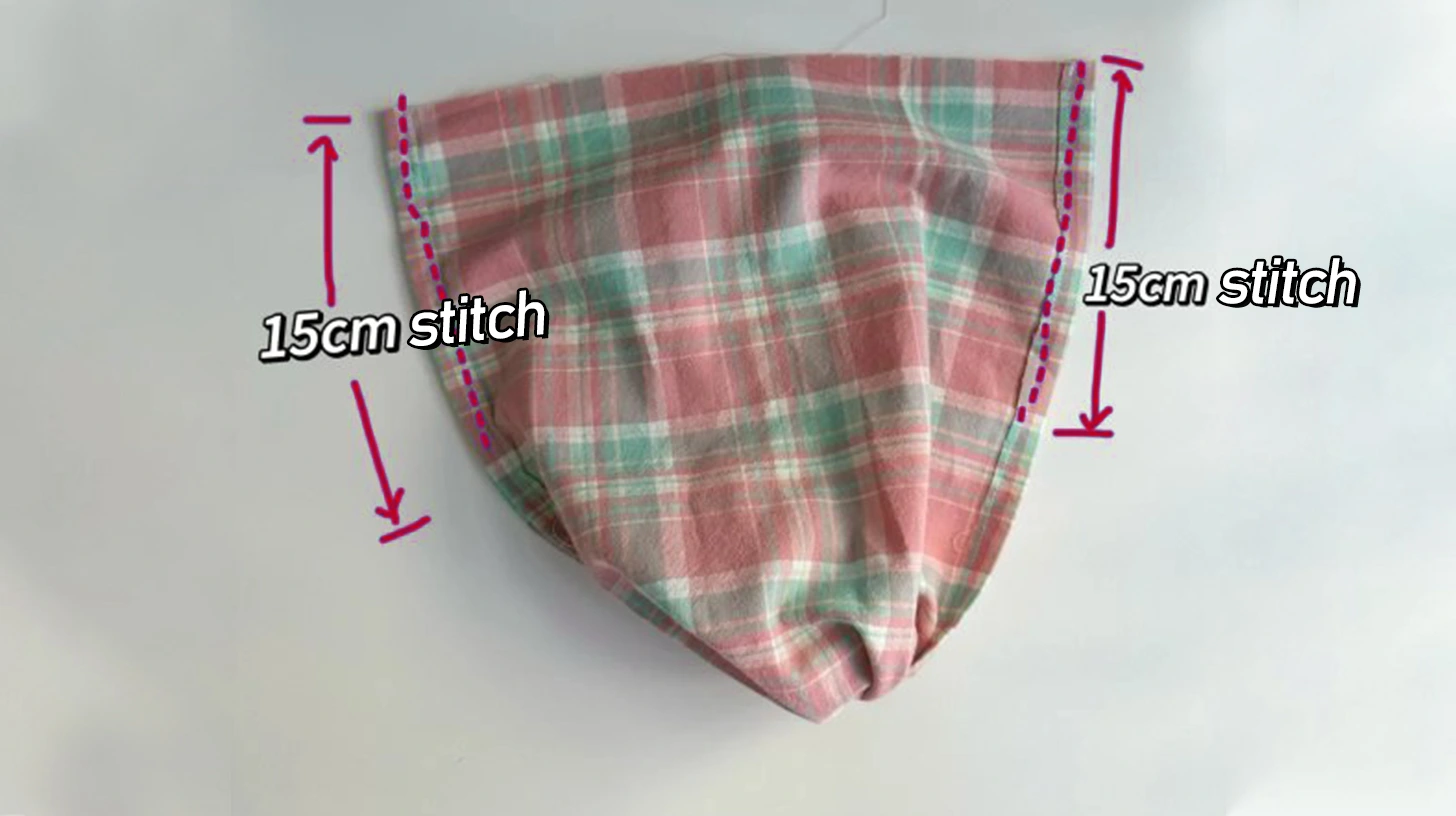
After tying the knot, fold the fabric in half with the right sides together. Align the edges neatly. Measure and mark a seam allowance of 1cm from the edges. Using a straight stitch on your sewing machine or stitching by hand, follow the marked seam line to create strong seams on both sides.
Step 5: Align the Seam Allowances and Sew
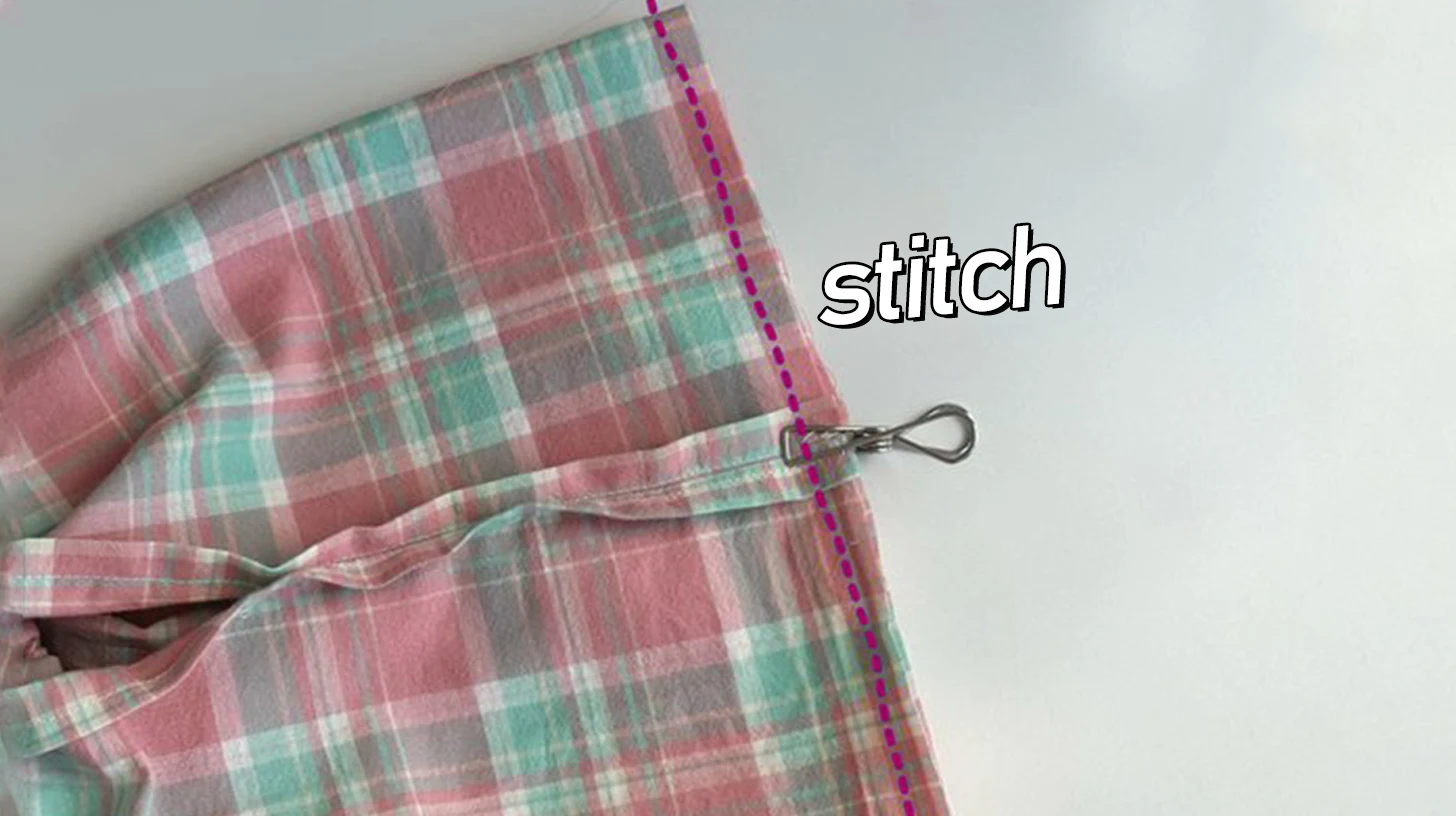
Align the two seam allowances and sew approximately 1 cm at the top. Remember to backstitch at both the beginning and end to secure your seam.
Step 6: Turn the Right Side Out and Finish Up
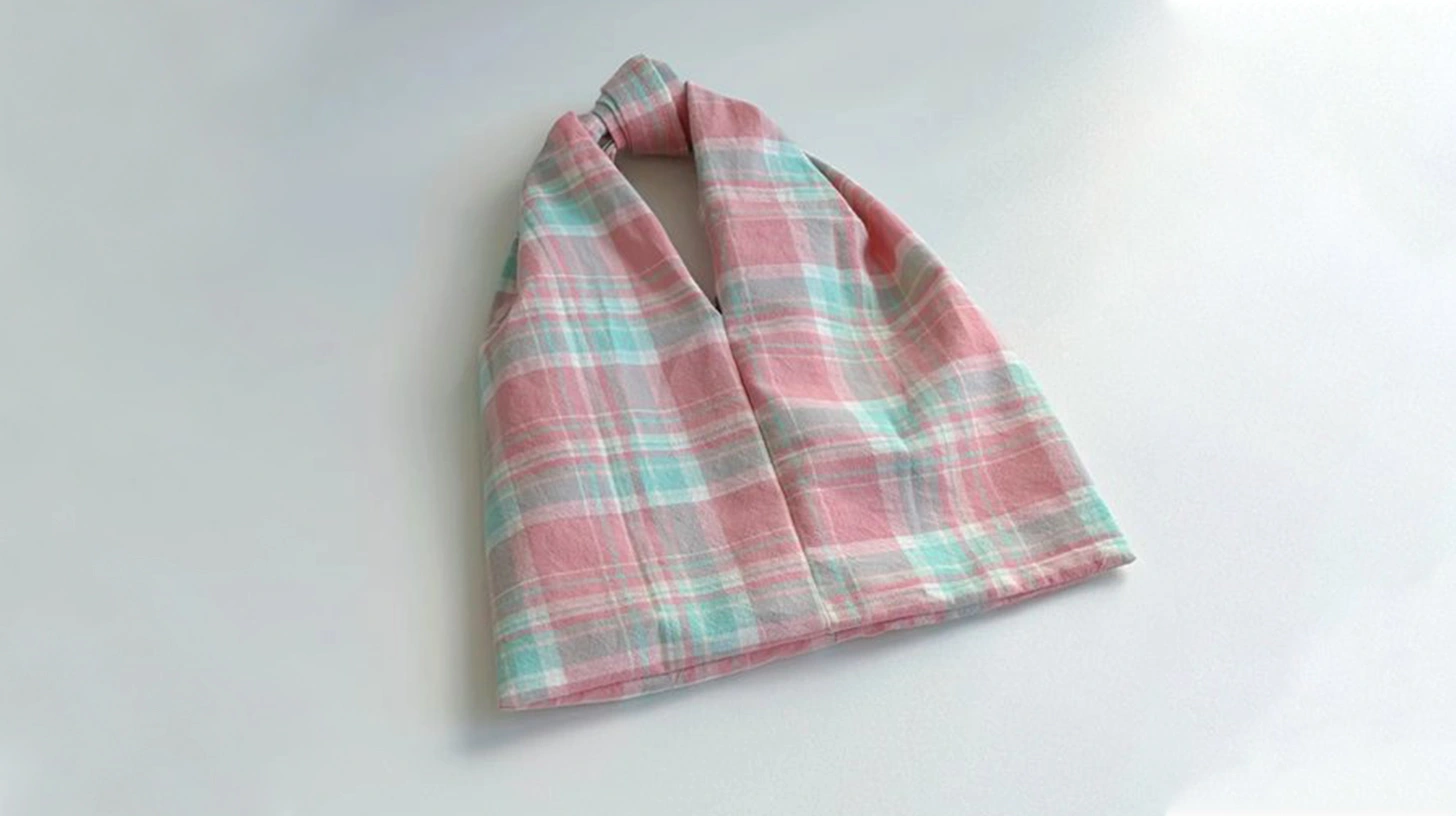
Now, it's time to bring your handbag to life by turning it right side out. Carefully reach inside the opening and gently pull the fabric through.
To shape the handbag properly, use a pencil or turning tool to push out the corners. This will help maintain its form. Next, gently press the handbag with an iron set to a low temperature to give it a crisp, finished appearance. The knot you created earlier will serve as the strap for hanging your bag.
Ideas for Adding Personal Touches to Your Bag
Transforming a basic handbag into a unique statement piece involves incorporating personal touches that reflect your style and creativity.
Start by choosing unique fabrics like upcycled denim or handwoven textiles to make your handbag truly handmade.
Add custom embroidery or patches that showcase your personality, favorite quotes, or interests.
Consider creating a monogram or adding your initials for a personal touch that also gives a sense of ownership.
Don't be afraid to experiment with different shapes and sizes to suit your lifestyle, ensuring your handbag meets both your functional needs and fashion preferences.
Conclusion
You've now crafted your handbag, showcasing your creativity and skills. With durable materials and careful stitching, your bag is ready to accompany you on countless adventures. Don't forget to add those personal touches that make it uniquely yours, whether it's a vibrant lining, decorative patches, or custom embroidery.
Enjoy the satisfaction of carrying something handmade, and remember, this is just the beginning of your handbag-making journey. Let your imagination lead the way!
Remember to take photos and videos to proudly share your adorable purse on Instagram, Facebook, Pinterest, and even YouTube!
Learn more sewing projects on the Longan Craft Blog, and dive into the fabric world with Longancraft!
FAQs
What Do You Need to Make a Handbag?
You'll need fabric, interfacing, and lining for structure and style. Gather tools like a sewing machine, scissors, and pins. Don't forget closures like zippers or snaps; follow a clear pattern to bring your handbag vision to life.
How to Make a Bag Step by Step?
Start by choosing your fabric and tools. Cut the main pieces and stitch them together. Add handles and embellishments. Turn the bag inside out before finishing the edges. Your personalized bag is ready to flaunt!
What Equipment Do You Need to Make a Bag?
You'll need a sewing machine, fabric scissors, pins, and a seam ripper. A rotary cutter with a mat helps with precision. Gather specialized hardware like zippers and snaps. Consider interfacing for structure. These tools make bag creation easier.
How to Make a Handbag With Cloth?
You've got to choose a durable fabric like cotton or canvas. Cut two rectangles for the bag's body. Sew them together, and add a lining, pockets, handles, and a closure. Turn it right side out. Done!


0 comments