

Have you ever wanted to create something stylish and personal using fabric scraps? Learning how to make a patchwork skirt is a fun and rewarding way to do just that! This project lets you combine different fabrics into a one-of-a-kind garment that reflects your creativity.
With this step-by-step guide, you'll discover how to make a patchwork skirt that fits perfectly and looks amazing. Ready to get started? Grab your materials, and let's dive in!
Key Takeaways
- Pick fabrics or fabric scraps that match your style. Combine colors and patterns to make it special.
- Cut the fabric pieces carefully, leaving about ¼ inch for seams.
- Sew the fabric pieces together slowly, pressing seams flat for a clean look.
- To finish it nicely, attach a waistband and hem the skirt. Add decorations to make it unique and truly yours.
Materials and Tools for a Patchwork Skirt
Before you start sewing your patchwork skirt, gather all the materials and tools you’ll need:
- Fabric Scraps: For the best results, use cotton, linen, or quilting cotton. Mix colors and patterns to create a unique look.
- Lining Fabric (Optional): If you want your skirt to have extra structure or coverage, pick a lightweight lining fabric.
- Elastic or Waistband Material: Elastic works great for a comfortable fit, but you can also use a fabric strip for a more tailored waistband.
- Thread: Match the thread color to your fabrics or use a neutral shade that blends well.
- Sewing Machine
- Rotary Cutter or Fabric Scissors
- Cutting Mat
- Measuring Tape: Use this to measure your waist and the length of the skirt.
- Pins or Clips
- Iron and Ironing Board
- Seam Ripper: Mistakes happen! A seam ripper will help you fix them easily.
How to Make a Patchwork Skirt: Step-by-Step Tutorial
Now that you've prepared the materials, here’s a detailed tutorial for making a patchwork skirt.
Step 1: Select Fabrics
Look through your fabric scraps or purchase small pieces of cotton or linen. These materials are easy to sew and hold their shape well, making them perfect for beginners.
Think about the overall look you want for your skirt. Do you prefer bold, contrasting colors or a more subtle, coordinated palette? For a playful vibe, mix bright patterns like florals, stripes, or polka dots. Stick to neutral tones or soft pastels if you want something more elegant.
Remember to consider the weight of the fabric. Lightweight woven fabrics are best for a flowy and comfortable skirt.
Step 2: Prepare Your Fabrics
Once you’ve selected your fabrics, it’s time to prepare them for sewing. Start by washing and drying each piece. This step is crucial because it prevents shrinking later on. After washing, iron the fabrics to remove wrinkles and make cutting easier.
Step 3: Cut the Fabric
Lay your fabric flat on a cutting mat and smooth out any wrinkles. Use a rotary cutter or fabric scissors to make clean cuts.
If you’re using a pattern, follow its measurements carefully. Otherwise, decide on the size of your squares, rectangles, or strips. A common choice is 4-6 inches wide squares, but you can adjust based on your design.
Remember to include a seam allowance of about ¼ inch for each piece. This extra space ensures that your seams stay strong when you sew the patchwork together.
Step 4: Sew the Patchwork Pieces
First, arrange the pieces in the order you want. Lay them out flat and experiment with different combinations until you’re happy with the design.
When you’re ready, take two pieces and place them with their right sides together. Pin or clip them to hold them in place. Using your sewing machine, sew along one edge, keeping a consistent 1/4-inch seam allowance.
Repeat this process, adding one piece at a time, until you’ve sewn all the patchwork pieces into rows. Then, sew the rows together to create a larger panel.
Follow these steps to make the other panel of the skirt.
Step 5: Create the Front and Back Panels
Lay out your patchwork panels on a flat surface. Decide which one will be the front and which will be the back.
Once you’ve chosen the front and back, trim the edges of each panel to ensure they're the same size. Use a measuring tape to confirm that the width and length match your desired skirt dimensions.
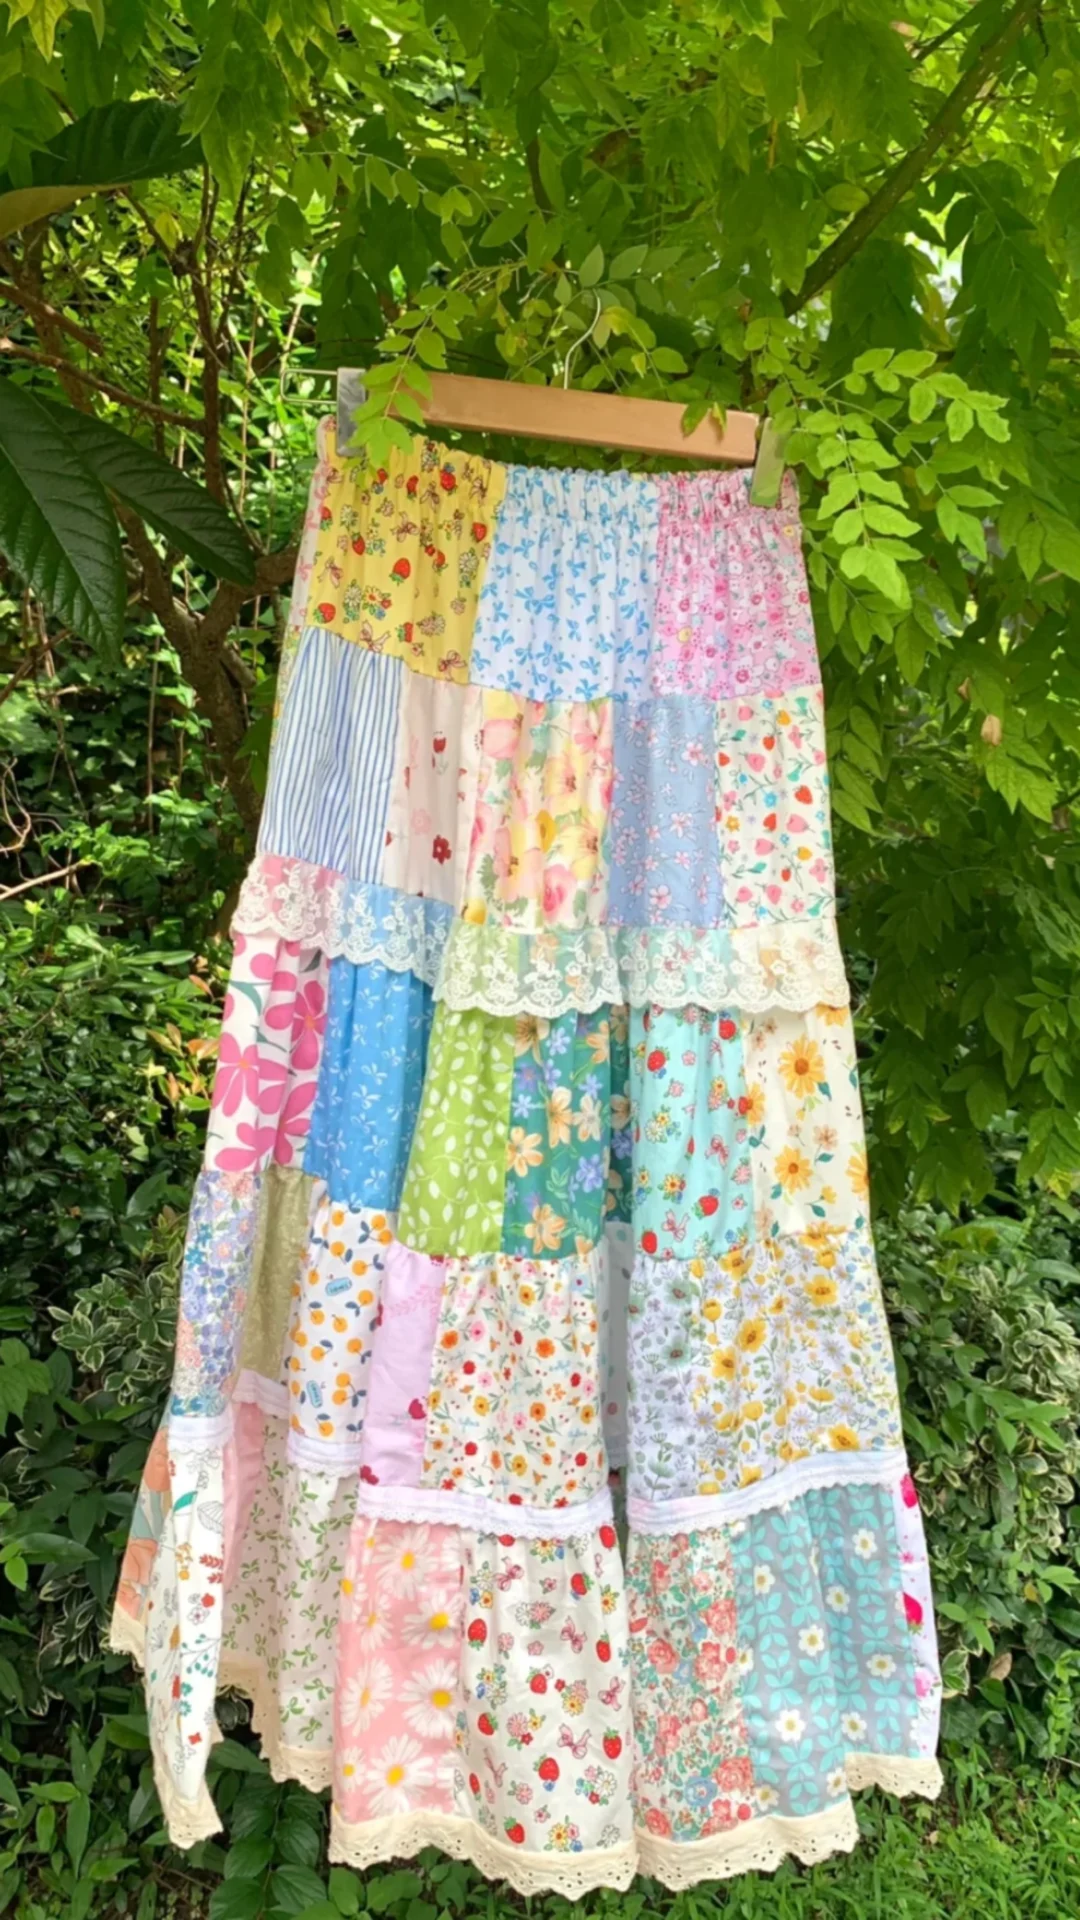
If you’re adding tiers, this is the stage where you’ll start patchworking the skirt tiers together. Sew the tiers to the bottom edge of each panel, keeping the seams neat and consistent. Press the seams flat with an iron for a polished finish.
Step 6: Sew the Panels Together
Place the panels with their right sides facing each other. Align the edges carefully and pin or clip them in place.
Using your sewing machine, sew along the side edges of the panels with a straight stitch. Keep a consistent seam allowance, usually about 1/4 inch. Once you’ve sewn both sides, press the seams open with an iron.
If you’re adding a lining, sew it to the inside of the panels at this stage. Attach the lining to the top edge of the skirt, ensuring it’s smooth and even. This step adds structure and comfort to your finished garment.
Step 7: Attach the Waistband
First, measure your waist. If you’re using elastic, cut a piece about 1-2 inches shorter than your waist measurement. For a fabric waistband, cut a strip long enough to wrap around your waist, plus an extra inch for seam allowance.
Fold the waistband in half lengthwise, with the wrong sides facing each other. Press it with an iron to create a crisp fold.
If you’re using elastic, insert it into the folded waistband and pin it in place. Align the raw edges of the waistband with the top edge of your skirt. Pin or clip them together, making sure the waistband is evenly distributed. Sew along the edge using a straight stitch, stretching the elastic slightly as you sew if you’re using it. Once attached, press the seam upward for a clean finish.
Step 8: Hem the Skirt
Hemming is the final step to give your skirt a polished look.
Fold the bottom edge of the skirt up about 1/2 inch. Press it with an iron to hold the fold in place. Fold it up again by another 1/2 inch to hide the raw edge. This double fold creates a neat hem that won’t fray over time.
Pin or clip the folded hem to secure it. Sew along the folded edge using a straight stitch. Take your time to keep the stitching even and close to the inner fold.
Step 9: Final Touches
You’re almost done! Before you call it finished, take a moment to inspect your skirt. Trim any loose threads and check that all seams are secure. If you want to add a personal touch, consider embellishments like buttons, lace trim, or embroidery. These details can make your patchwork skirt even more unique.
Finally, give your skirt one last press with the iron. This step smooths out any wrinkles and makes your work look crisp and polished. Now, your handmade patchwork skirt is ready to wear or gift!
Conclusion
Congratulations! You’ve just completed your patchwork skirt. This guide has helped you turn fabric scraps into a stylish and unique garment. Whether you wear your finished skirt or gift it to someone special, it’s a beautiful reflection of your creativity and hard work.
Keep experimenting with different fabrics, patterns, and techniques. Each project will teach you something new and help you create even more amazing designs. So, grab your sewing machine and start planning your next patchwork adventure!
Learn more sewing projects on the Longan Craft Blog, and dive into the fabric world with Longan Craft!
FAQs
How do I know how much fabric I need for my patchwork skirt?
Measure your waist and desired skirt length. Add extra for seam allowances and hems. If using fabric scraps, ensure you have enough to create the panels and waistband. A yard or two of fabric is usually sufficient for most designs.
How do I make sure my patchwork seams are straight?
Use pins or clips to hold the fabric pieces together before sewing. Sew slowly and guide the fabric gently through the machine. Pressing the seams with an iron after sewing also helps keep everything neat and flat.
Can I customize the design of my patchwork skirt?
Absolutely! Mix and match colors, patterns, and textures to create a unique look. You can add tiers, embellishments, or even pockets. Let your creativity shine and make the skirt truly your own.
0 comments