When you're facing uneven stitches or thread loops on your sewing machine, adjusting the tension can be crucial for achieving perfect results.
Begin by focusing on the upper tension dial, usually around a mid-range setting like 4. Ensure your machine is properly threaded through the tension discs. Test your adjustments on scrap fabric, looking closely for any signs of imbalance. If the problem persists, minor tweaks to the bobbin case tension may be necessary.
But what happens when these initial steps don't solve your tension woes? Let's explore further adjustments and troubleshooting techniques to perfect your stitches.
Key Takeaways
- Identify tension issues by examining for uneven stitches or visible top/bobbin thread on opposite sides.
- Adjust upper thread tension using the tension dial. Usually set between 4 and 5 in small 1/4-turn increments.
- Fine-tune bobbin tension by turning the small screw on the bobbin case in quarter-turn increments.
- Test stitch on scrap fabric after each adjustment to ensure balanced tension.
- Document all adjustments and results for consistent tension settings in future projects.
Identifying Tension Problems

Identifying tension problems on your sewing machine is crucial for achieving professional-quality stitches.
- If you see loops or nests of thread on the underside, your upper tension is likely too loose.
- When the needle thread is visible on the fabric's underside, either the bobbin tension is too tight, or the upper tension is too loose.
- Puckered fabric often points to incorrect bobbin tension, typically too tight.
- If the upper tension is too tight, skipped stitches can occur, preventing the needle from piercing the fabric.
- Consistently visible knots on the fabric's surface indicate a significant tension imbalance.
Address these issues to ensure smooth, even stitches and avoid compromising your sewing projects.
How to Adjust the Tension on a Sewing Machine

To adjust the tension of your sewing machine, follow these steps with care.
Step 1: Identify Tension Discs and Dial
First, locate the tension discs, typically found above the needle area. These discs control the upper thread tension.
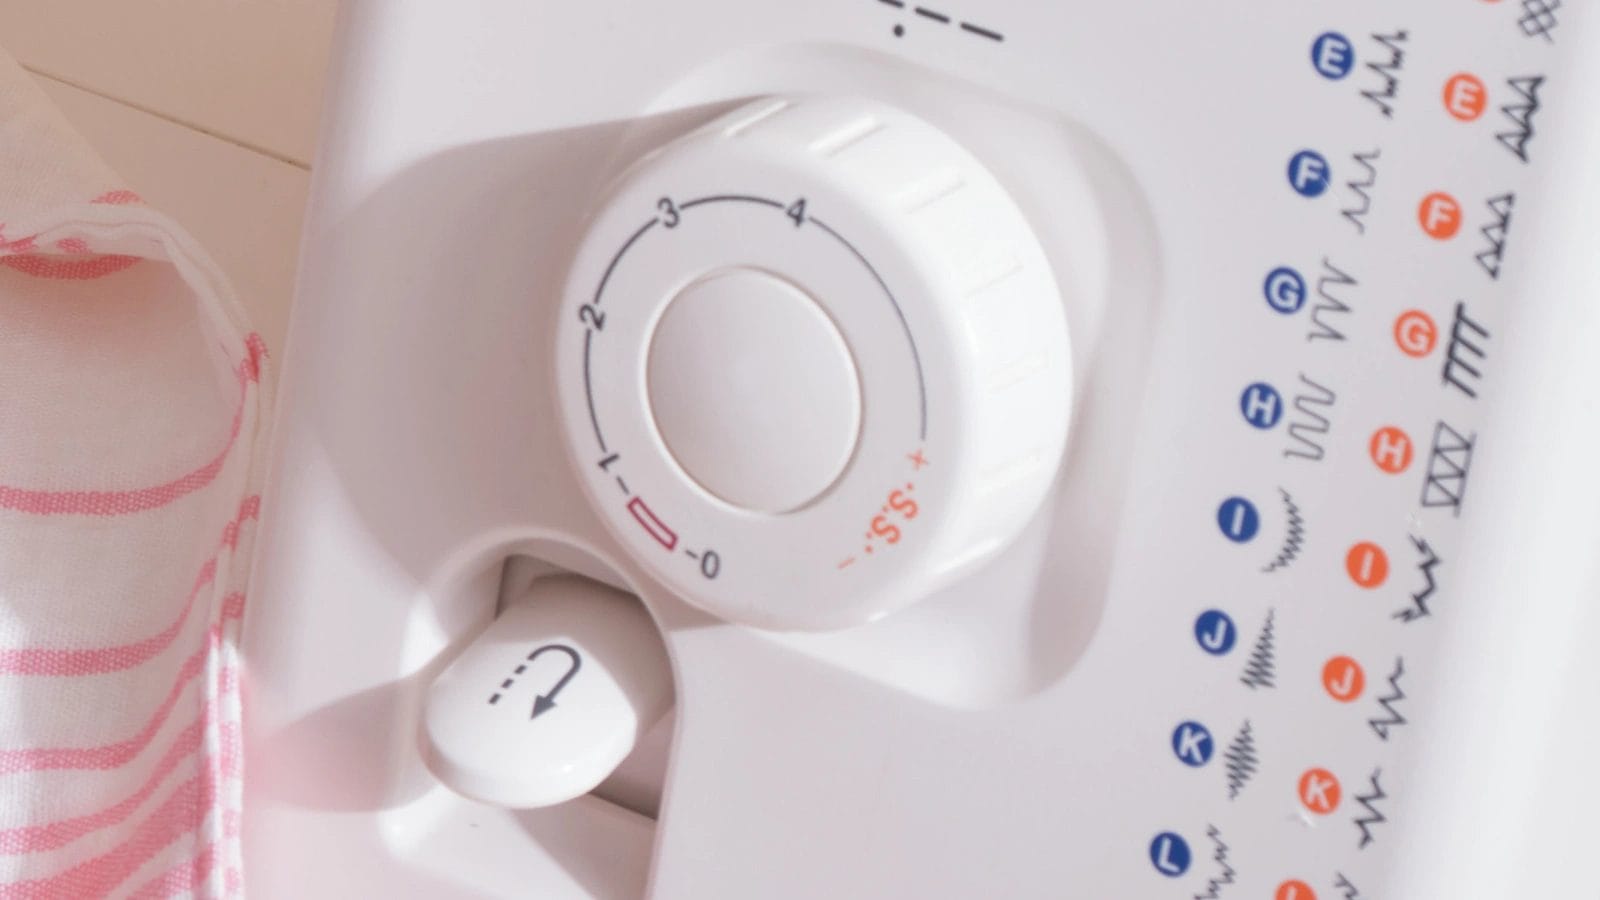
Next, identify the tension dial, usually marked with numbers from 0 to 9 or 0 to 10. This dial allows you to adjust the tension settings. A mid-range setting of around 4 is generally recommended for most fabrics.
Step 2: Thread Your Sewing Machine
The correct threading path may vary between models. For the correct threading path, refer to your machine's manual.
Start by ensuring the upper thread flows smoothly through all the thread guides and tension discs. Make sure it's securely seated in the tension mechanism. Next, wind the bobbin and insert it into the bobbin case properly.
Always use the same type of thread in both the needle and bobbin to ensure correct thread tension.
Step 3: Set the Initial Tension
Setting the initial tension is crucial for achieving perfect stitches. Start by setting the upper tension dial to 4, which works well for most fabrics.
Next, check the lower thread tension by ensuring the bobbin is correctly inserted and that the thread unwinds smoothly.
Step 4: Test the Stitch
After setting the initial tension, testing the stitch on a scrap piece of fabric helps you evaluate the current tension settings.
Sew a test stitch on your scrap fabric and examine both sides. The balanced stitches should interlock within the fabric layers, looking identical on both sides. If the upper tension is too tight, the top thread will show on the underside. Conversely, the upper tension is too loose if the bobbin thread is visible on top.
Step 5: Adjust the Top Tension
To adjust the upper tension, turn the tension dial gradually, typically in 1/4 turn increments, and test-sew on scrap fabric to assess the stitch quality.
If the needle thread appears too tight, loosen the top tension. Conversely, if the thread is too loose or forms loops, increase the tension accordingly.
Always check the threading path to ensure the thread is correctly seated in the tension discs. An incorrectly threaded machine can skew tension settings.
Step 6: Adjust the Bobbin Tension
Adjusting the bobbin tension on your sewing machine can affect stitch quality.
First, locate the small screw on the bobbin case, usually on the side. Turn this screw in small increments—no more than a quarter-turn—to tighten or loosen the bobbin tension. A tighter bobbin tension reduces the dominance of the needle thread, while a looser tension allows the needle thread to be more visible.
Ensure the bobbin is properly threaded and seated before making any tension adjustments. Test your adjustments by sewing a sample seam with contrasting thread colors to check the stitch balance.
If problems persist, revert to the original settings to prevent further stitching imbalances.
Step 7: Re-test and Fine-Tune
After adjusting both the top and bottom tension, you can now test the stitch quality on a scrap piece of fabric. If the stitches are still uneven, you might need to adjust your tension again.
Make small changes incrementally, then test again. Use contrasting thread colors to spot which thread needs adjustment.
Start a tension log to document each change and its effect. This will help you fine-tune your tension settings more effectively.
Troubleshooting Common Issues

When troubleshooting common sewing machine tension problems, address thread breaking, skipped stitches, and improper fabric feeding.
Thread Breaking
To solve thread breaking, first, consider adjusting the upper tension dial downwards. Overly tight upper tension often leads to thread breaking.
Next, check your needle. A damaged or worn needle can cause breakage, so replace it if necessary.
Ensure your needle and bobbin thread are consistent in type and weight.
Improper threading through guides and tension discs can also cause issues, so double-check your threading.
At last, keep your machine clean. Lint buildup in the tension discs and bobbin area contributes to thread breakage.
Skipped Stitches
Why do skipped stitches plague your sewing projects? Often, it's due to overly tight upper tension. To fix this, incrementally loosen the upper tension dial and test on scrap fabric until your stitches look balanced.
Incorrect needle size can also cause skipped stitches, so make sure your needle matches the thread and fabric weight. Sometimes, rethreading both the upper and lower threads can solve the problem, ensuring smooth thread flow.
Improper Fabric Feeding
Improper fabric feeding is often due to simple, fixable problems. First, ensure the presser foot is correctly engaged and not too loose, as this can prevent adequate grip on the fabric.
Check the feed dogs to ensure they're not lowered or blocked by lint, which can hinder fabric feeding.
Verify the needle is the correct size and type for your fabric.
Improper threading through guides and tension discs can also lead to inconsistent feeding, so double-check your thread path.
At last, inspect the bobbin area for any obstructions or jams, ensuring the bobbin is wound correctly.
Addressing these elements can resolve most fabric-feeding issues.
Tips for Maintaining Proper Tension
To keep your sewing machine's tension in top shape, follow these tips:
- Check threading: Follow the manual instructions to thread the machine.
- Bobbin placement: Insert the bobbin properly and make sure it rotates in the correct direction.
- Clean often: Dust and lint can affect tension; clean the machine often.
- Use high-quality thread: Cheap threads can cause tension problems and breakage.
- Needle check: Make sure the needle is appropriate for the fabric and not bent or dull.
- Test on scrap fabric: Always test settings on a piece of scrap fabric before starting your project.
- Consult the manual: Refer to the sewing machine manual for specific tension settings for different fabrics and threads.
- Regular maintenance: Have your machine serviced regularly by a professional to keep it in good working order.
Conclusion
By adjusting both the upper and bobbin tensions, you can achieve balanced stitches on your sewing machine.
Remember to start with the upper tension dial set around 4 and make small tweaks as needed. Test on scrap fabric and observe the results. Regular maintenance and keeping track of your settings will help you maintain proper tension and prevent future issues.
With these steps, you'll ensure your sewing projects look professional and flawless.
Learn more sewing tips on the Longan Craft Blog, and dive into the fabric world with Longancraft!
FAQs
What Should Sewing Machine Tension Be Set At?
For most fabrics, you should set the sewing machine tension around 4 to 5. Test stitches on scrap fabric, making small adjustments as needed. Different fabrics and threads might need specific settings, so always check your stitch quality.
How Do I Know If My Thread Tension Is Correct?
You'll know your thread tension is correct when the stitches are even on both sides of the fabric. If there are no loops or visible knots, your tension is balanced. Regularly test with contrasting threads for easier adjustments.
How Do I Fix the Upper Tension on My Sewing Machine?
Start by setting the tension dial to about 4. Test the stitches on scrap fabric. Adjust incrementally, turning clockwise to tighten or counterclockwise to loosen. Ensure proper threading and clean the tension discs for optimal performance.
How to Adjust Bottom Thread Tension?
To adjust the bottom thread tension, locate the tiny tension screw on the bobbin case. Turn it in small increments, typically a quarter-turn. Test on scrap fabric after each adjustment to ensure balanced stitch quality.


0 comments