

Cutting a sewing pattern is crucial in ensuring the success of your sewing project. A precise and accurate cut can make all the difference in achieving a professional-looking garment. From choosing the right tools to understanding the layout of the pattern pieces, there are several essential steps to consider when cutting a pattern.
In this article, we'll discuss how to cut a sewing pattern so you can confidently tackle your next sewing project.
Key Takeaways
- Read and understand the pattern instructions before you start cutting.
- Cut out the pattern pieces, ensuring they align with the fabric's grainline.
- Pre-wash, iron, and fold the fabric before laying out the pattern pieces.
- Secure the pattern pieces to the fabric to prevent shifting during cutting.
- Use fabric scissors or a rotary cutter for clean, precise cuts and accurate notches.
Gather Materials and Tools
When you're gearing up to cut a pattern, make sure you have the necessary tools ready.
- Sewing Pattern: The printed or traced pattern you'll be using.
- Fabric: The material you'll be cutting your pattern pieces from.
- Pattern Paper: If you need to trace or modify the original pattern.
- Fabric Shears: Sharp scissors specifically for cutting fabric.
- Paper Scissors: For cutting the pattern paper (never use fabric scissors on paper).
- Rotary Cutter and Cutting Mat: Useful for precise cutting, especially on straight lines.
- Pins or Pattern Weights: To hold the pattern in place on the fabric.
- Tailor’s Chalk or Fabric Markers: For marking fabric, such as darts, notches, and other important points.
- Measuring Tape or Ruler: To ensure accurate measurements and alignments.
- Seam Ripper: In case you need to correct a mistake.
- Iron and Ironing Board: To press the fabric and pattern pieces for a smooth cut.
- Tracing Wheel and Carbon Paper: For transferring pattern markings to fabric.
These materials ensure a smooth and accurate cutting, setting you up for sewing success.
Step 1: Preparing the Pattern
First, read the pattern instructions to understand the layout and cutting guidelines.
Then, use paper scissors to cut out the pattern pieces along the designated lines.
This ensures that your fabric pieces will match the pattern accurately.
Read the Instructions Carefully
Reading the pattern instructions is crucial for understanding the layout and cutting guidelines. Start by examining the pattern instructions to grasp the essential details. Look for information on grainlines, which indicate how to align the pattern on the fabric.
Identify the cutting lines to know exactly where you'll cut. Pay attention to pattern markings such as notches and darts, as these are vital for accurate assembly later. Understanding any recommended cutting techniques can also be beneficial.
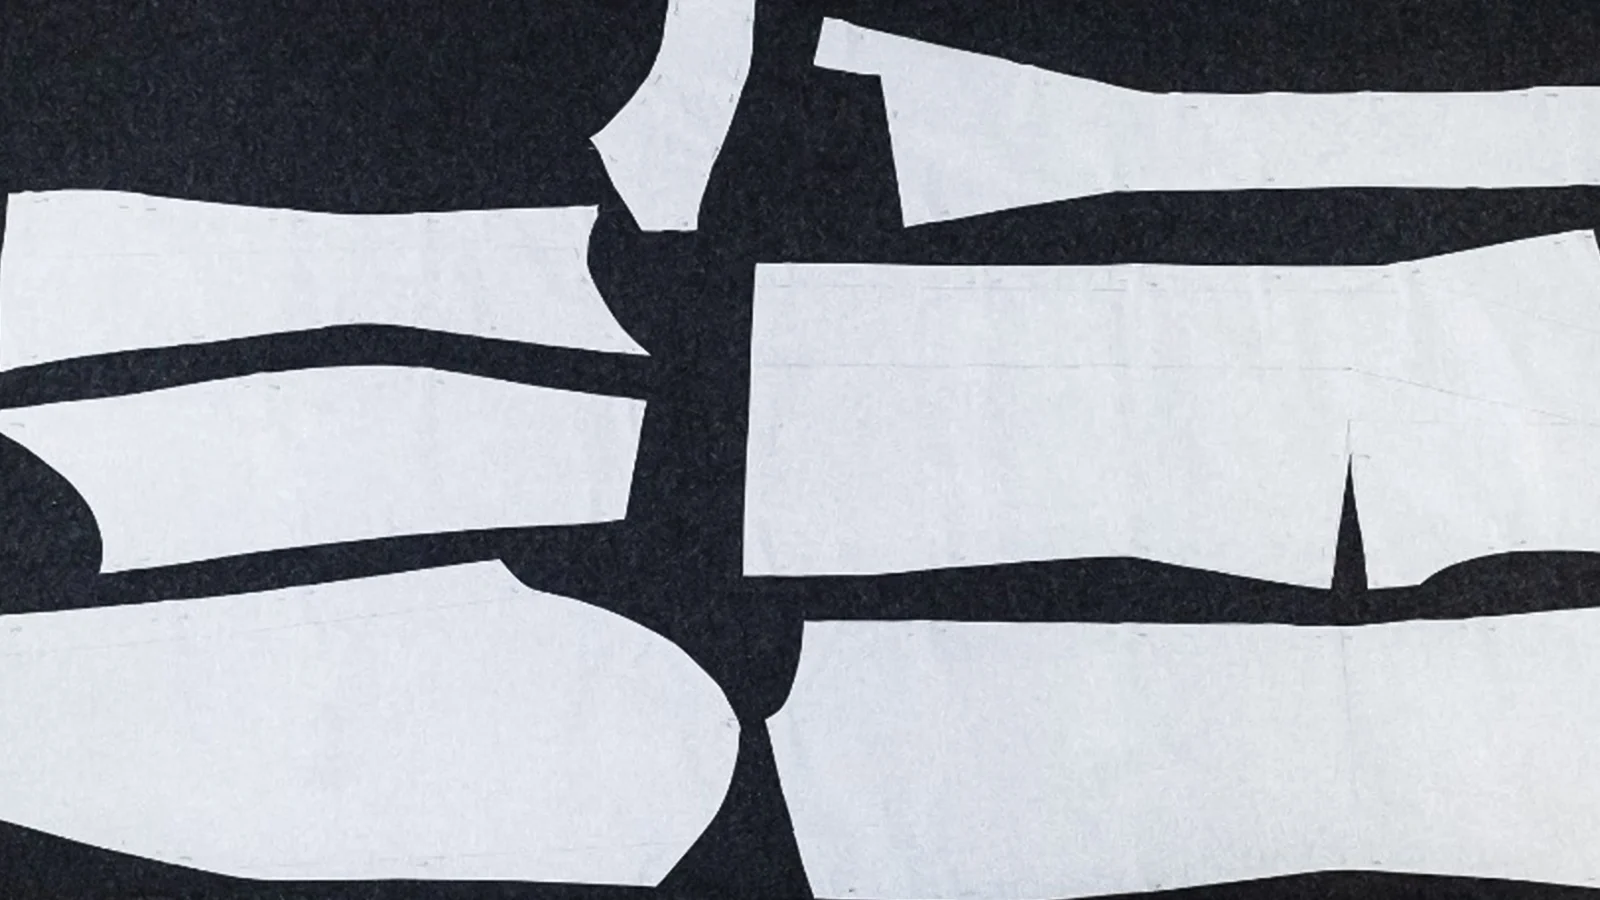
Cut Out Sewing Pattern Pieces
Once you've thoroughly reviewed the pattern instructions, lay out the paper pattern pieces on a flat surface to begin cutting. Use paper scissors to cut along the size line you selected. Make sure you stay outside the lines to preserve the original pattern for future adjustments.
Don't forget to label pattern pieces with their corresponding size and any necessary markings. This step will help you stay organized and ensure that each pattern piece fits together when you start sewing.
Step 2: Preparing the Fabric
Before you start cutting, pre-wash and iron your fabric to remove shrinkage and wrinkles. Once clean and pressed, fold the fabric according to the pattern instructions.
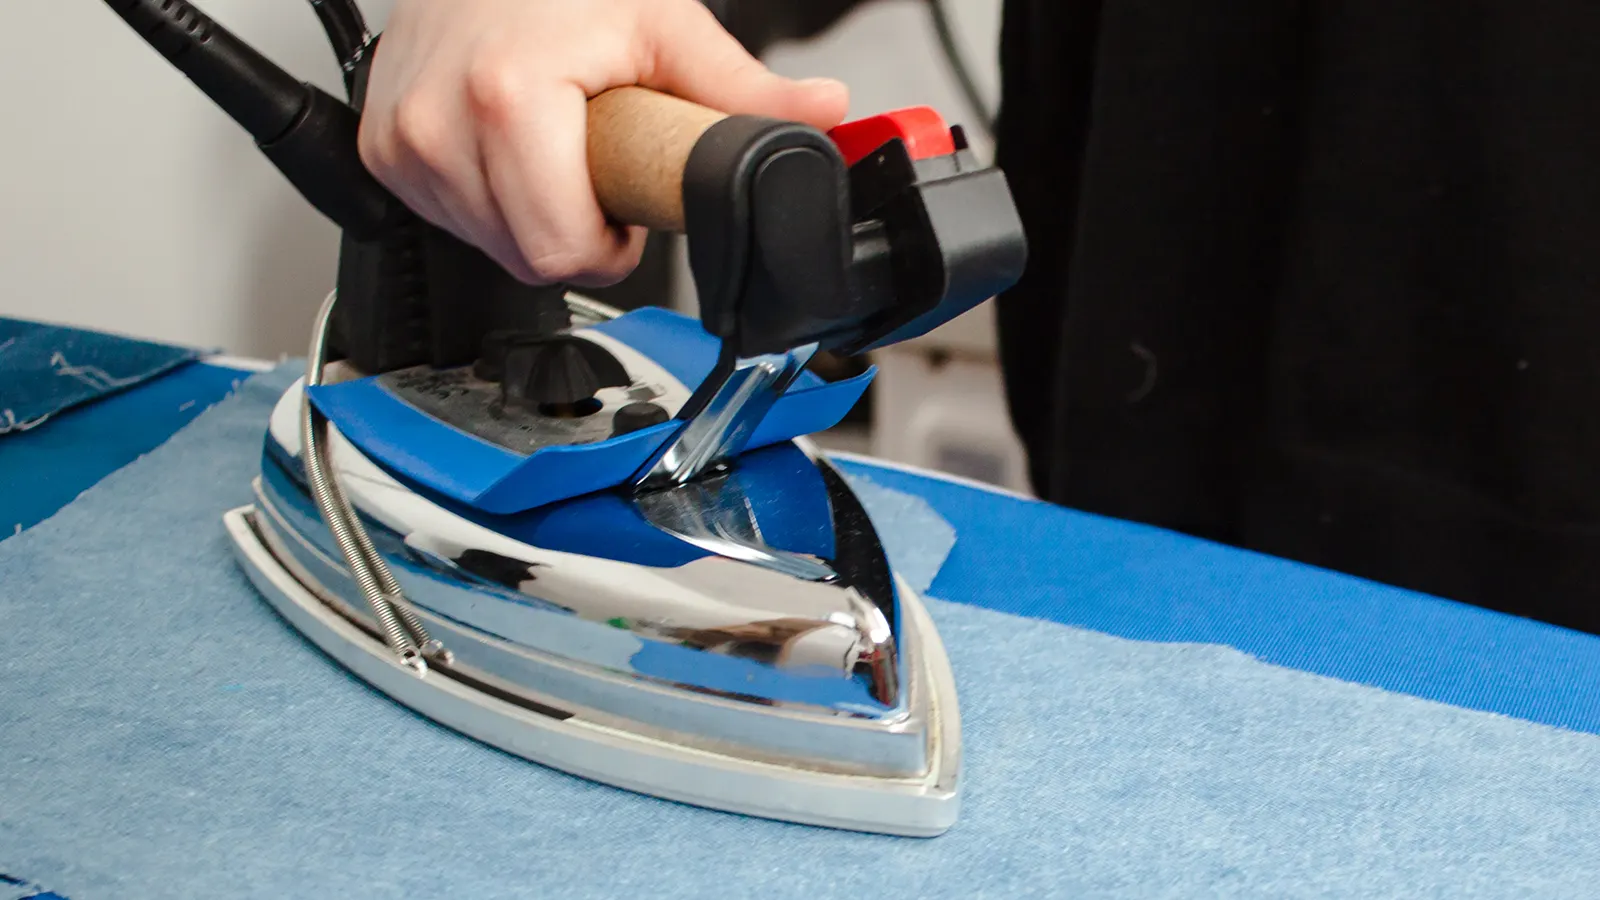
Pre-wash and Iron the Fabric
Pre-wash your piece of fabric to remove any sizing and potential shrinkage. This step helps prevent fabric distortion and ensures your final garment maintains its shape.
After the pre-wash fabric step, iron the fabric to remove wrinkles and creases. A smooth, flat surface is essential for accurate cutting, so don't skip this part. Use the appropriate heat setting for your fabric type to avoid any damage.
Fold the Fabric
After ironing, fold your fabric in half along the selvedge edges of the fabric to create double layers. Ensure the fabric is smooth and free of wrinkles. You can fold the fabric by either the right sides or wrong sides together.
Align the selvedge edges carefully so the two layers of fabric are even and symmetrical. Check the grain line to ensure it's straight and properly aligned. This step is crucial, especially when matching plaids or patterns.
Step 3: Laying Out Your Pattern Pieces
Next, lay out the pattern pieces on your fabric. Follow the layout guide in the pattern instructions.
Pin or weigh down the pattern pieces securely to prevent them from shifting. Align each piece with the fabric's grainline for proper drape and fit.
Pin or Weigh Down the Pattern
Securing your sewing pattern properly is crucial to ensure precise and clean cuts. Start by pinning the pattern using sharp pins at key points like corners and curves. This method works well for most fabric types, keeping the pattern aligned and stable. Ensure you pin perpendicular to the edges for added stability.
Alternatively, use pattern weights or heavy objects to hold the pattern in place. This approach is particularly useful for delicate or slippery fabrics.
Align with Grainline
Once your pattern is securely placed, align each piece with the fabric's grainline to maintain the garment's intended drape and fit. The grainline, indicated by an arrow on the pattern pieces, should parallel the fabric's lengthwise threads.
This alignment is crucial for the fabric's stability, preventing distortion and ensuring the garment retains its structure. Carefully match the grainline of your pattern pieces with the fabric's grain to achieve uniformity in how the fabric stretches and drapes.
Step 4: Checking and Adjusting
Before cutting, double-check all your pattern pieces for accuracy and completeness. Make any necessary adjustments to ensure a perfect fit.
Use a ruler or measuring tape to confirm straight lines and correct angles on the fabric and cut precisely.
Double-Check All Pieces
Lay out and double-check all your pattern pieces before cutting the fabric. Ensure you have every piece required by comparing them against the layout guide in your instructions. This helps confirm the correct placement and prevents mistakes.
Check the size, shape, and quantity of each pattern piece to ensure accuracy. Adjust the fabric or pattern pieces to fit perfectly before cutting into the fabric.
A thorough review guarantees a smoother sewing process and a more professional final product.
Adjust if Necessary
Assess the pattern's fit by placing it against your body or a dress form to identify any necessary adjustments. If the pattern needs tweaking, use tailor's chalk to mark areas that need changes. Focus on fitting issues like length or width.
Grading between sizes can help achieve a better fit. Make the pattern adjustments by altering the lines on the pattern pieces. Before cutting the fabric, test these adjustments by pinning or basting the pattern pieces together. This step ensures the changes will work as intended.
Step 5: Cutting the Fabric
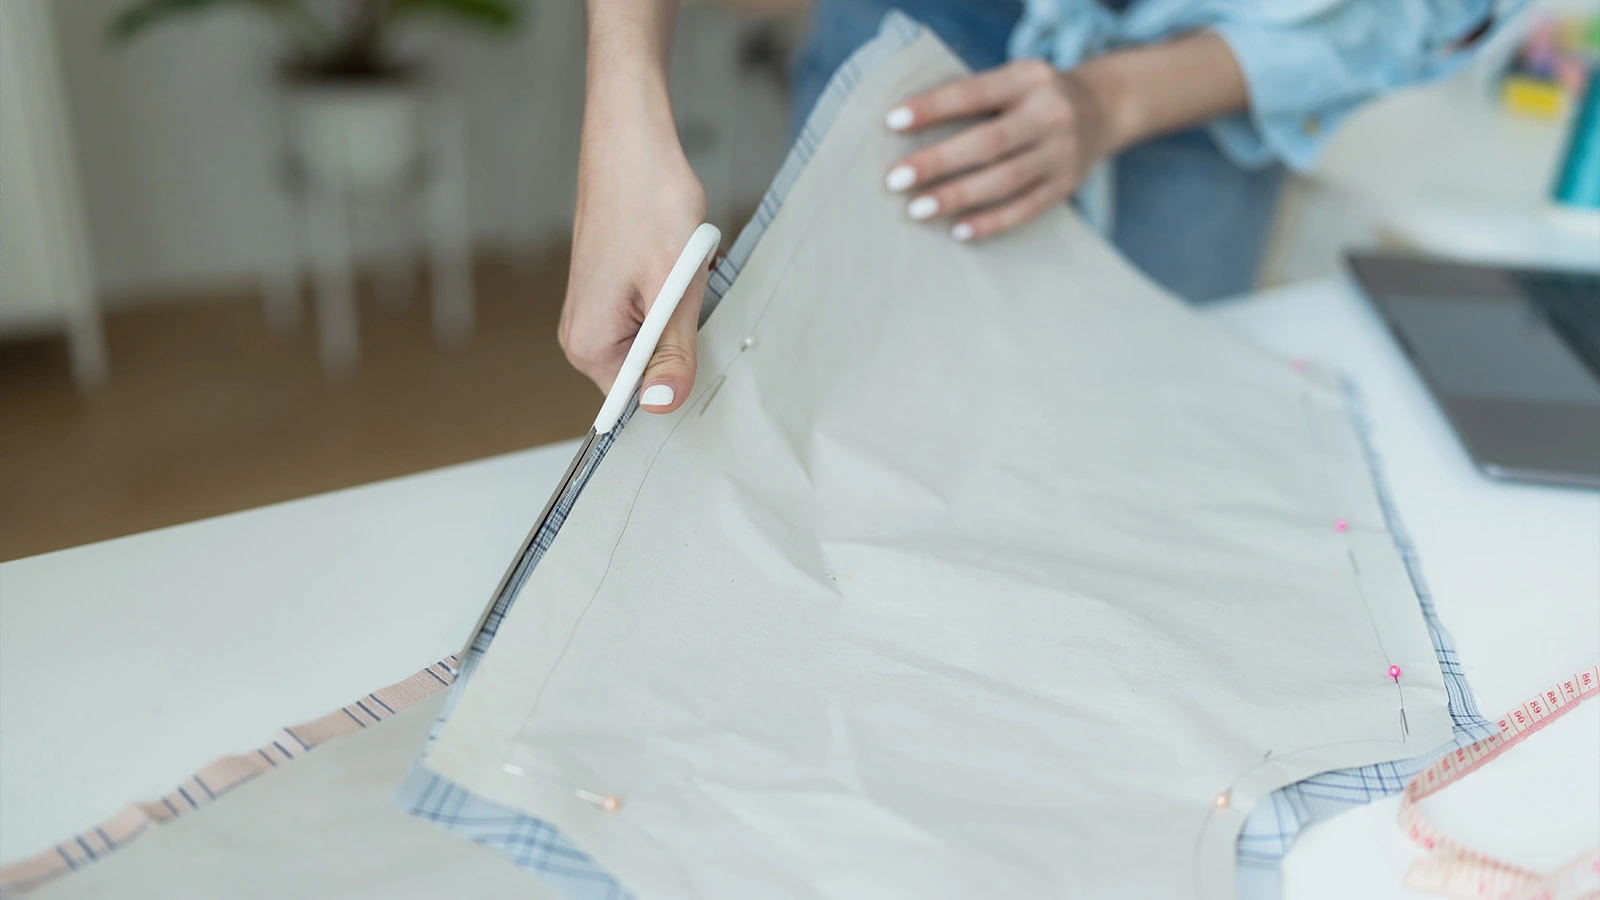
Now that your pattern pieces are secured, you can begin cutting the fabric. Cut along the pattern lines, paying close attention to curves and corners for smooth edges.
Don't forget to cut notches and other markings as indicated on your pattern for accurate assembly later.
Use Fabric Scissors or Rotary Cutter
Use scissors or a rotary cutter to cut around the marked lines precisely. They're crucial for the accuracy of your sewing project.
Hold the fabric taut as you cut, and rotate the fabric or pattern piece rather than moving your cutting tool. This technique helps maintain control and accuracy.
Cut slowly and steadily to avoid mistakes.
Cut Notches and Markings
Ensuring the accuracy of notches and markings is crucial for properly aligning and constructing your garment. Start by identifying notches and markings on your pattern pieces. They indicate key points like darts, pleats, and buttonholes.
Use tailor's tacks, chalk, or disappearing ink pens to transfer these notches and markings to your fabric. Carefully cut small triangles or diamond shapes for notches, ensuring they're precise for perfect alignment during sewing. Follow the pattern instructions to ensure you're transferring all necessary details accurately.
Troubleshooting Common Issues
When cutting a sewing pattern, you might encounter some issues. Pay attention to these common pitfalls to ensure your project goes smoothly.
Inaccurate Cutting
Inaccurate cutting often results from misaligned patterns and careless handling of fabric. When cutting pattern pieces, align them correctly with the fabric grainline.
Use a clear ruler to achieve accurate angles. Always double-check the fabric grainline against the pattern grainline. This helps maintain the garment's shape.
Match notches and markings on the fabric before cutting to prevent inaccuracies. Sharp scissors are essential for clean, precise cuts; dull blades can lead to jagged edges and fabric stretching.
These steps will help you avoid common cutting mistakes and achieve professional-looking results.
Fabric Slippage
Secure the fabric layers with pattern weights or pins to prevent fabric slippage during cutting. You can also use a cutting mat for added stability. Ensure the fabric is laid flat and smooth to avoid stretching that can distort your cuts.
By following these steps, you'll achieve clean, accurate cuts and align your pattern pieces.
Cut on the Wrong Grain
One common issue you might face is cutting on the wrong grain. This can distort seams and alter the garment's intended drape. The grainline on your pattern pieces should align with the fabric's lengthwise grain. Ignoring this can cause fabric stretch and make your garment hang awkwardly.
Cutting on the cross-grain, instead of following the grainline, can lead to distorted seams and affect the stability of the final piece. Always double-check the grainline direction before you start cutting. This ensures your fabric behaves as expected during construction.
Cut Multiple Layers Incorrectly
Cutting multiple layers incorrectly can throw off your entire project, leading to mismatched pieces and frustration.
When cutting the fabric, it's crucial to ensure all layers are flat and perfectly aligned. Use pattern weights or pins to secure the layers together to prevent shifting. This helps maintain precision and consistency.
Take your time and cut slowly through all layers. Ensure each cut is clean and accurate. After cutting, check the edges of each layer to ensure they match up perfectly.
Final Words: How to Cut a Sewing Pattern
In conclusion, following these steps will ensure your sewing project starts on the right foot. Carefully prepare the pattern and fabric, lay out the pieces accurately, and make precise cuts.
Don't forget to double-check your work and make the necessary adjustments. With patience and attention to detail, you'll avoid common pitfalls and set yourself up for successful sewing.
Happy sewing, and enjoy the creative process!
Learn more sewing tips on the Longan Craft Blog, and dive into the fabric world with Longancraft!
0 comments