When you need to make an invisible seam, the ladder stitch is your best ally. This technique requires precision but delivers impressive results, especially on stuffed toys or hems.
Start by threading your needle, but the magic lies in how you handle the stitches. Each small, evenly spaced stitch is the key to seamlessly blending fabric edges. Yet, there's more to it than just pulling a thread through the fabric.
Curious about the nuances that make your stitches nearly vanish? Let's explore the tutorial that guarantees your success.
Key Takeaways
- Thread the needle with enough matching thread, knotting the end for neat stitching.
- Insert the needle from inside the folded edge to hide the knot and maintain stitch invisibility.
- Alternate small, even stitches between fabric pieces, keeping spacing consistent for a seamless look.
- Pull the thread taut after each stitch, but avoid excessive tightness to prevent fabric bunching.
- Finish with a secure knot, reinforcing it for strength and concealing it within the fabric.
What Is a Ladder Stitch and What Is It Used for??
Elegance in sewing often comes down to the details, and a ladder stitch beautifully exemplifies this. This hand-sewing technique, also known as an invisible stitch, is your go-to for achieving a seamless and professional finish.
It's perfect for closing seams discreetly, making it indispensable for crafting stuffed toys or giving garments a polished edge. When you use the ladder stitch, the stitching appears nearly invisible, mimicking machine stitching on the fabric's wrong side.
Whether you're finishing the lining of a bag or hemming a dress, mastering the ladder stitch enhances your sewing prowess. It not only helps you close openings neatly but also elevates the overall look of your projects, ensuring they exude sophistication and craftsmanship.
Preparations Before Doing a Ladder Stitch
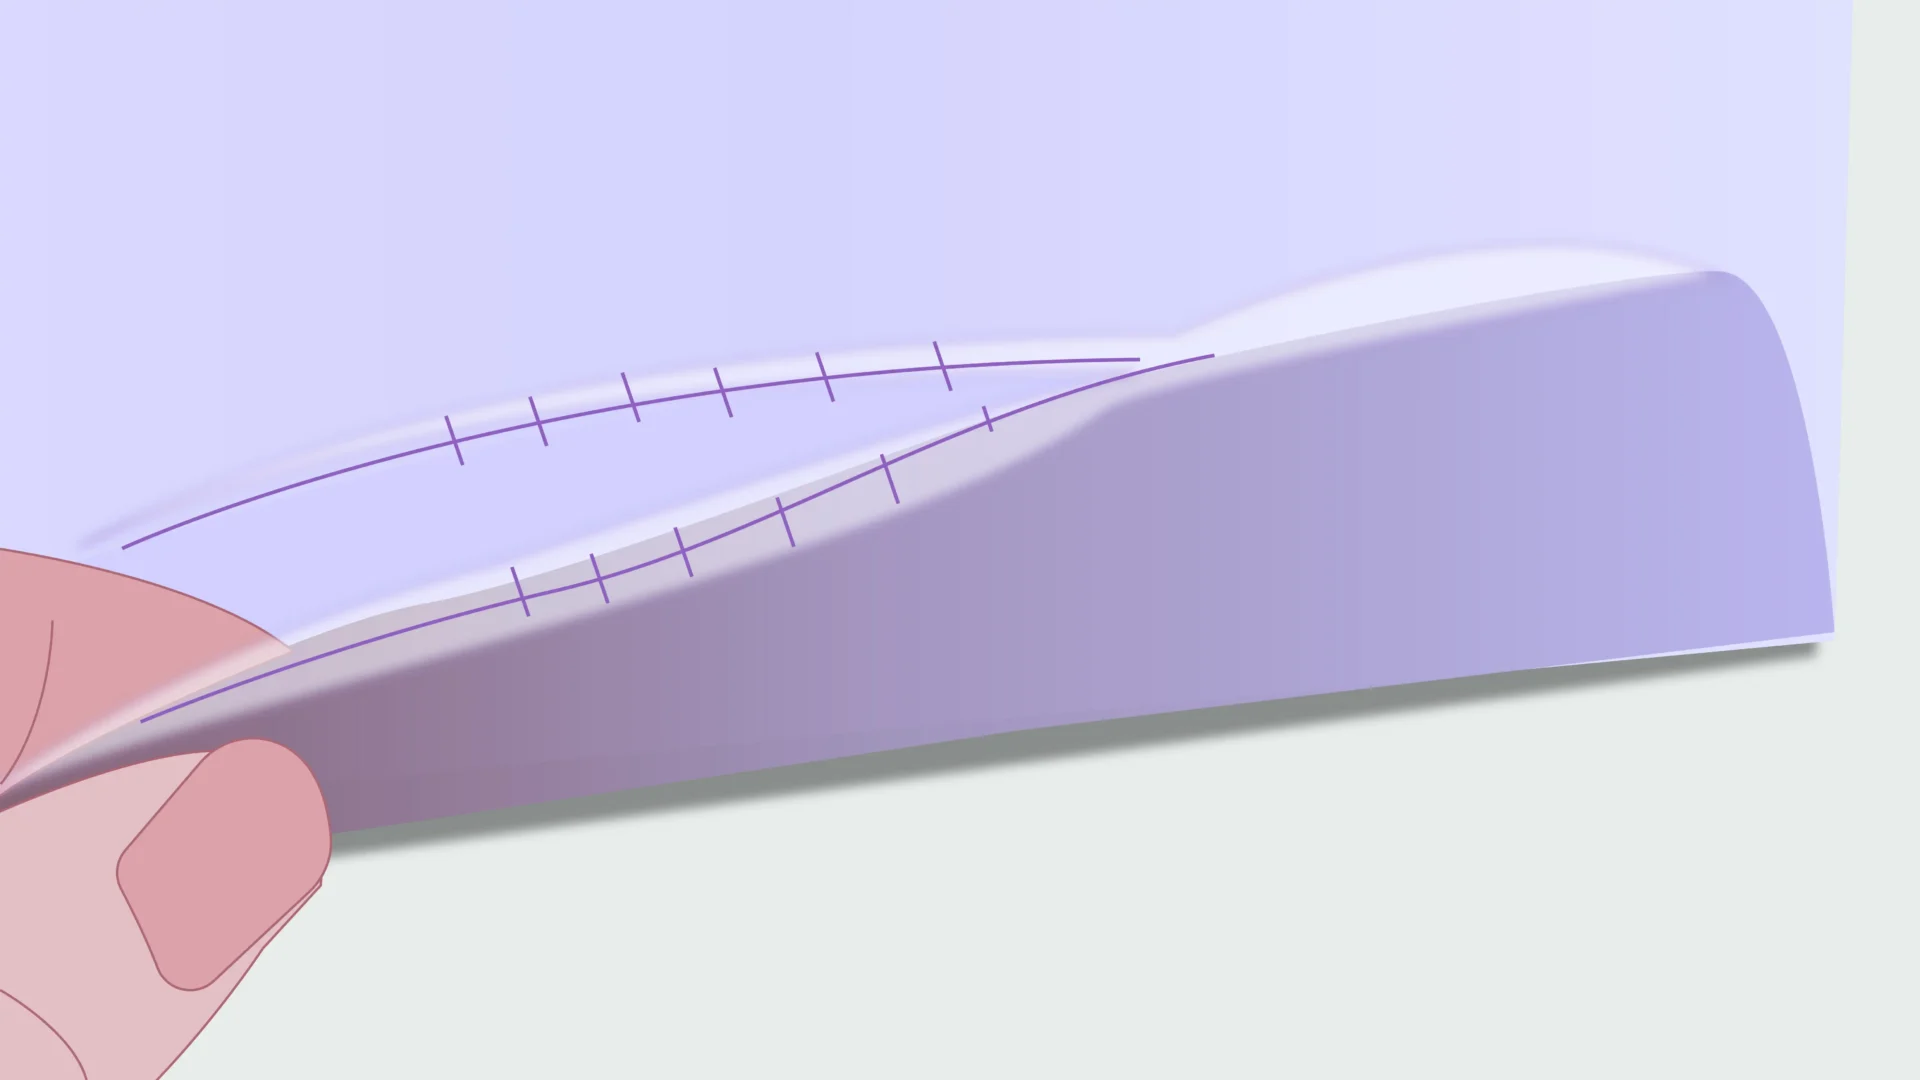
Before you begin a ladder stitch, there are some preparations that you need to take.
Align the Fabric
To achieve a neat and professional ladder stitch, properly align your fabric. Then, confirm that both pieces are turned right side out to maintain the correct appearance.
Fold the hem inward, matching a consistent seam allowance, typically around 1/2 inch, on each side. This creates a neat edge for your ladder stitch. Use a pin or clip to close the opening, keeping the fabric aligned while you sew.
For accuracy, mark the seam allowances with a fabric-safe pen or chalk and confirm that the top and bottom lines match perfectly.
Use a pressing tool or iron to make the edges crisp and flat. By carefully preparing and aligning the fabric, your finished seam will appear smooth and nearly invisible.
Choose the Right Thread
When you're ready to sew a ladder stitch, picking the right thread can make all the difference. Start by choosing a thread color that closely matches your fabric; a slightly darker shade works if an exact match isn't available. This helps keep your stitches invisible.
For most projects, use an all-purpose thread, but consider a double strand about 8-12 inches long for added strength. This choice supports your work with a durable thread that won't snap easily. Avoid threads thicker than your fabric, as they can lead to visible stitches and a less smooth finish.
How to Do a Ladder Stitch: Step-by-Step Instructions
To start the ladder stitch, follow these step-by-step instructions for a professional result.
Step 1: Make the First Stitch
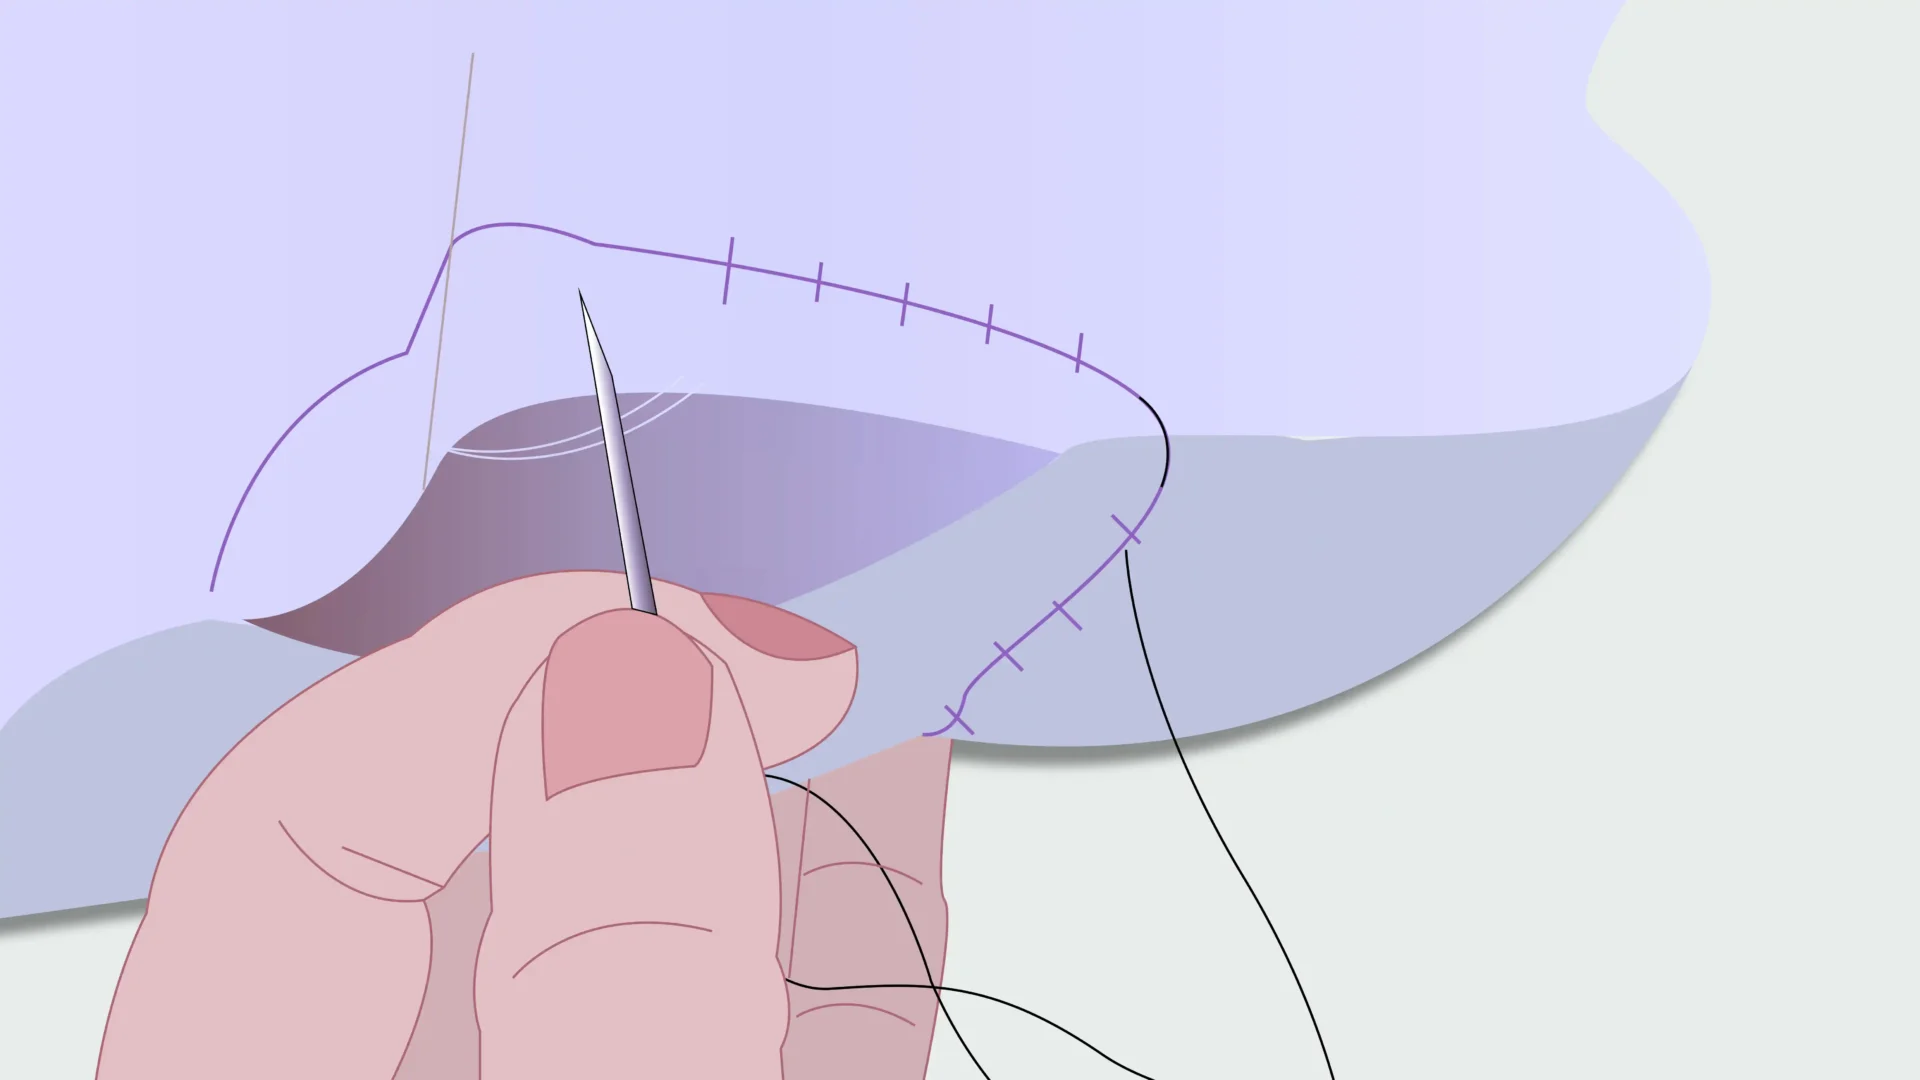
Choose a thread about 2-3 times the length of the opening you're closing, matching the fabric color for an invisible ladder stitch. Once threaded, tie a small knot at the end.
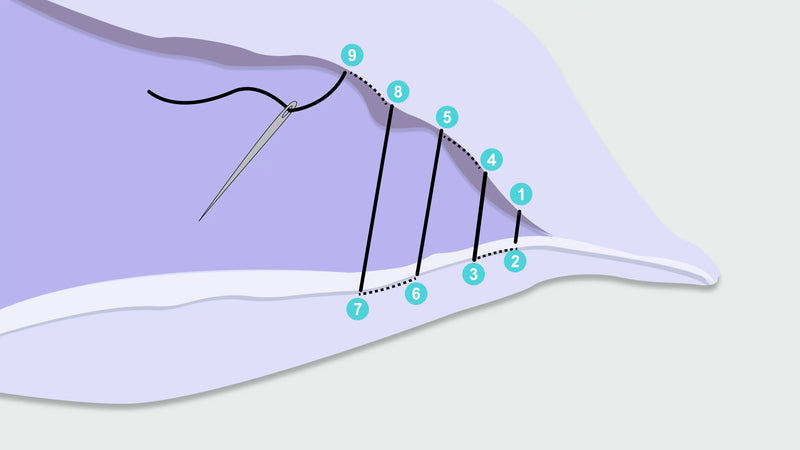
Insert the sewing needle from underneath one folded edge, making certain the knot hides within the fold. Keep the thread taut against the fabric as you pull it through, but avoid over-tightening.
Next, make a small stitch by inserting the needle into the opposite folded edge. Pull the thread gently to create a neat, ladder-like effect.
Step 2: Repeat Stitches
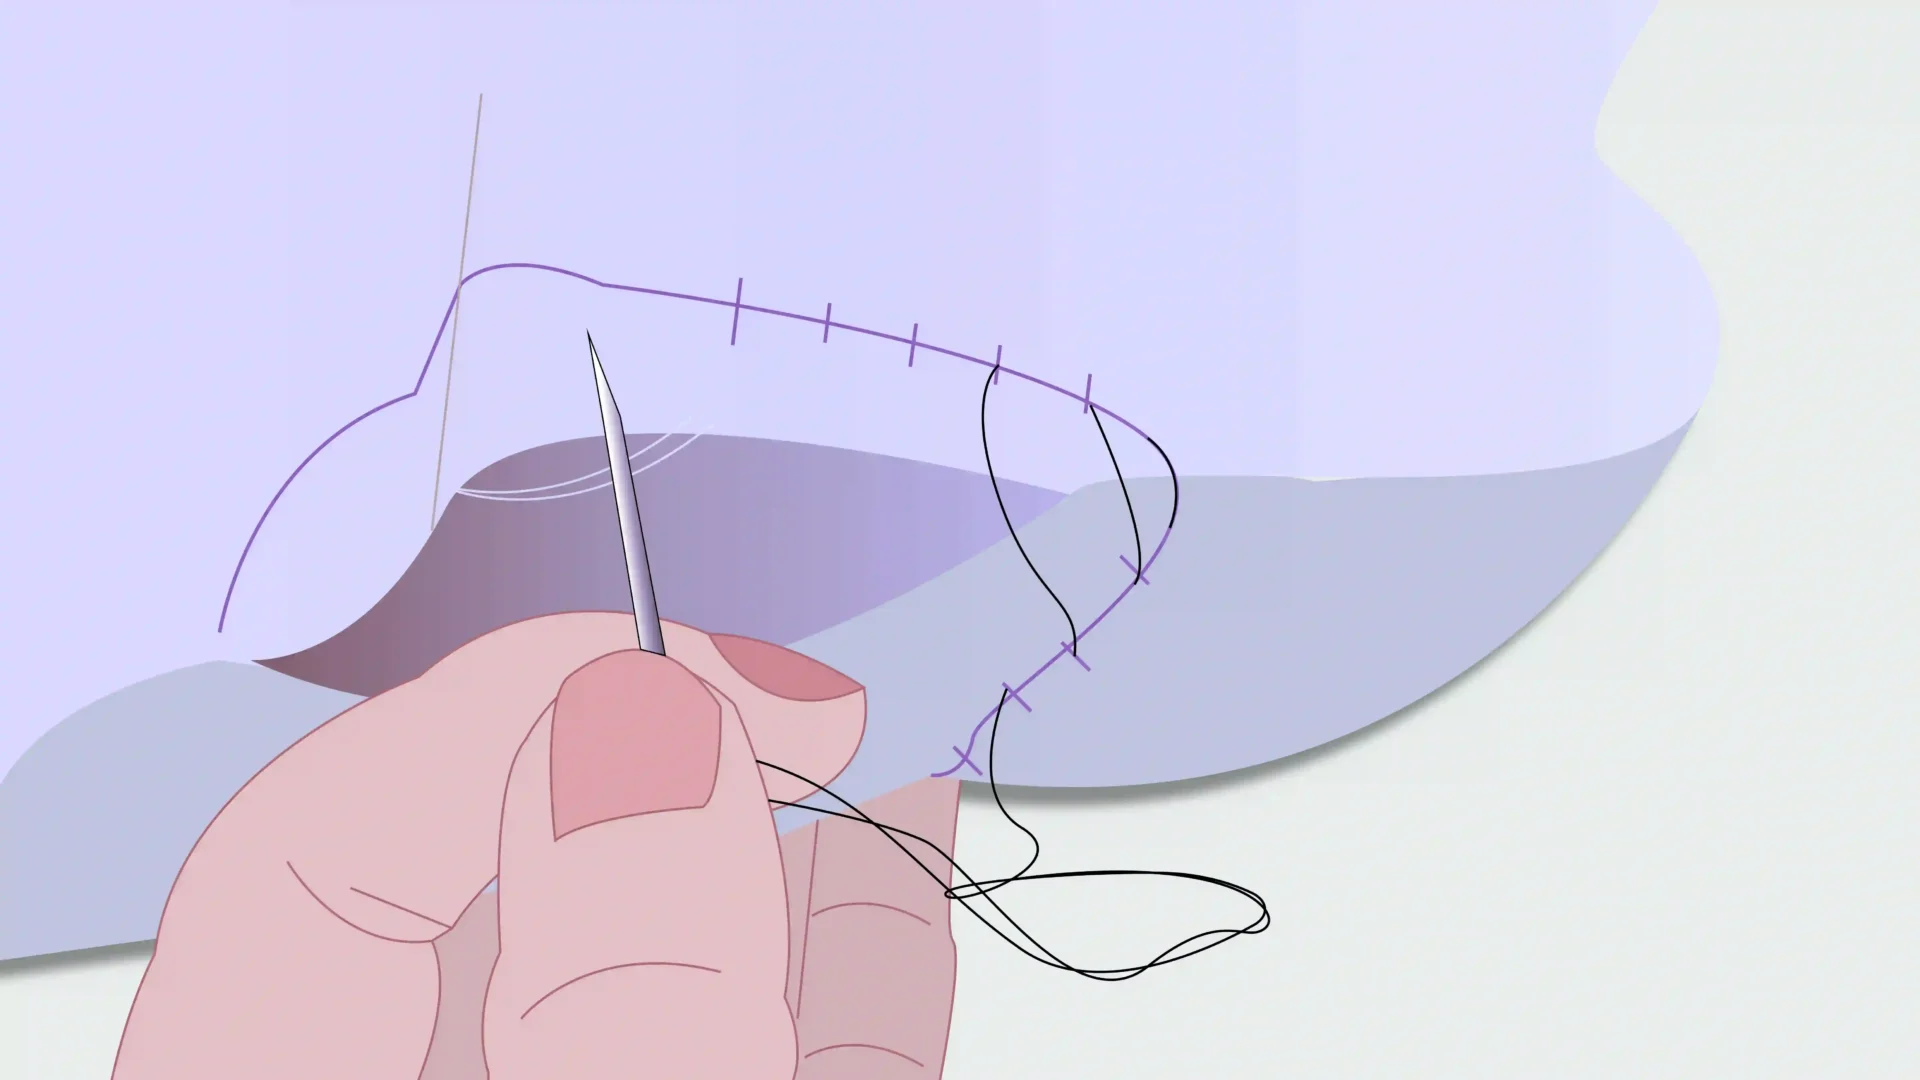
Continue with small stitches, alternating between the two edges. Keep them evenly spaced as you work across the opening, ideally 1/4 inch or less. Keep the thread taut after every stitch for even tension and a smooth, hidden stitch. This prevents puckering and keeps the seam invisible.
Continue this process along the seam allowance, aligning each stitch carefully. Remember, consistency in your stitch size and tension is key to achieving a seamless finish with your ladder stitch.
Step 3: Close the Seam and Secure the Stitch
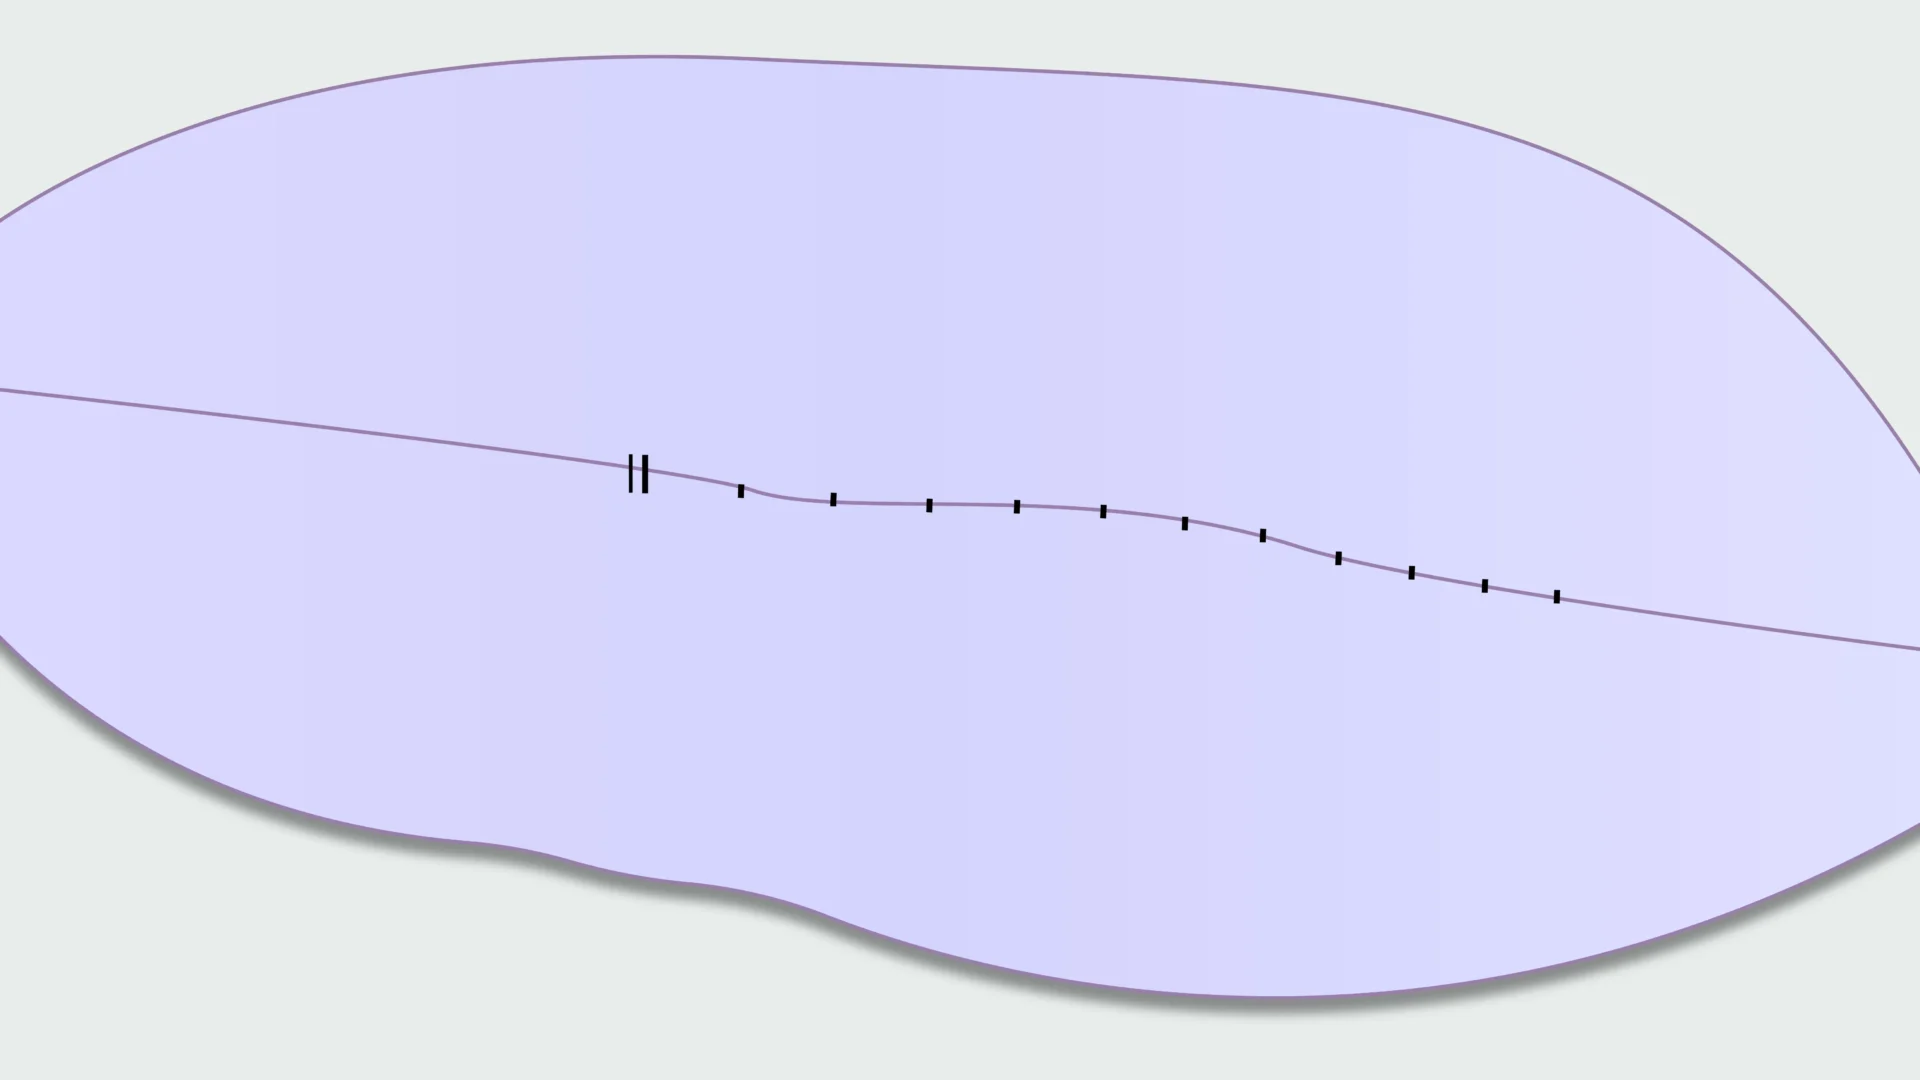
To finish the ladder stitch, create a knot at the end. Pass the needle through the last stitch, keeping the thread taut, to make a small loop with the thread. Pull tight to form a secure knot. For added strength, reinforce this knot by passing the needle through the loop twice or thrice.
Next, hide the knot by stitching the thread tail into the seam. This conceals any evidence of your work. Finally, trim the thread close to the fabric's surface, ensuring no tail is visible. A light press with an iron can help blend stitches, giving your seam a polished finish.
Tips for Doing a Ladder Stitch Successfully
Achieving a nearly invisible seam with a ladder stitch requires attention to detail and technique. Consider these helpful tips to perfect your skills.
Maintain Tension
Maintaining tension is essential for guaranteeing a smooth and durable seam. Consistent tension keeps your stitches even, enhancing the seam's visibility and creating a uniform appearance.
To do this, keep the thread taut every 2-3 stitches, but avoid overtightening. Excessive pulling can result in bunching or thread breakage, compromising your work.
Keep your stitches small, about 1/4 inch or less, and place them at the top of the folded edges. This prevents dimpling and maintains the fabric's smoothness.
Regularly check that stitches are aligned and evenly spaced across the fabric. Proper alignment and even spacing guarantee your ladder stitch maintains its integrity and professional finish.
Choose the Right Fabric
Selecting the right fabric is vital for achieving a seamless ladder stitch. Opt for materials with a smooth finish, like cotton or polyester blends, to guarantee your stitches glide easily and remain hidden.
Consider the weight of your fabric for stitching success. Lightweight fabrics benefit from smaller stitch spacing, approximately 1/4 inch, making the stitches nearly invisible. In contrast, heavier fabrics can handle larger stitches, around 1/2 inch.
Avoid fabrics with excessive texture or embellishments, as they can disrupt the ladder stitch's invisibility. Before beginning, pre-wash and press your fabric to eliminate shrinkage and achieve crisp edges, which are essential for precise stitching.
Practice on Scrap Fabric
To boost your ladder stitch skills, practice on scrap fabric. This approach lets you refine your hand sewing experience by trying out different thread colors and stitch lengths. Practice on some pillow covers is also excellent!
Troubleshoot Common Issues
It's normal to encounter a few common issues while mastering the ladder stitch, but you can overcome them with strategic adjustments.
1. Uneven Stitches:
- Cause: Inconsistent tension or uneven stitch length.
- Solution: Practice maintaining even tension on the thread throughout the stitching process. If necessary, mark your fabric to make each stitch the same length.
2. Visible Thread:
- Cause: The thread is too thick or does not match the fabric color closely enough.
- Solution: Use a thinner thread that closely matches the fabric color. Ensure the stitches are small and tight enough to be hidden within the fold of the fabric.
3. Fabric Gapping:
- Cause: Stitches are too far apart or too loose.
- Solution: To close any gaps between the fabrics, make the stitches closer together and pull the thread taut after each stitch.
4. Fraying Ends:
- Cause: Fabric edges are not secured before stitching.
- Solution: Fold the fabric edges inwards before starting the ladder stitch to prevent fraying. You can also use a fray-check product on raw edges.
5. Misaligned Fabrics:
- Cause: Fabrics shifting during stitching.
- Solution: Pin or baste the fabrics together before starting your ladder stitch to ensure proper alignment.
Conclusion
Mastering the ladder stitch has given you a valuable skill for seamlessly joining fabric edges. Whether repairing a tear or closing a stuffed toy, this technique offers a clean, professional finish.
Remember to choose the right stitch length for your fabric type, maintain even tension, and reinforce your knots. With practice, your stitches will become nearly invisible, enhancing the quality and durability of your projects. Keep stitching, and enjoy the satisfaction of your polished results!
Learn more sewing tips on the Longan Craft Blog, and dive into the fabric world with Longan Craft!
FAQs
What Is the Purpose of a Ladder Stitch?
You use a ladder stitch to create an invisible seam, perfect for closing openings in soft furnishings. It guarantees a neat finish without visible stitches, enhancing your project's aesthetic appeal while maintaining fabric integrity and professionalism.
Is Slip Stitch the Same as Ladder Stitch?
Yes, you'll find that a slip stitch is the same as a ladder stitch. Both terms describe the technique for creating nearly invisible seams, which is often used to close hems or finish stuffed toys for a neat look.
How to Make Ladder Stitch Stronger?
Use a double thread to strengthen your ladder stitch and guarantee consistent tension. Choose a high-quality thread that matches the fabric's weight. Secure the end with a triple knot and press the seam flat for durability.

0 comments