
Sewing a narrow hem can add a professional finish to your garments and projects. This technique is especially useful for lightweight fabrics where a bulky hem would be undesirable.
In this guide, we'll walk you through the steps to create a neat, narrow hem, ensuring your finished piece looks polished and clean. From choosing the right tools to mastering the stitching process, you'll gain the skills to enhance your sewing repertoire. Let's get started on perfecting your narrow hem!
Key Takeaways
- Press the fabric to remove wrinkles and create a smooth surface for accurate hemming.
- Measure and mark the hemline, then fold the fabric twice using the marked line as a guide for a precise hem.
- Use a sewing machine foot with a guide to maintain a straight stitch and achieve a narrow hem.
- Align the edge of the fabric for an even hem, and press the finished hem for a crisp look.
- Inspect the hem for evenness and smoothness, and check for loose threads or debris before finishing.
Gather the Materials
To get started on sewing a narrow hem, you'll need a few essential tools and supplies:
- Fabric: The material you want to hem.
- Sewing Machine: Ensure it's in good working condition.
- Thread: Match the color of the thread with your fabric.
- Needle: Choose a needle suited for your fabric type.
- Pins or Clips: To hold the fabric in place.
- Iron and Ironing Board: For pressing the hem.
- Measuring Tape or Ruler: To measure the hem width accurately.
- Fabric Scissors or Rotary Cutter: For cutting the fabric.
- Seam Gauge: Optional, but useful for measuring small distances.
- Seam Ripper: In case you need to correct any mistakes
With these tools and supplies, you'll be well-equipped to start sewing a narrow hem like a pro.
Preparing the Fabric
Frequently, a hot iron is your best friend when preparing fabric for a narrow hem, as it helps remove wrinkles and creates a smooth surface to work with.
To get started, take your fabric and press it to remove any wrinkles. This step is crucial in achieving a professional-looking finish. Make sure to press along the entire length of the fabric to prepare it for folding.
How to Sew a Narrow Hem: A Step-by-Step Tutorial
Now that you've prepared your fabric, it's time to sew your narrow hem. Carefully follow a series of steps to achieve a professional-looking finish.
Step 1: Measure and Mark the Hemline

As you prepare to sew a narrow hem, start by measuring the desired hem allowance on the wrong side of your fabric. This is a crucial step, as it sets the stage for a professional-looking finish. Take your time to measure accurately, ensuring the hem allowance is consistent throughout the fabric.
Once you've measured, mark the hemline using chalk or a fabric marker. Double-check your measurements to ensure accuracy, as even a slight mistake can throw off the entire hem.
Step 2: Fold and Press the Hem

Fold the fabric along the hemline you marked in Step 1, using it as a guide to create the initial hem fold.
Now, head to your ironing board and press the fold flat with an iron to ensure a crisp edge. This will help you achieve a professional finish. As you press, make sure to iron the fold carefully to avoid creating any wrinkles.
Step 3: Fold and Press Again
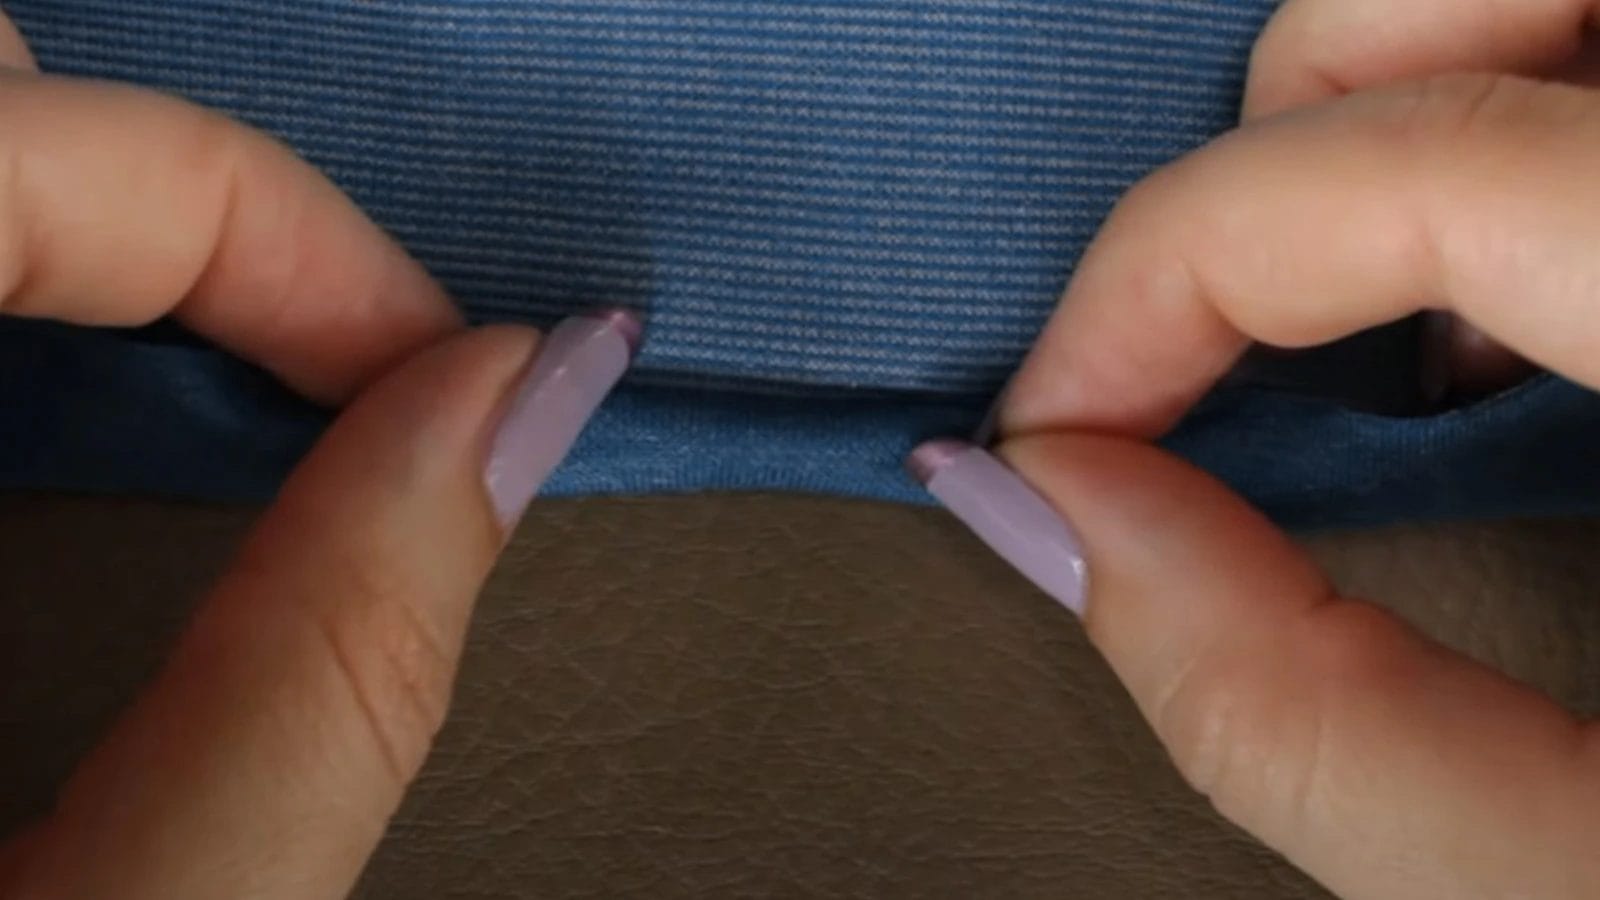
Fold the fabric a second time along the hemline, creating a narrow, even, flat hem. As you fold, ensure the edge of the fabric is aligned and the fold is even.
Press the fabric again to secure the narrow hem, ensuring it's flat and crisp. This will help you achieve a smooth, polished finish.
Step 4: Pin the Hem
With your narrow hem folded and pressed, pin the fabric in place to secure it before sewing. Use sharp pins to ensure the hem stays in position during stitching. Space the pins evenly along the hem to maintain a consistent width.
Before sewing, take a moment to check the hem for puckering or unevenness and correct any issues you find.
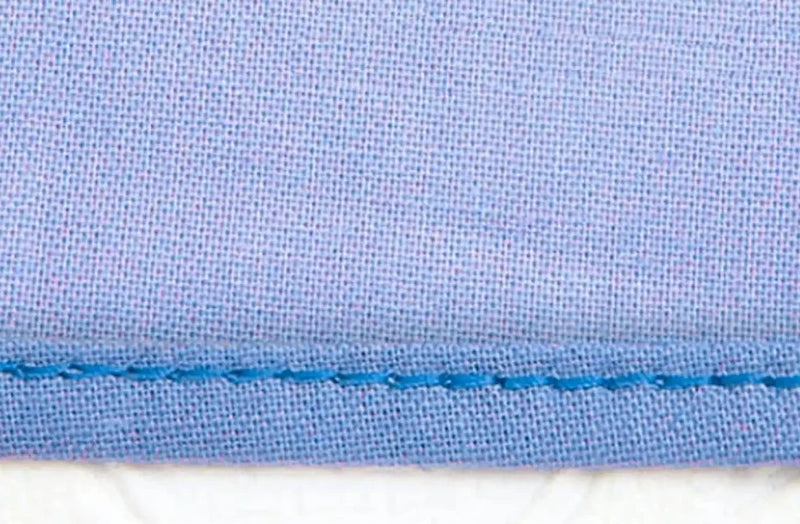
Step 5: Sew the Narrow Hem
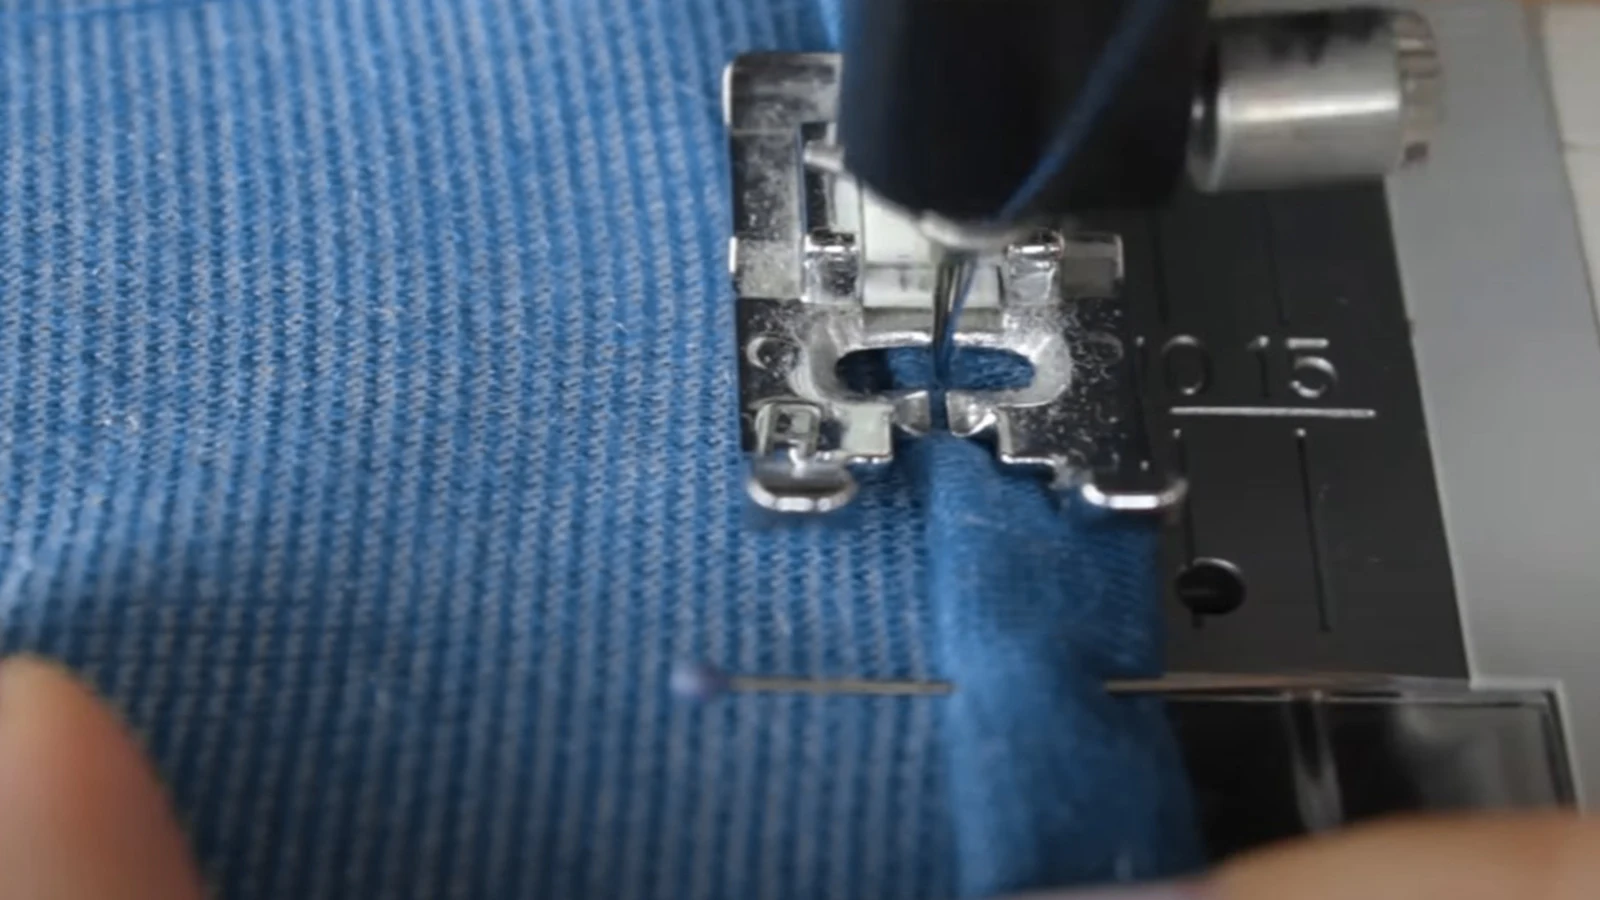
Now that your hem is pinned in place, start sewing close to the hemline, about 1/16 of an inch away, to achieve a neat finish. Use your presser foot as a guide to maintain a consistent distance.
As you sew, keep the fabric smooth and flat. By sewing close to the hemline, you'll achieve a professional-looking hem that's both neat and polished.
Step 6: Finishing Touches
With your hem sewn in place, grab your iron to give your finished hem a crisp, professional finish. You've worked hard to get to this point, and a good press will make all the difference.
Pay attention to any curves or corners in the hem, making sure to iron them carefully to avoid wrinkles.
Tips for Sewing Narrow Hems on Curves and Corners
Sewing narrow hems on curves and corners requires special consideration for a professional-looking finish. When working with curved hems, you'll need to make small snips along the curve to help the fabric lay flat, ensuring a smooth, even hem.
For inside corners, trim excess fabric and fold it diagonally before creating the narrow hem. Use a smaller stitch length to maintain precision and control. Be patient and take time sewing around curves and corners—it's worth the extra effort.
Practice on scrap fabric first to get comfortable with these techniques before working on your actual project. With these tips, you can achieve a polished, professional finish on even the most challenging curved hems.
Troubleshooting Common Issues
As you master the techniques for sewing narrow hems, you'll likely encounter some common issues that can make the difference between a professional-looking finish and a mediocre one.
When sewing a narrow hem, twisted seams can be a real problem. To avoid this, use an awl or sharp tool to push the fabric as you sew, ensuring a straight seam.
If you're working with thin fabrics, you may notice that your stitches are diagonal or wavy. Try using thinner thread or stabilizing paper to keep your stitches straight.
Additionally, if you notice your fabric starting to fray, sew two rows of stitches to keep it in place.
Conclusion
You've mastered the art of sewing a narrow hem! With practice, you'll be a pro at creating crisp, even hems that elevate your sewing projects.
Remember to take your time, maintain even tension, and inspect your work for smoothness.
Now, put your new skill to the test and take on your next sewing adventure with confidence!
Learn more sewing tips from the Longan Craft Blog, and dive into the fabric world with Longancraft!
FAQs
How Do I Make a Narrow Hem?
To do this, sew a guideline, fold the fabric, press it flat, and stitch it close to the edge for a professional finish.
What Does "Narrow Hem" Mean in Sewing?
It refers to a small, folded edge finish on fabric, typically 1/8 to 1/4 inch wide, used on lightweight fabrics for a clean, professional look.
How Do I Sew a Fine Hem?
Start by folding your fabric twice, creating a narrow fold, then sew close to the edge, keeping your stitches even and tight for a professional finish.
Which Machine Accessories Are Used for Stitching Narrow Hem?
Depending on your fabric and desired hem width, you'll need specific machine accessories for stitching a narrow hem, such as a straight stitch presser foot, rolled hem presser foot, hemming foot, or blind hem foot.
0 comments